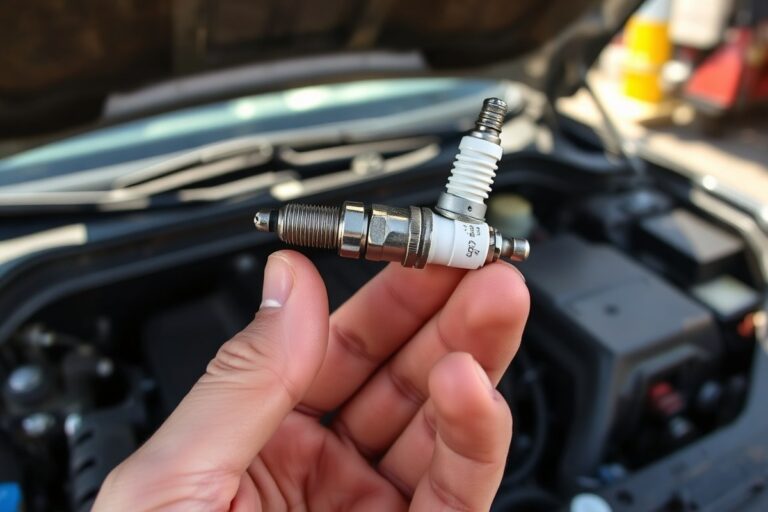
What Torque for Spark Plugs: Complete Guide with Torque Charts & Tips
What torque for spark plugs is essential to prevent damage and ensure engine efficiency. Correct torque ranges typically fall between 7 and 32 lb-ft, varying by plug size, seat type, and cylinder head material. Always use a torque wrench, start finger-tightening until the gasket or seat touches the cylinder head, then apply the specific additional turns or torque recommended for your spark plug type.
Key Takeaways
- Use a torque wrench to apply the exact manufacturer’s recommended torque and prevent thread damage or misfit.
- Finger-tighten spark plugs until seated, then tighten an additional ½ to ⅔ turn for gasket seats or about 1/16 turn for taper seats.
- Torque values differ for cast iron and aluminum cylinder heads, apply less torque on aluminum to avoid stripping threads.
- Over torquing sparks plugs can crack the insulator or stretch threads, causing potential engine damage.
- Flat seat plugs with gaskets need higher torque compared to conical seat plugs, which usually require less torque and no gasket.
- The need to replace spark plugs varies from 30,000 to 100,000 miles based on the type of plug material and how you drive.
What Is the Correct Torque for Spark Plugs?

The correct torque for spark plugs depends on the thread diameter and the cylinder head material. Installing spark plugs with the proper torque ensures the plug is securely seated, allowing efficient heat dissipation from the firing end to the cylinder head. Over-tightening can stretch threads, cause damage, or break the plug, while under-tightening delays heat transfer and can lead to poor engine performance. Below is a table showing recommended torque ranges for flat seat spark plugs based on thread size and whether the cylinder head is made of cast iron or aluminum. The torque values are given in pound-feet (lb-ft), a common unit for automotive torque:
| Spark Plug Type | Thread Diameter (mm) | Cast Iron Cylinder Head (lb-ft) | Aluminum Cylinder Head (lb-ft) |
|---|---|---|---|
| Flat seat type (with gasket) | 18 | 25.3, 32.5 | 25.3, 32.5 |
| Flat seat type (with gasket) | 14 | 18.0, 25.3 | 18.0, 21.6 |
| Flat seat type (with gasket) | 12 | 10.8, 18.0 | 10.8, 14.5 |
| Flat seat type (with gasket) | 10 | 7.2, 10.8 | 7.2, 8.7 |
| Flat seat type (with gasket) | 8 | , | 5.8, 7.2 |
| Conical seat type (without gasket) | 18 | 14.5, 21.6 | , |
Thread diameter directly influences the torque specification because larger threads naturally require higher tightening force to seal properly and transfer heat. For example, an 18 mm flat seat plug requires roughly 25 to 32 lb-ft torque in cast iron heads, whereas a 10 mm plug only requires about 7 to 11 lb-ft.
The material of the cylinder head also affects torque. Aluminum heads are softer, so the torque values are typically lower compared to cast iron heads to avoid thread damage. Applying the exact torque recommended for your spark plug model and head type preserves the spark plug threads and ensures a reliable engine seal. Using a calibrated torque wrench is the best way to achieve the correct tightness without risking damage.
Some spark plug manufacturers provide torque recommendations in Newton-meters (N·m) with suggested turning angles after hand-tightening starts to seat the plug. For example, an M10 thread flat seat plug often requires 10, 15 N·m torque, followed by an additional 1/3 to 3/4 turn based on the plug type. This method helps technicians achieve consistent installation without over- or under-tightening.
Why Must Spark Plugs Be Torqued to Specification?

Applying the correct torque to spark plugs is critical for engine health and plug longevity. Over-tightening risks stripping the threads in the cylinder head, which can lead to costly repairs since damaged threads require re-tapping or replacing the cylinder head. Also, too much torque can stretch the metal shell of the spark plug, breaking the internal gas seals or cracking the insulator. A cracked insulator often results in misfires and reduced combustion efficiency. Over torque also causes the firing end of the plug to overheat, increasing the chance of pre-ignition and detonation. These conditions generate intense shockwaves that can damage the piston crown and quickly wear down the spark plug electrodes.
Under-tightening spark plugs carries its own serious risks. If the torque is too low, combustion gases can leak past the plug, reducing engine compression and efficiency. The plug may vibrate loose or even blow out due to the engine’s high cylinder pressures. This can lead to incomplete fuel burning and cause misfires that affect engine smoothness and performance. Under-torqued plugs may also suffer internal electrode damage from the vibration, shortening their lifespan and necessitating premature replacement.
Proper torque prevents these problems by ensuring a tight, stable fit and optimal heat transfer between the spark plug and the cylinder head. It also protects the threads and the plug’s structural integrity. For example, installing spark plugs with a torque wrench set exactly to the manufacturer’s recommended value avoids the risk of over-tightening while guaranteeing that plugs are tight enough to seal combustion gases. Clean the spark plug holes thoroughly before installation to prevent the wrench from indicating proper torque when debris is causing an improper fit, which may lead you to under-torque unknowingly.
Always perform spark plug installation on a cool engine to avoid thread damage from thermal expansion. Avoid applying lubricants to the threads, as this can cause the torque wrench to give inaccurate readings and result in over-tightening. The risk of undetected over-torque is especially high in engines with deep spark plug wells, where it’s hard to see if the wrench or plug is tilted.
Use a torque wrench for spark plug installation and always double-check that the plug and engine threads are clean and dry to ensure the reading is accurate and prevent damage.
How to Torque Spark Plugs Safely and Accurately
Use a torque wrench to tighten spark plugs accurately and avoid over- or under-tightening. Always start spark plugs by hand to prevent cross-threading and ensure the threads align properly. Having the right tools and following a correct sequence guarantees a safe and effective installation.
Start Spark Plugs by Hand for Accuracy
Starting spark plugs by hand is essential to avoid damaging the cylinder head threads. Insert the plug straight into the hole, holding it vertically, and begin turning it slowly by hand or with a spark plug socket that has a rubber insert to hold the plug securely. This method ensures the threads engage smoothly without cross-threading, which can cause costly damage.
Hand-tighten the plug until it is seated snugly, typically tightening about 3 to 4 turns after the plug seats in an aluminum head or slightly more in a cast-iron head. Avoid using power tools or excessive force at this stage, as it risks cross-threading or stripping.
Use the Correct Torque Wrench and Settings
Using a torque wrench designed for spark plugs ensures the plug is tightened to the manufacturer’s specified torque, usually between 10 and 25 ft-lbs depending on the vehicle and plug type. This precision prevents damage to the spark plug or cylinder head and secures proper sealing.
Select a torque wrench with an appropriate range and accuracy, such as a beam or click-type torque wrench. Set the wrench to the exact torque value recommended in your vehicle’s service manual or the spark plug manufacturer’s instructions. Avoid guessing or using standard wrenches without torque measurement.
Tools needed include a torque wrench, the correct spark plug socket (6-point sockets reduce plug damage), and an extension bar if the plugs are recessed. Expect to pay around $30 to $60 for a quality torque wrench if you don’t already own one.
Follow Proper Tightening Sequence and Angles
Tighten spark plugs in the correct sequence, especially when working with multiple cylinders, to evenly distribute pressure and prevent warping the cylinder head. Usually, this sequence follows the firing order, which can be found in the vehicle’s manual.
After hand-starting each plug, apply torque gradually. Tighten in increments rather than one turn to the final torque setting. For some spark plugs, especially taper seats, the torque wrench may be adjusted to measure a specific angle of turn beyond the initial snug fit, as per the manufacturer’s recommendation. Step-by-step installation using a torque wrench:
- Check your spark plug gap and adjust if necessary.
- Insert the spark plug into the socket with a rubber insert to hold it.
- Place the spark plug straight into the cylinder head hole and start threading it by hand.
- Turn the spark plug by hand until it seats firmly to avoid cross-threading.
- Attach your torque wrench with the appropriate setting and tighten the plug carefully.
- Apply torque slowly until the specified torque value or angle is reached.
- Repeat for all spark plugs following the recommended tightening sequence.
Differences in Torque for Taper Seat and Gasket Seat Plugs
Spark plugs use either a taper seat or a gasket seat to seal against the cylinder head, and each type requires different torque settings. Taper seat plugs thread directly into a matching tapered hole, creating a metal-to-metal seal. Gasket seat plugs use a crush washer that compresses to form the seal, demanding a higher torque range to fully deform the gasket. Matching the proper torque to the seat type ensures a proper seal and prevents damage.
Definition of Taper Seat Plugs
Taper seat spark plugs have a conical, angled seating surface that matches a tapered cylinder head hole. The plug threads into the hole until the taper surfaces bite together and form a seal. This metal-to-metal contact does not require a gasket to seal combustion gases. Proper torque tightens the plug just enough to create this seal without deforming the threads or the plug’s metal shell.
Because the seal depends on the taper fit, you cannot overtighten taper seat plugs. Excess torque risks stripping the threads or deforming the plug housing, which may lead to gas leaks or difficult removal later.
Characteristics of Gasket Seat Plugs
Gasket seat spark plugs have a flat or slightly rounded sealing surface that presses against a crush washer or gasket. This washer, usually made from copper or aluminum, compresses slightly when the plug is torqued down, creating a gas-tight seal. The gasket both seals and accommodates minor irregularities in the mating surface.
Torque specifications for gasket seat plugs are higher and have a recommended range that allows full compression of the gasket without crushing it excessively. Under-torquing risks leaks, while over-torquing can flatten the gasket too much or damage the threads.
Torque Adjustments for Each Seat Type
The required torque differs significantly between taper seat and gasket seat plugs due to their sealing methods. Taper seat plugs typically need less torque because the metal-to-metal contact forms the seal, while gasket seat plugs need more torque to crush the gasket firmly. Differences also exist based on plug diameter and cylinder head material. Here is a comparison of recommended torque ranges for common plug sizes and head materials:
| Thread On Plug | Cast Iron Head (lb-ft) | Aluminum Head (lb-ft) |
|---|---|---|
| 10 mm, gasket seat | 7-11 | 7-11 |
| 12 mm, gasket seat | 11-19 | 11-19 |
| 14 mm, gasket seat | 26-29 | 15-22 |
| 14 mm, taper seat | 7-15 | 7-15 |
| 18 mm, gasket seat | 32-38 | 28-34 |
| 18 mm, taper seat | 15-20 | 15-20 |
| 7/8″, 18 (gasket seat) | 35-43 | 31-39 |
Use lower torque values when installing taper seat plugs to avoid thread damage and deformation. Gasket seat plugs require torque toward the upper end of the range to properly compress the gasket and maintain a reliable seal. Aluminum heads typically call for torque at the lower end of the range compared to cast iron to prevent thread stripping or warping. Following these specific torque values based on plug type, size, and head material supports correct spark plug installation and long-term durability.
How Cylinder Head Material Affects Spark Plug Torque
Torque values for spark plugs differ between aluminum and cast iron cylinder heads due to the materials’ distinct thermal expansion properties and strength. Cast iron is denser and less prone to warping under heat, allowing spark plugs to be tightened to a higher torque setting, typically around 30 to 40 ft-lbs. Aluminum heads are softer and expand more with heat, so they require lower torque values, often in the range of 15 to 25 ft-lbs, to prevent thread damage or warping.
A significant reason for using lower torque on aluminum heads is to avoid stripping the threads or causing cracks. Aluminum threads are more susceptible to damage because the metal is softer. Over-tightening a spark plug in an aluminum cylinder head can easily strip the threads or distort the seating surface, which leads to poor spark plug sealing and heat transfer. On the other hand, under-torquing risks slow heat dissipation and might cause the plug to loosen or blow out during operation, especially in high-performance engines.
To torque spark plugs correctly in an aluminum head, start by threading the plug in by hand until it is finger-tight. This helps prevent cross-threading, a condition where the spark plug threads become mangled due to misalignment, which is difficult to fix. After finger-tightening, use a torque wrench and tighten the spark plug in a steady, controlled motion to the manufacturer’s recommended lower torque value. Your vehicle manual might specify a torque angle instead; follow that to prevent over-torquing.
Working with cast iron heads allows for higher torque, but avoid cross-threading at all costs. Always ensure the plug is started straight and threaded by hand before applying torque. Higher torque helps with better sealing and heat transfer in cast iron, two essential factors for engine performance and spark plug longevity. Proper torque prevents combustion gases from escaping around the plug and facilitates heat flow from the plug tip into the cylinder head, keeping operating temperatures in range.
Different spark plug seat types, such as taper seat or gasket seat, also influence torque settings, but the cylinder head material remains a critical factor. Cast iron is more forgiving because of its rigidity, while aluminum’s softness demands careful torque control. Tools like torque sticks calibrated for specific torque values can help you avoid exceeding the limit in aluminum heads, especially in tight engine bays.
Always hand-thread spark plugs first to avoid cross-threading, especially in aluminum heads where thread damage is more common and costly to repair.
Common Spark Plug Installation Mistakes and How to Avoid Them
Common installation mistakes with spark plugs include cross-threading, allowing dirt or debris in the threads, and applying the wrong torque. These errors can cause damage, leaks, or improper engine operation. You can avoid these problems by paying attention to thread alignment, cleaning the plug holes before installation, and using the correct torque tools and settings for your vehicle.
Cross-Threading and Its Prevention
Cross-threading happens when the spark plug is not aligned properly with the cylinder head threads and is forced in at an angle. This damages the threads, making future removal difficult or requiring costly repairs to the cylinder head. It usually occurs because the spark plug is started too quickly or with excessive force.
To prevent cross-threading, always hand-thread the spark plug until you feel it seat correctly. Begin turning the plug slowly and gently, stopping and backing off if there is unusual resistance or if it feels like it’s binding. Use the following checklist when installing spark plugs:
- Check plug type and thread pitch to match the engine specifications
- Inspect the cylinder head threads for damage or debris before installation
- Lubricate threads lightly if manufacturer recommends anti-seize compound
- Hand-start the plug to feel it engage the threads smoothly
- Stop if you encounter sharp resistance; back out and realign
Fixing cross-threaded plugs requires removing the plug carefully and may require a thread repair kit or professional machining if damage is severe.
Cleaning and Preparing Plug Hole
Dirt, corrosion, or debris in the spark plug hole can cause poor seating, compression loss, or damage when the plug is installed. Even small particles can lead to stripping threads or improper torque readings.
Before installing a new spark plug, use compressed air to clear out the plug hole and threads thoroughly. A soft wire brush can remove rust or carbon deposits around the threads. Avoid using harsh chemicals that could leave residues inside the cylinder head. For best results:
- Blow out the spark plug hole with compressed air for at least 10 seconds
- Use a thread chaser tool if threads are corroded to restore them gently
- Clean spark plug surface contacts and electrodes before installation
- Inspect and replace the plug gasket or sealing washer if applicable
Taking time to prepare the plug hole helps ensure a secure fit and accurate torque application.
Avoiding Overtightening and Undertorquing
Overtightening spark plugs can strip threads or damage the cylinder head material, especially aluminum heads, causing expensive repairs. Undertorquing may allow combustion gases to leak, leading to engine misfires or plug blowout while running.
Use a torque wrench set to your vehicle manufacturer’s recommended torque value, which often ranges between 13 to 25 ft-lbs depending on the plug type and head material. Tighten the spark plug in two stages: first snug it by hand, then use the torque wrench to finish tightening to the specified ft-lbs. This two-step process reduces the risk of over- or undertorquing.
- Reference OEM torque specs, usually found in the vehicle manual
- Use a calibrated torque wrench with a suitable socket
- Apply the torque smoothly without jerking or sudden movements
- Recheck torque after the engine reaches operating temperature if recommended
Consistent torque application helps maintain engine performance and prevents damage over time.
Proper Wrench Handling
The type of wrench and how you handle it can affect torque accuracy and prevent spark plug damage. A torque wrench with a 6 or 12-point spark plug socket with a rubber insert protects the plug insulator and seat.
Use smooth, even pressure when tightening rather than jerky or swinging motions. Avoid using adjustable or claw wrenches, which can slip and damage the plug. Keep the wrench aligned straight with the plug axis to prevent cross-threading and uneven torque application. If you feel abnormal resistance at any point, stop and reassess alignment. Proper wrench use is especially important on modern engines with delicate aluminum heads or precision plug seats that can fail under uneven forces.
When to Replace Spark Plugs and Re-Torque Recommendations
Spark plugs generally require replacement between 30,000 and 100,000 miles based on their material and the vehicle maker’s guidelines. Copper plugs tend to last about 30,000 miles, whereas platinum and iridium can remain effective for up to 100,000 miles or beyond. Common signs that spark plugs need changing include rough idling, lower gas mileage, hard engine starts, and misfiring. Consult your vehicle’s manual to find the recommended service interval for your specific spark plugs.
Reusing spark plugs is generally not recommended. Even if a plug looks clean, deposits and electrode wear can affect performance and spark quality. Torque specifications do not change based on the plug’s age or reuse. Always follow the torque values provided for new spark plugs to ensure a proper seal and avoid damaging threads or the plug itself.
Though some mechanics may reinstall used spark plugs after cleaning, this carries risks. Cleaning might remove carbon buildup but cannot restore electrode wear or combustion gap accuracy. Before reusing spark plugs, examine them closely for any cracks, worn electrodes, or heavy buildup that could affect performance. Use a gap tool to verify the clearance matches the manufacturer’s specs, typically between 0.028 and 0.060 inches depending on the vehicle.
When reinstalling, apply anti-seize compound sparingly on the threads if recommended by the spark plug manufacturer or vehicle manufacturer. This can affect torque readings, so you may need to reduce torque by about 10% if anti-seize is used. Then, use a torque wrench to tighten the plug to the specified torque, often between 10 to 20 ft-lbs for most passenger vehicles. Over-tightening can strip aluminum heads or fracture the plug, while under-tightening can cause poor heat transfer or allow combustion gases to leak.
Replacing spark plugs involves purchasing plugs that typically cost $3 to $15 each, depending on type and brand. You can replace them yourself with a spark plug socket, ratchet, and torque wrench, or pay a shop service fee of $100 to $200. Performing timely replacement and correctly torquing plugs helps maintain engine performance, fuel economy, and emission levels.
Torque Charts for Popular Spark Plug Brands and Vehicle Makes
Torque specifications can vary between spark plug brands such as NGK, DENSO, and Champion. Matching these specs to your vehicle make is essential for proper installation and engine performance. Each brand designs their plugs with specific seat types and materials that require precise torque values to ensure a secure fit without damaging the cylinder head or plug.
For popular vehicle makes like Toyota, Honda, and Chevy, torque values often differ based on engine design and plug seat type. Toyota engines typically use torque values around 13-18 ft-lbs for their factory NGK or DENSO plugs. Honda vehicles usually specify about 14-18 ft-lbs, commonly using NGK plugs. Chevy trucks and passenger cars with Champion spark plugs often require torque between 15-22 ft-lbs depending on engine size and model year.
Using the correct torque prevents issues such as cracked insulators, which could indicate timing problems or use of low-octane fuel, and avoids stripped threads in aluminum heads. Follow the manufacturer’s recommendation closely when installing spark plugs to maintain engine efficiency and reliability.
| Vehicle Make | Common Spark Plug Brand | Tightening Torque (ft-lbs) |
|---|---|---|
| Toyota | NGK / DENSO | 13 – 18 |
| Honda | NGK | 14 – 18 |
| Chevy (Light Trucks and Cars) | Champion | 15 – 22 |
| Toyota | Iridium / Platinum (DENSO) | 16 – 18 |
| Honda | Iridium (NGK) | 14 – 18 |
To torque spark plugs correctly according to these specifications, start by hand-threading the plug until it seats firmly. Then use a torque wrench calibrated in foot-pounds to tighten the plug within the specific range for the vehicle and plug brand. Over-torquing can strip threads, especially in aluminum cylinder heads, while under-torquing risks poor compression and misfires.
Practical tip: Always clean the spark plug hole and inspect threads before installation to ensure accurate torque application and avoid damaging the engine head.
Step-by-Step Action Plan for Torqueing Spark Plugs Correctly
Follow these steps to ensure your spark plugs are installed with the right torque and avoid common problems.
- Before you start: Check your vehicle’s service manual or a trusted torque chart for the correct torque spec based on your spark plug type and cylinder head material.
- Before installation: Clean the spark plug threads and inspect the new plugs for damage to prevent cross-threading or poor sealing.
- During installation: Hand-tighten the spark plug into the cylinder head until snug to avoid cross-threading.
- Using a torque wrench: Set your wrench to the specified torque and tighten the spark plug slowly and evenly.
- After firing order check: Once all plugs are installed and torqued, start the engine and listen for unusual noises or misfires indicating an installation issue.
- After driving 100 to 200 miles: Re-check the torque on the spark plugs, especially on aluminum heads, to catch any loosening early.
- At recommended replacement intervals: Replace old spark plugs and follow the torque procedure again to maintain engine performance.
Frequently Asked Questions
Should I Use a Torque Wrench for Spark Plugs?
Yes, always use a torque wrench to install spark plugs. This ensures you apply the correct torque, preventing damage to the spark plug or cylinder head and ensuring proper heat dissipation.
Do Spark Plugs Need to Be Very Tight?
Spark plugs must be tightened to the manufacturer’s specified torque. Over-tightening can damage threads, while under-tightening may cause poor heat transfer and potential plug blowout.
How to Torque Spark Plugs by Hand?
Start threading spark plugs by hand to avoid cross-threading, then use a torque wrench to tighten to the specified setting. Hand tightening alone is not enough for a secure fit.
Can Spark Plugs Be Overtightened?
Yes, overtightening spark plugs can strip threads in the cylinder head and cause stress fractures. Use the recommended torque to avoid damage and engine issues.
What Happens If Spark Plugs Are Too Loose?
Loose spark plugs can blow out under engine compression or cause poor heat transfer, leading to engine misfires and damage.
How Often Should Spark Plug Torque Be Checked?
Checking torque is essential when replacing spark plugs, which usually happens between 30,000 and 100,000 miles depending on the type of plug used and the vehicle model.
The Bottom Line
Correct spark plug torque matters for reliable engine operation and avoiding damage to the cylinder head or plug. Use accurate tools, follow your vehicle’s specs, and handle each plug carefully during installation. Take action today by finding your engine’s exact spark plug torque and preparing your tools for the job.