What Does the Engine Oil Filter Housing Do? A Complete Guide with Repairs & Costs
What does the engine oil filter housing do? It holds the oil filter in place and directs engine oil through the filter to remove contaminants. This part also routes oil through the cooler to regulate temperature before it reaches sensitive engine components. Ensuring the housing and its gasket remain leak-free helps maintain proper oil pressure and engine health.
Key Takeaways
- The oil filter housing connects the filter to the engine and channels oil flow efficiently.
- A sturdy housing prevents oil leaks that can lead to engine damage from low oil pressure.
- The gasket between the housing and engine block seals oil passages to avoid leaks.
- The oil filter housing routes oil through the cooler to keep operating temperatures safe.
- Replacing a worn housing or damaged gasket can prevent costly engine repairs.
- Tighten housing bolts to the manufacturer’s torque specs, often around 18 ft-lb (25 Nm).
What Is the Engine Oil Filter Housing and Its Role?

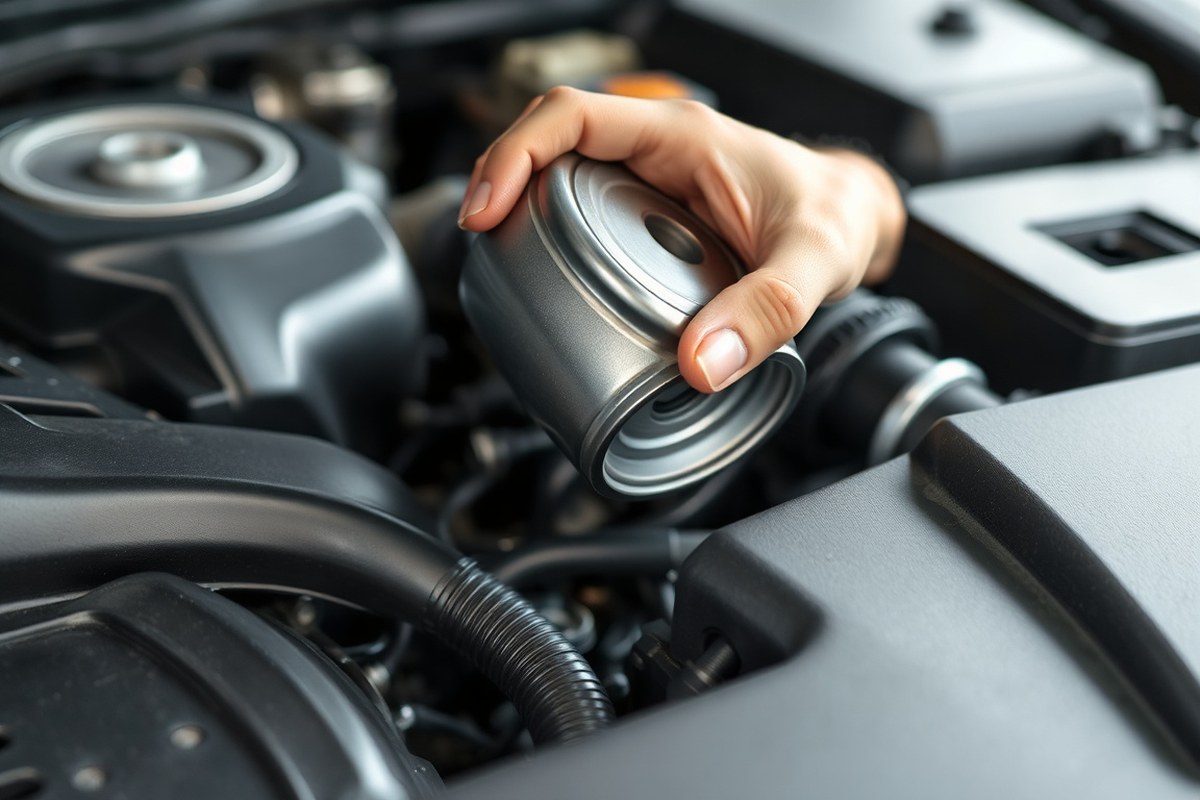
The engine oil filter housing secures the oil filter in place and serves as a passageway for engine oil to flow through the filter. This housing acts as the mounting base for the oil filter, holding it firmly while routing the oil to ensure contaminants are trapped before the oil circulates through the engine. By directing oil through the filter, the housing plays a important role in protecting engine components from dirt, metal particles, and other debris that can cause wear or damage.
Connected directly to the engine’s oil passages, the oil filter housing typically attaches to the engine block or cylinder head. It provides channels that guide the hot engine oil into the filter and back out toward the engine. In many vehicles, the housing also routes oil through an oil cooler to help maintain safe operating temperatures, especially under heavy load or high-temperature conditions. This dual function ensures the oil not only stays clean but also cool, supporting engine longevity.
The oil filter housing assembly usually includes the housing body itself, an O-ring gasket that sits between the housing and the engine block to prevent oil leaks, and a removable filter cap or cover. The filter cap seals the housing and holds the cartridge-style filter inside. During routine oil changes, you often replace the oil filter and the cap’s O-ring seal to maintain a reliable, leak-free connection. The housing gasket is replaced if there is any sign of leaks or when the housing or filter cap is removed, as disturbing the seal can compromise it.
Variations exist depending on the engine design. Some vehicles place the oil filter housing at the top, the front, or even the side of the engine, affecting accessibility and replacement difficulty. Despite differences, the essential function of holding the filter and routing oil remains the same. In certain engines, the housing also integrates additional features like built-in oil pressure sensors or bypass valves, which further regulate oil flow and filtration under varying engine conditions.
Maintaining the oil filter housing properly is important. Damage such as cracks, warping, or worn-out gaskets can lead to oil leaks, which reduce oil pressure and may cause severe engine damage if left unrepaired. Repair or replacement of the housing or its gasket generally involves draining the engine oil, removing the old filter and housing components, cleaning mounting surfaces, installing new seals, and reassembling with the correct torque specifications. Cost varies by vehicle but expect parts to range from $20 to $150, with labor adding more if done professionally. Addressing issues promptly protects engine health and performance.
How the Oil Filter Housing Works with Filters and Oil Flow
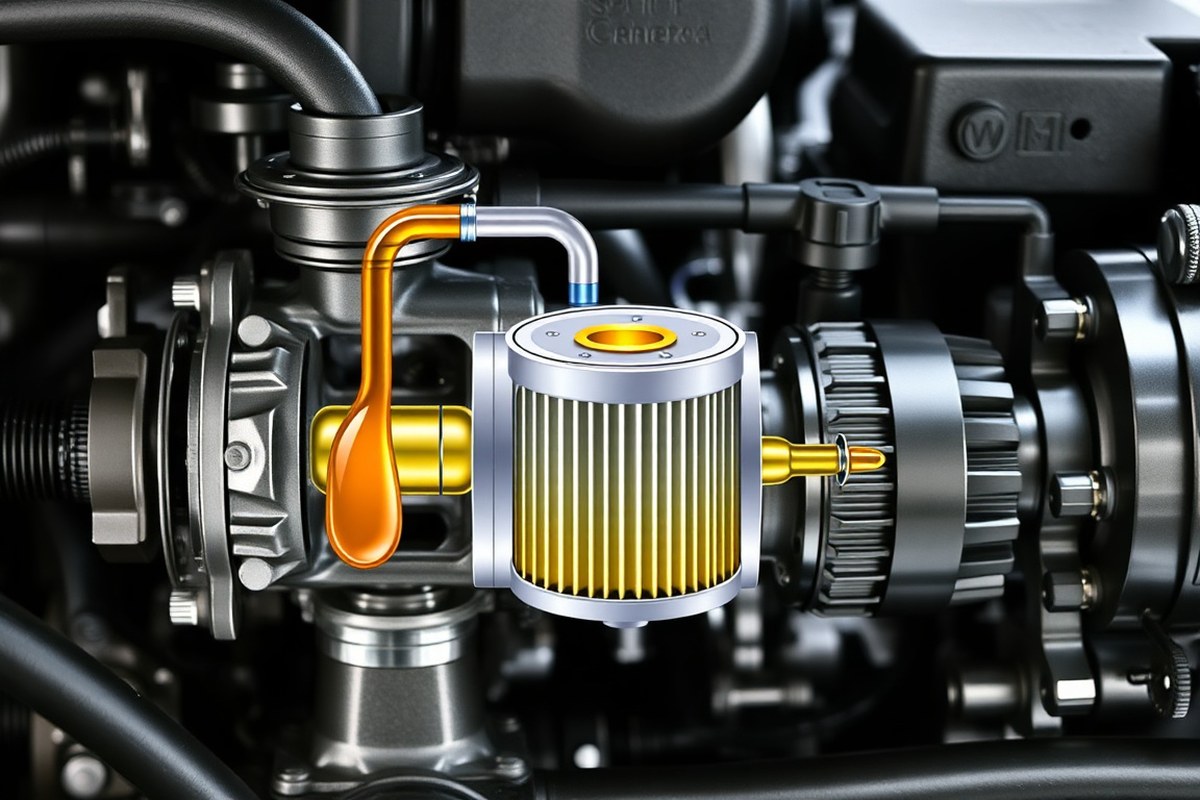
Engine oil flows from the oil pump into the oil filter housing, which acts as a secure enclosure for the oil filter element. The housing channels the oil directly through the filter media, where contaminants like dirt, sludge, and metal particles are trapped. This process ensures only clean oil reaches the engine’s internal components, maintaining proper lubrication and reducing wear.
The oil filter housing plays a critical role in maintaining the right oil pressure and flow rate. Full-flow oil filters that are commonly used balance filtration efficiency with maintaining an adequate flow, so the engine doesn’t lose pressure and the lubricating oil circulates evenly. The housing’s design ensures the oil passes fully through the filter before it continues through the engine, protecting important parts without restricting flow.
Certain oil filter housings also incorporate an oil cooler. This additional feature lowers oil temperature, preventing oxidation and breakdown caused by excessive heat. By keeping the oil cooler and cleaner, the housing contributes to extending the engine’s life and maintaining performance under demanding conditions such as towing or high-speed driving. The effectiveness depends on your vehicle’s make and model but is especially beneficial in engines that run hotter or under heavy load.
The housing holds the oil filter firmly in place, preventing leaks and ensuring all oil flows through the filter rather than bypassing it. Cartridges with spin-on filters require only the filter element to be replaced, keeping the metal housing mounted on the engine to reduce parts handled during an oil change. This system lowers maintenance effort and costs, though damage to the housing itself requires replacement, which can range from about $171 to $700 depending on your vehicle and location.
Failures in the oil filter housing, such as cracks or seal leaks, disrupt oil flow and filtration, leading to engine damage from contaminated oil. Good results look like steady oil pressure and no oil pooling around the housing during operation. Watch for symptoms like engine noises or overheating, which can indicate inadequate lubrication due to clogged filters or housing issues.
Always inspect the oil filter housing for cracks or damaged seals when replacing your oil filter to prevent leaks that could cause significant engine damage.
Common Signs, Causes, and Consequences of Oil Filter Housing Issues
Common signs of a problem with the engine oil filter housing include visible oil leaks around the filter area, oil spots on the ground where you regularly park, and a noticeable burning oil smell after driving. Another clear warning is a consistently low oil level when checking the dipstick or the illumination of the oil pressure warning light on your dashboard. Oil residue often collects around the base of the housing, indicating a leaking gasket or damaged seal.
Oil filter housing failures usually stem from three common problems: damaged gaskets, cracks in the housing, and worn or misaligned threads on the cap. Gasket problems happen when the seal deteriorates or gets harmed, leading to oil leaks. Cracks may develop in the housing due to excessive heat or impact damage. Caps with stripped or cross-threaded threads don’t tighten properly, which lets oil seep out around the cap. These issues frequently affect vehicles like BMWs, where oil leaks often come from the oil filter housing gasket, as well as valve cover and oil pan gaskets.
Leaving these issues unaddressed can have serious consequences. Oil leaking onto a hot surface such as the exhaust manifold can create a burning oil smell and risk engine damage or fire. Continuous oil loss will lead to low oil levels, resulting in poor engine lubrication. Running your engine with insufficient oil can cause severe internal damage that costs far more than a gasket or housing replacement. Oil leaks may also affect surrounding components, such as belts and pulleys, which need close inspection and potential replacement when fixing the housing gasket.
To identify a faulty oil filter housing, inspect the top of the cartridge housing for oil or damage to the cap O-ring and threads. Check the junction where the housing meets the engine block for gasket wear or a warped surface that can’t seal correctly. Also, inspect cooler connections if your housing includes an integrated oil cooler, seals there can fail and cause leaks. Looking upward from any fresh oil spots can help trace whether the leak originates from the housing or another engine part.
Addressing these problems involves replacing the worn gasket or, in cases of cracked housings or damaged cap threads, replacing the housing or cap entirely. Repair costs vary by vehicle and part availability but tend to be reasonable compared to engine repair costs from running with low oil. Regular maintenance and prompt attention to oil leaks will help keep your engine running smoothly and avoid costly repairs.
Can You Drive with a Leaking or Damaged Oil Filter Housing?
Driving with a leaking or damaged engine oil filter housing is generally unsafe and not recommended. The oil filter housing secures the oil filter and routes engine oil through the filter, so any damage or leak can reduce oil pressure and allow oil to escape. Without proper lubrication, engine components can quickly suffer from increased friction, overheating, and accelerated wear, potentially leading to severe engine damage and costly repairs.
When you see oil leaking near the filter housing, first confirm the exact source. Often, the leak results from a faulty gasket or an improperly seated oil filter rather than the housing itself. After an oil change, double-check that the oil filter’s O-ring is properly placed, the filter cap is aligned correctly, and the threads are not stripped or cross-threaded. These steps can resolve many minor leaks without replacing the entire housing.
Continuing to drive with even a small leak risks the engine oil level dropping too low. When the oil-pressure warning light comes on or you hear unusual engine noises linked to lubrication, stop driving immediately. A leaking housing or cap that is loose or crooked allows oil to drip rapidly, which accelerates oil loss and raises the risk of engine seizure. Driving under these conditions can void warranties and result in repair costs far exceeding the price of a timely fix, which typically ranges from $100 to $500 depending on parts and labor.
In rare cases, if the leak is minor and the oil level remains stable, you might drive a short distance with frequent level checks to reach a repair facility. However, monitor oil levels carefully daily and avoid long trips, high engine loads, or extreme temperatures. Note that some vehicles have valves within the housing that allow oil to bypass the filter temporarily when cold to prevent starvation of lubrication, but this does not mean the system can handle a leak without damage.
Prompt repair of oil filter housing issues reduces the risk of secondary damage. When inspection reveals the entire housing is damaged, use a reliable sourcing tool to find a compatible replacement for your vehicle. Replacement involves draining the engine oil, removing the old housing, changing the gasket, installing the new unit, and refilling with fresh oil. This procedure requires basic mechanical skills and tools but must be done correctly to ensure a proper seal and oil pressure maintenance.
How to Diagnose and Fix an Oil Filter Housing Leak
Diagnosing and fixing an oil filter housing leak involves carefully pinpointing the exact source of the leak, inspecting all related components, and replacing worn gaskets or damaged parts. The repair process ensures proper sealing and prevents oil loss or engine damage. Follow a step-by-step approach to confirm the issue and complete the repair safely and effectively.
Inspecting for Oil Residue and Leak Sources
Start by examining the engine area around the oil filter housing for signs of oil residue or fresh leaks. Look closely at the housing gasket, O-rings, cap, and any visible cracks in the housing itself. Oil stains or wet spots indicate potential leak points. Use a flashlight for better visibility and clean the area before inspection to help identify active leaks.
Check the condition of the oil filter gasket, since a worn or improperly seated gasket often causes leaks. Also inspect the housing threads and the cap; damaged or stripped threads can compromise the seal. Cracks or breaks in the plastic housing usually require full housing replacement.
Testing Oil Pressure and Filter Function
Low oil pressure alongside leaks could point to larger issues, including problems with the high-pressure oil pump (HPOP) or clogging in the filter housing. Verify engine oil pressure using a mechanical gauge or a diagnostic scanner if available. If oil pressure remains low after fixing the leak, further inspection or replacing the HPOP might be necessary.
Ensure the oil filter itself is functioning correctly and is not blocked. Blockages can increase pressure on the housing seals, causing leaks. Regular maintenance such as timely oil and filter changes helps prevent these problems.
Removing and Replacing Gasket or Housing Parts
Perform the repair carefully by first draining engine oil and removing the oil filter. Replace the oil filter gasket before handling the oil filter housing or its components. Inspect all parts closely and decide whether to replace just the gasket, the cap, or the entire housing depending on damage severity. Follow these steps to diagnose and fix the leak correctly:
- Remove the engine cover and clean the oil filter housing area thoroughly.
- Drain the engine oil partially or fully to prevent spills during removal.
- Unscrew the oil filter cap carefully without damaging the threads.
- Remove the oil filter and inspect its gasket for wear or deformation; replace if necessary.
- Inspect the housing gasket and O-ring; replace any that show cracks, flattening, or damage.
- Examine the housing and cap threads for cross-threading or stripping; replace components if damaged.
- Reassemble the oil filter housing with new gaskets and o-rings, ensuring all parts seat correctly.
- Refill engine oil to the correct level and start the engine; check for leaks and proper oil pressure.
Tip: Always replace the oil filter gasket along with the housing gasket to guarantee a secure, leak-free seal after repairs.
Choosing Between Gasket Replacement, Cap Repair, or Full Housing Swap
Deciding between gasket replacement, filter cap repair, or a full oil filter housing swap depends on the symptoms you observe, the damage severity, and your budget. Small leaks or minor wear often call for just a gasket change, while cracked or warped parts generally require replacing either the filter cap or the whole housing. Costs rise with the extent of the repair and parts involved.
Signs Indicating Gasket Replacement
A leaking gasket usually shows up as oil seepage around the housing edges, but the housing and cap remain intact. You might notice slight oil drips or dampness after the engine runs. This can happen when the gasket hardens or crushes from heat and pressure over time. Tightening the cap won’t fix the leak if the gasket is worn out.
Replacing the gasket alone is often the quickest and most affordable fix. It typically takes 30 to 60 minutes to remove the cap, swap the gasket, and reinstall everything properly. This replacement prevents minor leaks from worsening and avoids contamination. Gaskets cost between $10 and $30 depending on your vehicle.
When to Replace the Filter Cap
Damage such as cracks, warping, or stripped threads on the filter cap indicate cap replacement. These issues compromise the seal even with a new gasket, causing persistent leaks or poor oil pressure. A damaged cap might also cause difficulty tightening or loosening the oil filter during changes.
Filter caps usually cost $20 to $75, and replacing them takes about the same time as a gasket swap if you’re familiar with the process. You’ll remove the old cap, inspect the housing for damage, install a new gasket on the new cap, and torque it to the manufacturer’s specs, typically around 15 to 25 ft-lbs. Avoid overtightening as it may cause future damage.
Conditions Requiring Full Housing Replacement
The entire oil filter housing must be replaced if you find cracks in the housing, extensive corrosion, or damage from overheating. Persistent leaks despite gasket and cap replacement also signal the need for a new housing. Faulty housing can cause oil pressure problems and lead to engine damage if not addressed quickly.
Replacing the whole housing is more time-consuming and expensive. Expect 2 to 3 hours of labor as it may require draining oil, removing several components for access, and refilling oil afterward. Parts costs vary widely from $100 to $400 depending on your vehicle model and whether you choose OEM or aftermarket components. Failing to replace a damaged housing promptly can increase engine wear and risk costly damages. Here is a comparison of repair options based on symptoms, cost, and severity to help decide the right fix:
| Repair Option | Symptoms | Estimated Cost | Labor Time | When to Choose |
|---|---|---|---|---|
| Gasket Replacement | Small oil leaks at housing edge, intact cap and housing | $10, $30 for gasket | 30, 60 minutes | Minor leaks, gasket wear, routine maintenance |
| Filter Cap Replacement | Cracked, warped, or stripped filter cap; persistent leak | $20, $75 for cap | 30, 60 minutes | Damaged cap, seal failure despite gasket change |
| Full Housing Replacement | Cracked or corroded housing; ongoing leaks after other repairs | $100, $400 for housing | 2, 3 hours | Severe damage, persistent leaks, oil pressure issues |
Choosing the right repair helps avoid further damage and saves on labor. Always torque parts to manufacturer specs to ensure proper sealing after gasket or cap replacement. Extensive damage or difficult leaks usually require a housing swap for long-term reliability.
Oil Filter Housing Location and Variations by Vehicle
The oil filter housing’s location varies across different vehicles, largely depending on the engine design and manufacturer. In many modern cars, the housing sits close to the engine block, usually near the oil pan or cylinder head. On diesel engines, you will often find it alongside or underneath the oil filter, making it easier to access. European models like BMW often place the housing on top of the engine or at the front, but sometimes it’s integrated with an oil cooler to save space and simplify the layout.
Not all engines have a separate oil filter housing. Some use an integrated housing that combines the filter and cooler, which reduces overall complexity but can increase replacement costs. For example, on BMW N-series engines, the entire housing unit may need replacement if it’s damaged, and the part alone can exceed $300. This integration improves leak resistance and optimizes oil flow, but it also affects how you service the filter.
The design of the oil filter housing has a big impact on how difficult it is to replace or service. Engines with a standalone housing typically require unbolting the housing from its mounting point, draining oil if necessary, then replacing the filter and gasket. This process usually takes between 30 to 60 minutes for a familiar DIYer, though it may vary based on engine arrangement. Some vehicles have cramped engine bays, limiting access to bolts or filters, and may require removal of other components for clearance.
Space-saving designs that integrate the housing, filter, and cooling features often mean you have to replace the entire unit rather than just the filter element. That raises costs and repair complexity but can extend the service interval to 7,500 miles or more when synthetic oil is used. Less common arrangements may see the filter located in hard-to-reach areas like behind the radiator or beneath other engine parts.
Each vehicle generation can have multiple engines with different housing placements, so verifying the exact location for your year, make, and model is critical. Matching the replacement oil filter to your engine is essential to maintain proper filtration. For routine filter service, gaining clear access to the housing and understanding how it mounts and seals within the specific engine setup will help you avoid leaks or damage during replacement.
Preparing for Oil Filter Housing Replacement: Tools, Time, and Safety
Replacing the engine oil filter housing or its gasket requires specific tools, attention to safety measures, and a clear plan. The process can vary but generally takes one to two hours for most vehicles. Understanding what you need and how to proceed helps avoid common problems like oil leaks and ensures a proper seal.
Basic Tools Required for Replacement
You will need a socket wrench set with metric and standard sizes since bolts on the oil filter housing differ by make and model. A torque wrench is essential for tightening bolts to manufacturer specifications to prevent leaks or damage. Prepare a gasket scraper or a plastic putty knife to remove old gasket material without scratching the housing surface. Have a new oil filter and compatible housing gasket ready to install, as well as a drain pan for catching oil spillage during the process.
Additional handy items include gloves to keep your hands clean and protected, clean rags for wiping surfaces, and a funnel for refilling engine oil afterward. In some models, you might need a special tool to remove the filter cartridge or to access the housing casing; check the vehicle’s service manual to confirm. Since oil filter housing components can be made of aluminum or plastic, use a gentle touch with tools to avoid cracking or stripping bolts.
Step-by-Step Safety Precautions
Start by parking the vehicle on a flat, stable surface and engage the parking brake. Always let the engine cool down completely before starting the job to avoid burns from hot oil or engine parts. Wear gloves to protect your skin from oil and chemical exposure. Disconnect the negative battery terminal as a precaution against accidental electrical shorts while working near the engine.
Dispose of used oil and filter materials responsibly, following local regulations to avoid environmental damage. To prevent slips or accidents, clean up any oil that spills onto the floor immediately. Use eye protection to guard against splashes, particularly when loosening bolts or removing the housing. After replacement, double-check all connections and tighten bolts to the exact torque to avoid leaks.
Never attempt to remove the oil filter housing until the engine is fully cool and pressure inside the oil system has subsided to avoid hot oil spray injuries.
Time Estimates for Typical Repairs
For most vehicles, replacing the oil filter housing gasket takes around 45 minutes to 1.5 hours, including draining oil and cleaning mating surfaces. A full housing replacement may take 1.5 to 3 hours due to additional steps like disconnecting hoses, sensors, and possibly repositioning engine mounts for access. Experienced DIYers on familiar vehicles might complete the job faster, but beginners should allow extra time to carefully follow instructions.
Time also depends on the vehicle’s engine design; transverse engines in front-wheel-drive cars usually provide easier access than longitudinal setups or those with tightly packed engine bays found in trucks or luxury cars. Be prepared for possible delays if corrosion is present on bolts or if the housing requires gentle persuasion to avoid damage. Effective planning and having all tools on hand save significant time.
Vehicle-Specific Notes and Tips
Some vehicles have oil filter housings that include integrated oil coolers or pressure sensors attached, requiring careful disconnection and reattachment. In these cases, avoid damaging sensors or connectors, and check for leaks along associated lines after replacement. Certain European models like BMW or Mercedes often specify unique gaskets requiring exact dimension matches, so verify part numbers before ordering.
In some cars, the oil filter housing is mounted near the front of the engine, while in others it sits at the side or rear, affecting how much engine cover or components need removal for access. Vehicles with aluminum cylinder heads or blocks demand careful torque management when tightening housing bolts, as over-tightening can crack the casting. Consult the owner’s service manual or repair guide to confirm torque specs and any special instructions for your specific make and model.
Step-by-Step Action Plan for Handling Engine Oil Filter Housing Issues
Follow these steps to detect and address problems with your engine oil filter housing promptly and safely.
- Immediately: Check for visible oil leaks around the oil filter housing area after parking your vehicle. A clean area without drips indicates no active leak.
- Within 24 hours: Monitor your engine oil level and pressure gauge while driving. Stable readings suggest your oil circulation is normal despite housing concerns.
- Within 48 hours: Inspect the oil filter housing gasket and cap for cracks or damage if you spot leaks. Replace any faulty parts you find to stop leakage.
- Within the first week: If leaks or pressure problems persist, schedule a professional diagnostic to check housing integrity and surrounding seals. A confirmed diagnosis ensures the right repair path.
- After diagnosis: Decide between gasket replacement, cap repair, or complete housing swap based on the technician’s advice and part condition. Proper choice reduces risk of recurrence.
- During repair: Follow safety guidelines when handling engine oil and components, including wearing gloves and cleaning spills immediately to avoid damage and injury.
- Post-repair: Drive your vehicle while regularly checking for leaks and monitoring oil pressure for at least a week. No signs of leakage means your issue is resolved.
Frequently Asked Questions
What Does the Engine Oil Filter Housing Do?
The engine oil filter housing contains the oil filter and directs oil flow through it, which removes impurities before the oil moves through the engine. It links with the engine’s lubrication channels to regulate oil flow and maintain correct pressure.
What Happens When Oil Filter Housing Goes Bad?
A bad oil filter housing can cause leaks, loss of oil pressure, and contamination of engine oil, which may lead to engine damage if not fixed promptly. Engine performance can suffer, and you might notice oily residue on or around the engine.
How Much Should It Cost to Replace Oil Filter Housing?
Replacing the oil filter housing typically costs between $171 and $655 in the US and $378 to $702 in Australia, depending on the make and model of your vehicle. Labor costs and parts prices vary widely by location and engine type.
Can I Drive with an Oil Filter Housing Leak?
Driving with an oil filter housing leak is risky because it can lead to low oil levels and engine damage. It’s best to address leaks quickly to avoid costly repairs and reduced engine reliability.
Is Oil Filter Housing Easy to Replace?
Replacing the oil filter housing can be moderately challenging because it involves removing engine components and carefully handling oil passages and gaskets. Basic mechanical skills and the right tools are necessary, so consider professional help if unsure.
What Causes Oil Filter Housing Gasket Failure?
Oil filter housing gasket failure usually occurs due to age, heat cycles, and improper installation, causing oil leaks and reduced seal effectiveness. Regular maintenance checks help catch early signs before serious problems develop.
Key Points to Remember
The engine oil filter housing plays a key role in maintaining proper oil flow and pressure, which keeps your engine running smoothly. Addressing leaks or damage early prevents engine wear and potential failure. Take time to inspect your vehicle, and replace or repair any worn housing components promptly. Consulting a trusted mechanic when uncertain is the best next step for safety and long-term reliability.