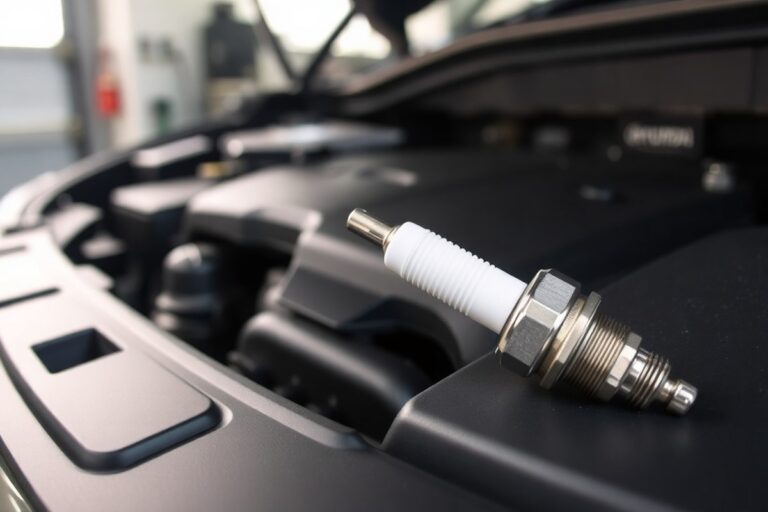
What Do I Need to Change Spark Plugs Complete Tools, Tips & Steps for Success
What do I need to change spark plugs? You need a spark plug socket, a ratchet with extension, a gap gauge, and new spark plugs matched to your vehicle. Make sure to check your owner’s manual for the right spark plug type and replacement interval before starting.
Begin by locating the spark plugs in your engine, usually one per cylinder, and confirm the exact tools required to safely access and remove them. Proper tightening during installation prevents engine damage and ensures optimal performance.
Key Takeaways
- Use a spark plug socket with a rubber insert to remove and install spark plugs without damaging them.
- Consult your owner’s manual to confirm spark plug type and recommended replacement mileage.
- For most cars, replace spark plugs between 30,000 and 100,000 miles depending on plug type.
- Check and adjust the spark plug gap using a gap gauge before installation.
- Properly tighten spark plugs to manufacturer torque specifications to avoid engine damage.
- Replace spark plug wires or ignition coils if they show signs of wear or malfunction.
What Tools and Parts Do I Need to Change Spark Plugs

Changing spark plugs requires gathering specific tools and parts to ensure the job goes smoothly and safely. You’ll need the right size spark plug socket, usually 5/8 or 13/16 inches, which matches your plugs and engine type. A ratchet and an extension bar are helpful for reaching plugs, especially in tight engine compartments. A gapping tool is essential to check and adjust the spark plugs’ electrode gap to your vehicle’s exact specifications before installation. It’s also wise to have dielectric grease on hand to lightly coat the inside of the spark plug boot, helping prevent moisture and corrosion.
Choosing the correct spark plugs depends on your vehicle make and model. Most modern cars use platinum or iridium plugs, which can last as long as 60,000 to 80,000 miles. Check your owner’s manual or parts store database to confirm the recommended plug type and gap. It’s best to replace all spark plugs at once to maintain balanced engine performance. Avoid using any lubricant on the spark plug threads; this can cause inaccurate torque readings and potentially damage the engine.
- Sock and ratchet set with the correct spark plug socket size
- Extension bar for hard-to-reach plugs
- Spark plug gapping tool
- New spark plugs matched to your vehicle’s specifications
- Dielectric grease for spark plug boots
- Protective gloves and eye protection
- Torque wrench for precise installation
Safety gear such as gloves and eye protection is recommended to avoid cuts from engine components and exposure to dirt or chemicals. Performing this task with a cool engine prevents burns and makes spark plug removal easier. While the cost of spark plugs typically runs around $10 each, specialized types for larger or performance engines can cost more. You may spend about $130 to $160 for professional replacement, but doing it yourself saves labor charges. Ensuring you have all necessary tools and parts before starting prevents interruptions and reduces the risk of damaging spark plugs or the engine.
How to Locate and Access Spark Plugs in Your Engine

Spark plugs are located in each cylinder of your engine, usually embedded in the cylinder head. Accessing them can require removing parts or covers that block your reach. Their position depends on your engine design, so knowing your engine type and how the ignition system is set up will help you find and access the plugs safely and efficiently.
Identifying Spark Plug Locations by Engine Type
Most engines have one spark plug per cylinder. Inline engines arrange cylinders in a single row, making plugs accessible along one side. V-type engines, like V6 or V8, have two cylinder banks set in a V shape, so spark plugs are located on either side of the engine. In both setups, look for a small cylindrical protrusion usually around the top of the cylinder head.
Many older engines use spark plug wires that run from the ignition coil or distributor to each plug, making the plug well visible at the cable’s end. In engines with coil-on-plug setups, each coil sits directly on top of the plug, often hidden beneath plastic covers or components. Checking your owner’s manual or repair manual can give you exact plug locations and cylinder identification. You can often spot spark plugs by tracing ignition wires or locating individual ignition coils per cylinder, especially in modern vehicles, helping to know exactly where to focus your work.
Removing Engine Covers and Components Safely
Accessing spark plugs sometimes requires removing engine covers, air intake tubing, or other components that block your reach. These covers are often held on by screws, bolts, or clips and vary by vehicle model. Removing them carefully prevents damage and makes accessing spark plugs easier.
Before starting, allow your engine to cool, working on hot engines risks burns and can damage components. Gather the right tools, typically a socket wrench set and screwdrivers. Use compressed air to blow away dirt or debris around your work area to prevent contamination when you remove the plugs. Follow these steps to remove covers or obstacles:
- Open the hood and locate the engine cover or items blocking access to the spark plugs.
- Use a screwdriver or socket wrench to loosen and remove bolts or screws securing the cover.
- Lift off the cover gently, avoiding fast removal that can snap plastic clips.
- Disconnect any hoses or electrical connectors if necessary, remembering their positions for reassembly.
- Set the removed parts safely aside on a clean surface.
Use a magnetic tray or container to keep screws and bolts from getting lost during disassembly.
Differences Between Coil-On-Plug and Wire-On-Plug Setups
Engines generally have one of two spark plug ignition types: wire-on-plug or coil-on-plug. Wire-on-plug setups use spark plug wires connecting the ignition coils or distributor to each spark plug. You can usually see and unplug these wires directly from the spark plugs, which simplifies identifying each plug.
Modern coil-on-plug engines have the ignition coil mounted directly on each spark plug, eliminating external wires. To remove the spark plugs in these systems, you first need to disconnect and remove each coil. This often involves unplugging an electrical connector and removing a mounting bolt before you can access the plug below.
Coil-on-plug setups usually require careful handling when removing coils to avoid damage, especially since coils contain delicate internal electronics. The absence of wires reduces potential ignition problems but changes how you prepare to swap plugs.
How to Remove Old Spark Plugs Safely and Inspect Them
Removing old spark plugs safely involves the right tools, careful handling, and proper inspection. Prevent damage by using a suitable socket and controlling torque. Check plugs for wear signs like deposits and damage. Always inspect related ignition parts like wires or coils for cracks or corrosion during removal.
Using the Right Socket and Ratchet Maneuvers
Choose a spark plug socket that fits snugly and has a rubber insert or magnet to hold the plug securely. Attach the socket to a ratchet and use an extension if the spark plug is recessed in the engine. Avoid forcing the socket or twisting at odd angles.
Loosen the spark plug by turning the ratchet counterclockwise in smooth, controlled motions to prevent breaking the plug or damaging threads. Stop if you feel resistance and try to reposition the socket for better use.
- Disconnect the battery to prevent accidental sparks.
- Attach the spark plug socket to your ratchet, with an extension if needed.
- Place the socket over the spark plug firmly to avoid slipping.
- Turn the ratchet slowly counterclockwise to loosen the plug.
- Remove the plug by hand or continue with the socket once loose.
- Set the old plug aside carefully to inspect it.
- Repeat for each spark plug.
Visual and Physical Signs to Inspect on Old Plugs
Examine the spark plug’s electrode tip and insulator for wear indicators. Look for heavy soot, oily deposits, or white ash, which can show fouling or overheating. A worn electrode will appear rounded or eroded.
Check the ceramic insulator for cracks or chips, as this can cause misfires. Also, confirm the spark plug gap hasn’t widened beyond specification, as this reduces ignition efficiency.
Checking Ignition Components for Related Wear
Inspect the spark plug wires or ignition coils and their boots when removing plugs. Look for brittle, cracked insulation or corrosion on terminals inside the boots. Damaged wires or coils often cause symptoms similar to worn plugs, such as misfires or rough idle.
Replace any components showing physical damage or heavy corrosion to maintain consistent engine performance. Ignoring these signs can lead to repeated ignition issues even after swapping plugs.
When and How to Gap New Spark Plugs Correctly
Proper spark plug gap ensures your engine runs efficiently by providing the right spark size for ignition. Having the correct gap helps optimize fuel combustion and prevents misfires or rough idling. You need to measure and adjust the gap to your vehicle manufacturer’s specific recommendations for best performance.
Understanding Spark Plug Gap Specifications
The spark plug gap is the distance between the center electrode and the ground electrode at the firing end of the plug. This gap controls the size of the spark generated to ignite the air-fuel mixture in the combustion chamber. When the gap is too wide, the spark might be weak or fail to jump across, resulting in misfires. When the gap is too narrow, the spark can be too small, lowering combustion efficiency and fuel economy.
Manufacturer specifications for the spark plug gap vary by engine design, typically ranging from about 0.028 to 0.060 inches (0.7 to 1.5 mm). You should check your vehicle’s owner’s manual or a reliable source like the Autolite® Spark Plug Catalog to find the exact gap recommendation for your make and model. Always follow this value rather than assuming new plugs are pre-gapped correctly.
Tools and Techniques to Measure Plug Gap
Measuring the spark plug gap requires a precise tool, usually a gap gauge or feeler gauge with thickness measurements in thousandths of an inch (or millimeters). Avoid using makeshift items like paper or coins, which are inaccurate and may damage the electrodes. A wire-type gap gauge or a tapered feeler gauge is preferred for accuracy and ease of use.
To measure, insert the appropriate gauge thickness between the two electrodes at the firing end of the plug. It should fit snugly without forcing or excessive looseness. When the gauge slides in without resistance or won’t fit, the gap needs to be adjusted.
Adjusting the Gap Safely Without Damage
You can adjust the spark plug gap manually to match manufacturer specifications. It is essential to handle plugs carefully during this process to avoid bending or breaking the electrodes. Over-bending may alter the electrode shape, causing poor spark performance or plug damage. Avoid touching the ceramic insulator or applying pressure to the center electrode. Below is a step-by-step approach to adjusting spark plug gaps:
- Consult your vehicle’s owner’s manual or a reputable catalog like the Autolite® Spark Plug Catalog to find the exact gap specification.
- Use a gap gauge or feeler gauge to measure the current gap between the electrodes carefully.
- When the gap is too wide, gently tap the ground electrode on a hard surface or use a tool to bend it closer to the center electrode a little at a time.
- When the gap is too narrow, put the gauge in and carefully bend the ground electrode outward a bit. Use small adjustments to avoid over-bending.
- Recheck the gap with the gauge after each adjustment to confirm it matches the specified measurement.
- Once the correct gap is set, avoid further adjustments and handle the plug carefully to prevent altering it before installation.
Pre-gapped spark plugs may generally fall close to the manufacturer’s gap, but variations during shipping or storage can change this slightly. Always measure and verify the gap yourself to avoid engine performance issues. Setting the correct gap may take a few minutes but prevents costly problems and poor fuel economy later.
How to Install New Spark Plugs Without Causing Damage
Installing new spark plugs correctly is essential to avoid engine damage and ensure optimal performance. You need to thread the plugs in gently to prevent cross-threading, then tighten them to the recommended torque. Over-tightening can strip the cylinder head’s threads or crack the spark plug, while under-tightening may cause poor engine compression or plug loosening during operation.
A torque wrench is highly recommended because it ensures you apply the exact specified tightness, which usually ranges from 13 to 25 lb-ft (18 to 34 Nm) depending on your vehicle and plug type. Check your vehicle’s service manual for the correct torque. You can tighten the spark plugs hand-tight first without a torque wrench, then use a ratchet to turn them an additional quarter to half turn, but this method is less precise and riskier.
Generally, do not use lubricants on the spark plug electrodes or threads unless specified by the spark plug manufacturer. Some spark plugs come with a factory-applied anti-seize on the threads, which you should preserve. When your spark plugs have a plain steel or copper body and your engine’s manual suggests it, apply a small amount of anti-seize carefully on the threads to stop seizing, especially in aluminum cylinder heads. Avoid applying lubricant on the electrode or tip as it can affect the spark. Follow these steps to install spark plugs without causing damage:
- Clean the spark plug hole: Use compressed air to blow out any dirt or debris from the cylinder head opening to prevent contamination inside the engine.
- Check the gap: Verify the spark plug gap with a feeler gauge matches the recommended specification before installation.
- Start threading by hand: Carefully thread the spark plug into the hole using your fingers. This prevents cross-threading, which can ruin the cylinder head threads.
- Use a ratchet or socket wrench: Once hand-tight, snug the plug with the wrench until it seats firmly, avoiding excessive force.
- Tighten to specification with a torque wrench: Set your torque wrench to the recommended setting (usually 13-25 lb-ft). Apply a steady crank until it clicks or stops.
- Double-check all plugs: Ensure all plugs are equally tight and seated properly to avoid uneven performance or leaks.
- Reconnect wires or coils: Attach ignition wires or coils securely to each new spark plug.
Never force a spark plug into the hole, if it doesn’t thread in easily, back it out and start over to avoid damaging the threads in your engine’s cylinder head.
Should I Replace Spark Plug Wires or Ignition Coils Too
Maintenance for coil-on-plug systems differs since there are no spark plug wires to check or replace. When you change the spark plugs on these engines, also inspect coil connectors and boots for corrosion, cracks, or carbon tracking. If the coil’s boot doesn’t seal well against the spark plug, it can cause misfires. Ignition coils in hot engine environments can lose efficiency over years, so monitor engine performance and diagnostic trouble codes (DTCs) from your vehicle’s onboard diagnostics system to decide if coil testing or replacement is needed. Your decision rule is to replace spark plug wires if you have an older vehicle and notice physical wear or engine performance issues, particularly electrical resistance outside recommended ranges. For ignition coils on coil-on-plug systems, replace only those that fail diagnostic tests or trigger trouble codes indicating a misfire. Performing simple checks, such as using a multimeter for wires or an ignition coil tester for coils, helps identify the exact component in need of replacement. This targeted approach avoids unnecessary expenses while keeping your engine running smoothly.
Signs and Timing: When to Replace Spark Plugs
Bad spark plugs usually show up through noticeable changes in your vehicle’s performance. Look for poor fuel economy, rough idling, engine misfires, or difficulty starting the car. Even a single faulty spark plug can affect how smoothly the engine runs. Catching these signs early helps you avoid more serious engine issues and costly repairs.
Spark plug replacement intervals vary based on the plug type and how you drive. Consult your vehicle’s manual for the exact plug specifications and recommended timing. Standard copper plugs usually need replacement between 20,000 and 30,000 miles, while platinum or iridium plugs may last from 60,000 up to 100,000 miles. Driving mostly on highways at steady speeds generally helps plugs last longer, but frequent stops, rapid acceleration, and short trips can reduce their lifespan. Cold weather with frequent starts also tends to decrease how long plugs last.
| Spark Plug Type | Typical Replacement Interval (Miles) | Effect of Driving Style |
|---|---|---|
| Copper | 20,000 – 30,000 | Short trips and stop-and-go shorten life |
| Platinum | 60,000 – 80,000 | Stable highway driving extends life |
| Iridium | 80,000 – 100,000 | Harsh conditions reduce lifespan |
Monitor the engine’s performance periodically to spot issues before the plugs are due for replacement. Consistent misfires, slow acceleration, or rising fuel use after surpassing the suggested mileage indicate it’s time to replace your spark plugs promptly. Following your manufacturer’s interval and considering your driving pattern ensures you keep your spark plugs in optimal condition, maintaining engine efficiency and lowering the chance of breakdowns.
Common Mistakes When Changing Spark Plugs and How to Avoid Them
Common errors during spark plug replacement include using an incorrect gap, over-tightening, cross-threading the plugs, and reusing old ones. These mistakes can lead to engine misfires, damage to the cylinder head, or inefficient combustion. Ensuring the spark plug gap matches the exact specification for your engine is essential; a gap too wide or too narrow can cause poor ignition and fuel waste.
Cross-threading happens when you start the spark plug by forcing it into the cylinder head at the wrong angle, which damages the threads and risks costly repairs. To avoid this, always begin threading the spark plug by hand and turn it clockwise slowly until it feels snug before using a wrench. Only use a spark plug socket with a rubber insert that grips the plug, preventing it from slipping and breaking.
- Check and set the spark plug gap using a gapping tool to match your vehicle’s specification exactly.
- Start threading spark plugs by hand before tightening with a wrench to avoid cross-threading.
- Tighten spark plugs to the manufacturer’s torque specs, typically between 13 and 25 ft-lbs, to prevent over-tightening.
- Do not reuse old spark plugs; replace them with new ones to ensure proper performance and prevent fouling.
- Apply a small amount of anti-seize compound on the plug threads only if recommended by the manufacturer to ease future removal.
- Verify the spark plug is fully seated against the cylinder head for a proper seal and heat transfer.
Over-tightening can strip the threads or break the ceramic insulator in the plug, leading to costly engine repairs. Use a torque wrench to apply the correct tightness, too loose and the plug can blow out under engine pressure; too tight and you risk damaging threads. Reusing spark plugs is tempting to save money, but old plugs often have worn electrodes or built-up deposits affecting ignition quality and fuel efficiency.
Use a torque wrench and always hand-start the spark plug threads to protect the cylinder head and ensure a perfect seal.
Not gapping spark plugs correctly leads to inefficient combustion and engine knocking, which degrades engine parts over time. Some spark plugs come pre-gapped, but you should verify this with a gap tool, adjusting carefully by bending the outer electrode only. Proper lubrication of plug threads with anti-seize prevents them from seizing in the head due to heat cycles, but use this sparingly as excess compound can alter tightening torque readings.
Step-by-Step Action Plan for Changing Spark Plugs
Follow these steps to replace your spark plugs safely and ensure your engine runs smoothly after the job.
- Before you start: Gather all necessary tools and parts, including the correct spark plugs, a spark plug socket, ratchet, gap gauge, and torque wrench. Confirm the plug type matches your car’s specifications.
- At the beginning: Locate and clear access to your spark plugs by removing any components blocking the engine cover. Make sure the engine is cool to avoid burns and damage.
- During removal: Remove spark plug wires or ignition coils carefully without pulling on wires. Unscrew old spark plugs with the socket, turning counterclockwise. Inspect plugs for wear or damage.
- Before installation: Check and adjust the gap on new spark plugs using a gap gauge. Correct gap ensures proper ignition and engine performance.
- Installation phase: Thread new spark plugs by hand at first to avoid cross-threading. Use a torque wrench to tighten plugs to manufacturer specifications to prevent overtightening or loosening.
- After installation: Reconnect spark plug wires or ignition coils firmly. Start the engine and listen for smooth operation or absence of misfires as confirmation your work was successful.
- Next day: Inspect for any signs of loose connections or unusual noises during driving. Tighten or troubleshoot as needed for optimal performance.
Frequently Asked Questions
How Much Does It Usually Cost to Have Spark Plugs Changed?
On average, replacing spark plugs costs between $211 and $274, depending on your vehicle type and spark plug quality. Labor costs vary by location and car model, so getting a local estimate helps you budget accurately.
Will AutoZone Change Your Spark Plugs for You?
AutoZone generally sells parts and may offer advice, but they usually don’t perform installation services. Some locations partner with local mechanics or mobile services, so check with your store for available options.
Is It Hard to Change Spark Plugs Yourself?
Changing spark plugs is usually straightforward with basic tools and proper guidance. Some engines have harder-to-reach plugs, so access and layout can affect difficulty.
What Do You Normally Replace with Spark Plugs?
You typically replace spark plug wires or ignition coils along with spark plugs if they show wear or damage. This ensures consistent electrical performance and prevents misfires.
How Often Should Spark Plugs Be Replaced in High-Mileage Cars?
Spark plugs should be replaced every 30,000 to 100,000 miles, depending on type and vehicle. Check your owner’s manual for your car’s recommended interval to maintain performance.
Can Incorrect Spark Plug Installation Damage the Engine?
Yes, improper installation can cause engine misfires or damage. Always follow torque specs and gap settings to avoid costly repairs.
Final Thoughts
Changing spark plugs requires the right tools, careful handling, and attention to detail. Taking the time to gap plugs correctly and tighten them properly can prevent engine problems and save you costly repairs. Check your owner’s manual for specific intervals and start with the steps in this plan to maintain your engine’s performance. Your next move is to schedule your spark plug change based on your mileage or engine condition today.