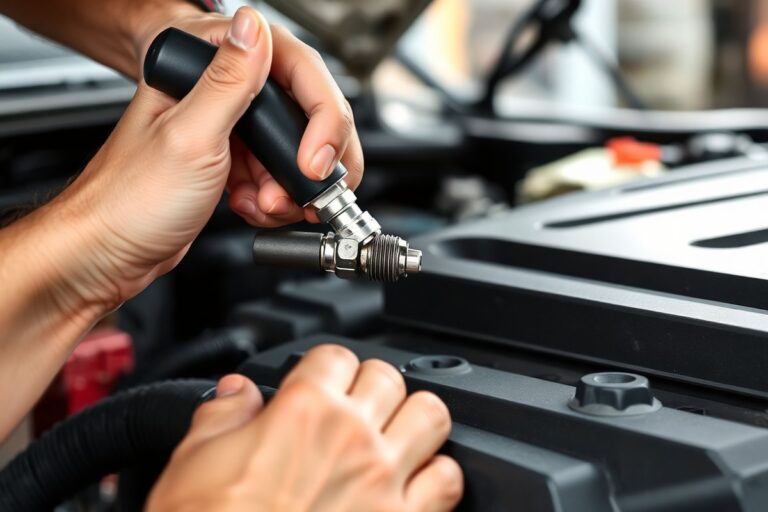
How Do You Fix a Fuel Pump: A Complete Guide with Proven Repair Steps
How do you fix a fuel pump? You can often repair a faulty fuel pump by cleaning or replacing components like the fuel filter or electrical connectors without a full replacement. Testing fuel pressure and power supply first helps identify the exact issue before attempting any repair.
Key Takeaways
- Check the fuel pump’s electrical connections and wiring for corrosion or damage before considering replacement.
- Replace the fuel filter regularly to prevent clogging that can stress or damage the fuel pump.
- Access the fuel pump through a rear seat panel or by dropping the fuel tank, depending on your vehicle model.
- Test fuel pressure with a gauge to confirm whether the pump delivers proper fuel flow.
- Listen for unusual noises from the fuel tank area, like whining or humming, which can indicate pump problems.
- Make sure the pump has both power and ground; lack of either can cause fuel delivery issues even if the pump itself is fine.
How to Fix a Fuel Pump Without Full Replacement

Fixing a fuel pump without replacing it usually involves addressing minor issues like clogging, electrical contact problems, or worn filters. Repairing the pump can save money and time compared to a full replacement, but it only works if the pump is partially functional. You should first confirm the pump isn’t completely failed by checking for adequate fuel pressure and electrical continuity. Minor fixes often restore performance by removing dirt or corrosion and replacing easily accessible parts like the fuel filter or pump strainer.
To repair a fuel pump without full replacement, focus on cleaning and inspecting components, replacing filters, and ensuring solid electrical connections. Avoid this if the pump’s motor or internal mechanisms are damaged, as these parts require specialized tools and knowledge to rebuild safely and reliably. Most vehicles have the pump inside the fuel tank as part of a module, but you can still clean or replace the fuel filter and strainer once the pump is accessed. Repair kits are available for specific pump models but check that your issue matches what the kit repairs.
- Relieve the fuel system pressure. Before working on the pump or fuel lines, reduce pressure to avoid fuel spray. You can do this by removing the fuel pump fuse and starting the engine until it stalls.
- Disconnect the battery negative terminal. This prevents sparks when working near flammable gasoline.
- Access the fuel pump. Follow your vehicle’s safe procedures to reach the pump, commonly through the rear seat, trunk panel, or after dropping the fuel tank.
- Inspect and clean electrical contacts. Remove any corrosion or dirt from the connectors and terminals using electrical contact cleaner and a soft brush.
- Remove and clean or replace the fuel filter and strainer. A clogged fuel filter restricts fuel flow and can mimic pump failure. Replacing the filter costs around $10-$30 and requires only basic hand tools.
- Test the fuel pump operation. Reconnect the electrical connector and battery, then briefly turn the ignition to run the pump. Listen for the humming sound and check fuel pressure with a gauge (typically 4-60 psi depending on your system).
- Use a fuel pump repair kit if applicable. Some kits include internal parts like diaphragms and valves for specific mechanical pumps; follow kit instructions closely. These kits usually cost under $50 but require some pump disassembly skill.
- Reassemble the module and reinstall any removed fuel system parts. Double-check seals to avoid leaks and confirm all connections are tight before starting the engine again.
Good results mean your engine runs smoothly without hesitation or stalling, and fuel pressure remains within the manufacturer’s specified range. If repairs don’t restore normal operation, the pump motor or internal components may be worn out, signaling the need for full replacement. Also, avoid driving long distances with a marginally functioning pump because fuel system problems can increase fire risk.
Identifying Signs of a Failing Fuel Pump

A failing fuel pump shows itself through several noticeable symptoms that directly affect your vehicle’s engine performance. You may notice difficulty starting the engine or that it cranks multiple times before finally starting, which means the pump isn’t delivering enough fuel pressure. Stalling, especially when the vehicle is under load or accelerating, indicates the pump struggles to maintain the proper fuel flow. Reduced engine power or jerking while driving confirms the fuel supply is inconsistent, which can also make handling feel off as the engine misfires or stumbles.
Other signs include strange noises like whining or buzzing coming from the fuel tank area, which usually means the pump motor is wearing out. A drop in fuel efficiency, where you find yourself filling the tank more often despite no changes in driving habits, can point to the pump delivering fuel inefficiently. Most modern vehicles will trigger the check engine light if the fuel pump performance drops below a certain threshold, which you can verify with an OBD-II scanner.
- Engine cranks but doesn’t start or stalls under load
- Whining or buzzing noise from the fuel tank area
- Erratic engine power and jerky acceleration
- Increased fuel consumption without driving changes
- Check engine light illuminated
- Steering wheel may feel jerky or hard to control
- Multiple attempts needed to start the engine
Driving with a bad fuel pump risks serious damage to the engine or can cause a fire hazard due to fuel leaks or overheating components. Stop driving immediately if the engine won’t start after several tries, stalls repeatedly, or if the noise from the fuel pump gets louder than usual. Continuing to operate a vehicle in these conditions can lead to complete engine failure and more costly repairs.
Never rely on temporary fixes like jump-starting the pump yourself; these can cause further damage or safety risks.
To confirm a fuel pump problem, you can check the fuel pressure using a gauge connected to the fuel line. Normal fuel pressure varies but typically falls between 40 and 60 psi for most fuel-injected vehicles. If the gauge shows minimal or no pressure during cranking, the pump is likely failing. Keep in mind that issues like clogged fuel filters or faulty wiring might cause similar symptoms, so these should be inspected before assuming a pump replacement is necessary.
Confirming Fuel Pump Problems Before Repair
Confirming a fuel pump problem involves testing both its electrical components and fuel pressure to distinguish it from issues like a faulty relay, fuse, or clogged filter. Accurate diagnosis requires step-by-step checks with a multimeter, a fuel pressure gauge, and sometimes a scan tool to avoid costly and unnecessary replacements.
Check Fuses and Electrical Relays
Start by verifying the simplest components: the fuel pump fuse and relay. A blown fuse or bad relay can cut power to the pump, mimicking pump failure. Use the vehicle’s manual to locate the fuse and relay that control the fuel pump circuit.
First, inspect the fuse for visible damage or test it with a multimeter for continuity. Next, swap the relay with a similar known-good relay from the fuse box if available. This can confirm whether the relay is faulty without special tools.
Check power and ground at the fuel pump connector with the ignition key turned to ON (not start) after confirming all other items are correct. You should see battery voltage at the pump connector. Absence of voltage means checking wiring and connectors next. To isolate the relay, you can use a jumper wire at the relay socket to send power directly to the pump terminal. The relay or its control circuit is faulty when the pump runs.
Measure Fuel Pressure at the Fuel Rail
Fuel pressure measurement is the most direct way to confirm a pump problem. You need a fuel pressure gauge designed for your vehicle’s fuel system. Attach the gauge to the test port on the fuel rail or appropriate service port. Follow procedures for safety and pressure relief before connecting the gauge.
Turn the ignition key to ON without starting the engine. Note the pressure reading and compare it to the manufacturer’s specifications, typically found in the service manual. Low pressure (often below 35 psi for gasoline systems) usually indicates a weak or failing pump or a clogged filter upstream.
Without a fuel pressure gauge, pull the fuel pump fuse or relay and crank the engine to perform a simple test. The engine should stall within a few seconds due to loss of fuel pressure. Running longer indicates low fuel pressure or other fuel delivery problems. However, this test is less precise and should be followed by pressure measurements for confirmation.
- Locate the fuel pump fuse and relay according to the vehicle manual
- Test fuse continuity and inspect visually for damage
- Swap the relay with a known good one or bypass using a jumper wire
- Check battery voltage and ground at the fuel pump connector with ignition ON
- Connect a fuel pressure gauge to the fuel rail test port
- Compare fuel pressure to vehicle specs, typically 35-45 psi for gasoline systems
- Use engine stall test as a rough check if no gauge is available
Repeat pressure testing under cranking and running conditions for full diagnosis. Note that a high-pressure engine-mounted pump may require different pressure ranges than an in-tank pump, so identify your system before testing. Low readings combined with correct electrical input confirm a faulty pump.
Use an OBD-II Scanner for Diagnostic Codes
Modern vehicles often store diagnostic trouble codes (DTCs) when the fuel pump or related systems malfunctions. Plug in an OBD-II scanner to the vehicle’s diagnostic port to read these codes. Codes like P0230 to P0234 typically indicate fuel pump circuit or pressure issues.
Besides codes, some scan tools provide live data allowing you to monitor fuel system voltage, pump operation time, and fuel pressure readings if supported. This data helps distinguish a fuel pump problem from sensor or relay faults.
Use the scanner after verifying power and pressure to pinpoint persistent or intermittent faults. Although helpful, the scanner should not replace physical tests since some electrical failures or mechanical blockages won’t trigger codes immediately.
Tools and Parts Needed for Fuel Pump Repair or Replacement
Fixing or replacing a fuel pump requires specific tools and parts to do the job safely and correctly. Most vehicles need either the fuel pump accessed through a panel under the rear seat or by dropping the fuel tank. The process usually requires a decent level of mechanical skill and proper equipment to avoid damaging the pump or fuel system.
Essential tools include a socket set and wrench, which you’ll use to remove bolts and fasteners holding the fuel tank or access panel. Fuel line disconnect tools help safely detach the fuel lines without causing leaks. You’ll also need a jack and axle stands or a vehicle lift to raise and support the car securely if you must lower the fuel tank. These tools ensure you can reach the fuel pump and remove it without risk.
Choosing the right replacement fuel pump depends on your vehicle. OEM (Original Equipment Manufacturer) pumps match the exact specifications and tend to offer the best reliability. Quality aftermarket options may be less expensive but vary in quality and durability. For consistent performance and longevity, investing in an OEM pump or a highly rated aftermarket alternative is advisable, especially for newer or high-mileage vehicles.
It’s critical to replace the fuel filter during fuel pump repair. The filter keeps debris from clogging the new pump and prolongs its life. Most electric fuel pumps have a pre-filter sock inside the fuel tank, but the external fuel filter still needs regular replacing as part of maintenance. Skipping this step can cause poor pump performance or early failure.
- Socket set and wrenches for fasteners
- Fuel line disconnect tools to prevent leaks
- Car jack and axle stands or a lift
- New fuel pump (OEM or quality aftermarket)
- Replacement fuel filter to protect the pump
- Safety glasses and gloves for personal protection
- Container to catch fuel drips or spills
Gather these tools and parts before starting the repair. Expect the process to take several hours, especially if dropping the tank is necessary. Following the correct procedure reduces risks like fuel leaks or pump damage. After installation, check for secure connections and proper pump operation before lowering the vehicle. This attention to detail leads to reliable, trouble-free fuel system performance.
Safe Procedures for Accessing the Fuel Pump
Accessing the fuel pump safely depends on your vehicle’s design. Many cars let you work on the pump through an access panel inside the cabin, avoiding the need to drop the fuel tank. When the panel is not available, lowering the tank is necessary but requires careful preparation to prevent fuel spills and injury. Always relieve system pressure first and follow safety procedures to handle gasoline safely.
Access Through Rear Seat or Interior Panel
Certain cars have a hidden panel located beneath the rear seat, trunk floor, or cargo space. This panel sits over the fuel tank’s top, making it possible to reach the fuel pump without taking out the entire fuel tank. Begin by folding back or taking out the rear seat cushion or cargo trim. After that, take off any screws or inspection covers securing the panel.
This method greatly reduces labor and the risk of fuel spills. You may need to lift or remove the carpet and seats, which typically takes 15 to 30 minutes depending on your experience and vehicle design. Once the panel is off, you can disconnect the pump’s electrical connectors and fuel lines with less risk.
Work carefully, as some fasteners are torque-sensitive, and watch for any fuel vapors trapped inside. Keep the work area ventilated and have a fire extinguisher nearby.
Lowering the Fuel Tank
Older or some modern vehicles lack an interior access panel, requiring the fuel tank to be lowered for pump access. This job involves several steps: first disconnect the negative battery terminal, then carefully relieve fuel pressure to avoid spray or fire hazards. Next, disconnect the filler neck, electrical connectors, EVAP lines, and fuel lines from the tank.
Lowering the tank usually requires support such as a jack or a fuel tank cradle and the removal of tank strap bolts. This process can take 1 to 2 hours due to the need to work underneath the vehicle and avoid damage to fuel lines or the tank itself. Rusted or stuck fasteners increase difficulty and may require penetrating oil or special tools.
Working under the vehicle with fuel components exposed demands strict attention to safety. Avoid sparks or open flames and consider hiring a professional if you have limited experience or if rust and corrosion make tank removal hazardous.
Relieving Fuel Pressure Safely
Always relieve fuel system pressure before disconnecting any fuel lines or opening the fuel system. Pressurized fuel can spray and ignite, causing serious injury. Follow the specific procedure in your vehicle’s service manual. Typically, this includes removing the fuel pump fuse or relay, then running the engine until it stalls, or using a fuel pressure gauge with a relief valve.
Disconnect the battery once fuel pressure is relieved. Vacuum pressure in the lines will reduce the chance of fuel spraying during disassembly. Have a rag ready to catch any small fuel drips and keep a fire extinguisher within reach.
Use nitrile gloves and eye protection to guard against fuel exposure. Do not smoke or use phones close to the work area. Here is a comparison table to help you decide which access method applies to your vehicle and what steps to expect:
| Access Method | Location | Tools Needed | Time Estimate | Safety Considerations | Typical Difficulty |
|---|---|---|---|---|---|
| Interior Access Panel | Rear seat, trunk floor, cargo area | Socket set, screwdriver | 15, 30 minutes | Relieve pressure, avoid sparks, ventilate area | Low to moderate |
| Lowering Fuel Tank | Under vehicle | Jack, wrenches, penetrating oil, safety glasses | 1, 2 hours or more | Relieve pressure, handle fuel lines carefully, avoid rust damage | Moderate to high |
| Preliminary Steps | N/A | Motor vehicle manual, fuel pressure gauge (for some models) | 10, 15 minutes | Disconnect battery, relieve pressure, use protective gear | Essential |
Always ensure the fuel system pressure is safely relieved before disconnecting any lines or components to prevent fuel spray and avoid fire hazards.
Step-by-Step Fuel Pump Removal and Installation
Removing and installing a fuel pump requires careful steps to avoid damage and ensure it functions properly. Clean the tank area first, use the right tools to release the lock ring, and always replace seals to prevent leaks. Proper alignment and gentle handling keep the new pump secure and working well.
Disconnecting Battery and Fuel Lines
Start by disconnecting the battery to prevent sparks or short circuits during the fuel pump replacement. Depressurizing the fuel system is essential to avoid fuel spray that could cause fire or injury. Carefully disconnect the fuel lines, electrical connectors, and vent lines; use line-specific tools if available to prevent damage to fittings. Follow these steps to safely clear power and fuel connections:
- Disconnect the negative battery terminal using a wrench to cut electrical power.
- Relieve fuel system pressure by removing the fuel pump fuse and running the engine until it stalls.
- Disconnect the fuel lines at the pump by releasing the locking clips or fittings, using special fuel line disconnect tools if needed.
- Unplug the electrical connectors for the pump and any related sensors.
Removing the Old Fuel Pump Module
Cleaning the top of the fuel tank before removal helps prevent dirt or debris from falling inside. Locate the pump retaining ring, which holds the pump module in place. Use the correct removal tool designed for your vehicle model; if unavailable, a brass punch and hammer may be used gently, only if the service manual allows it. Perform these steps in order to remove the fuel pump module safely:
- Clean the tank surface thoroughly to avoid contamination.
- Remove any screws or bolts securing access panels or straps.
- Use a fuel pump lock ring tool to twist and remove the retaining ring without forcing it.
- If a specialized tool isn’t available, lightly tap a brass punch to turn the lock ring carefully as permitted by the manufacturer.
- Lift the fuel pump module straight out, noting orientation and attached lines for reinstallation.
Installing the New Fuel Pump and Seals
Replacing the seal is critical to preventing leaks. Always install a new tank seal even if the old one appears intact. Place the fuel pump module into the tank in the exact orientation it was removed, ensuring the seal sits evenly. Misalignment can cause leaks, loss of pressure, or fuel pump damage. Take these steps to install the pump correctly:
- Compare the new fuel pump module with the old one to verify it matches exactly.
- Place a new tank seal around the pump opening to ensure a tight fit.
- Insert the fuel pump gently into the tank, aligning all fittings and connectors.
- Install the retaining ring fully seated and aligned, tightening with the correct tool or method stated by the manufacturer.
Reconnecting Electrical and Fuel Lines
Reconnect fuel and electrical connections carefully to prevent leaks and electrical issues. Make sure hoses and wiring clips are secured exactly as before to maintain system integrity. After reassembly, check for leaks and proper pump operation before completing the job. Follow these steps to complete reconnection:
- Reattach all fuel lines, ensuring fittings click or lock into place firmly.
- Connect electrical wiring and sensors, ensuring connectors are clean and tight.
- Reinstall any tank covers, shields, or bolts removed earlier.
- Reconnect the battery and turn the ignition to the “on” position without starting the engine to prime the fuel pump and check for leaks.
Avoiding Common Fuel Pump Repair Mistakes
Common mistakes during fuel pump repair can lead to persistent issues or safety hazards. One of the biggest errors is reusing old O-rings and seals. These components degrade over time, and reusing them often causes leaks that undermine fuel pressure and risk fire. Always replace O-rings and seals with new parts specified for your vehicle model. The cost typically ranges from $5 to $15 for a set, a small investment that prevents costly future repairs or dangerous fuel leaks.
Not properly relieving fuel system pressure before starting work increases the chance of fuel spraying and fire. Always disconnect the battery and follow the manufacturer’s recommended procedure to depressurize the fuel system, which may involve opening a fuel rail valve or removing the fuel pump fuse and running the engine until it stalls. Wearing safety goggles and working in a well-ventilated area away from open flames or sparks are critical precautions.
Misdiagnosing the fuel pump issue can waste time and money. Check the fuel pump relay, fuse, and wiring harness for continuity before attempting repair. Electric fuel pumps rely on a motor attached to an impeller, so electrical supply failure or connector corrosion often mimics pump failure. Mechanical pumps operate differently with a diaphragm mechanism but share similar risks of gasket failure and system leaks.
- Do not reuse old fuel pump seals and O-rings; always install new ones to avoid leaks.
- Relieve fuel system pressure precisely as recommended to prevent fuel sprays and fires.
- Confirm electrical supply to the pump to avoid unnecessary replacement.
- Clean fuel connections and replace corroded wires to maintain proper function.
- Use manufacturer-approved parts for pump and gasket replacements.
- Handle fuel with care, avoiding sparks, flames, and static electricity sources.
- Double-check pump mounting to prevent vibrations or misalignment.
Incorrect torque when tightening fuel pump mounting bolts can damage the pump housing or cause warping, resulting in leaks or premature failure. Check the service manual for torque specifications, usually between 5 to 10 foot-pounds, and use a calibrated torque wrench. Once installed, test the system for leaks and proper fuel pressure before reassembling everything fully.
Neglecting safety and procedural steps during fuel pump repairs can lead to fire hazards or incomplete fixes. Taking time to carefully follow recommended protocols ensures the repair lasts, avoids additional damage, and keeps you safe. Professional mechanics often charge from $300 to $700 for fuel pump replacement, with labor and parts included, which shows why DIYers should avoid common errors and focus on precision and safety.
When to Call a Professional for Fuel Pump Issues
A professional diagnostic is the best option when your fuel pump issue is not clearly linked to an obvious cause or if the problem persists after you replace the pump yourself. For example, if you install a new fuel pump and your car still won’t start, a mechanic can determine if an underlying electrical fault, such as a wiring short or blown fuse, is preventing the pump from working correctly. Electrical problems are common culprits in fuel pump failure because the system relies on proper voltage and signals to function. Without a multimeter and the right diagnostic tools, finding these issues can be difficult for a DIYer.
Calling a professional makes sense if your car cuts out when driving at high speeds or has inconsistent engine power. These symptoms often require specialized fuel pressure testing equipment to confirm that the pump delivers fuel continuously under load. Mechanics can also check for clogged fuel filters, defective fuel pressure regulators, or issues with the fuel pump relay, components that interact closely with the pump and affect performance. In most repair shops, such diagnostics typically cost between $50 and $150, depending on your vehicle and local labor rates.
Another situation to call a pro is when you face safety risks during repair. Accessing the fuel pump usually means working around the fuel tank, which contains flammable gasoline vapors. Without a well-ventilated workspace or proper safety gear, letting a professional handle removal and installation reduces fire hazards and exposure to harmful fumes.
Here’s a good rule to follow: after replacing the fuel pump, if your engine cranks but doesn’t start, test for fuel pressure at the fuel rail with a pressure gauge. No or low pressure means a wiring or relay issue; steady pressure without the engine starting points to different fuel or ignition problems. Unsure how to conduct these tests or interpret the results? A mechanic can assist. Fixing electrical faults related to the fuel pump often involves testing voltage at the pump connector, inspecting the fuel pump fuse and relay, and even scanning for trouble codes with an OBD-II scanner.
Do not attempt to spray starting fluid into the intake to bypass a fuel pump problem, this can damage your engine and mask electrical faults that need professional diagnosis.
Replacing a fuel pump yourself can save money but expect the part cost to range from $100 to $400, depending on your vehicle, with labor costing another $200 to $500 if done by a shop. Experts often suggest towing your car to a mechanic rather than driving it when fuel pump failure causes no-start or stalling. This avoids further damage or safety risks on the road.
Step-by-Step Action Plan to Fix Your Fuel Pump
Follow these steps to diagnose and repair your fuel pump safely and effectively. Each phase ensures you’re making progress and can confirm the issue is resolved.
- Before you start: Gather all necessary tools and replacement parts listed earlier. Check your vehicle’s manual to confirm fuel pump location. This preparation ensures smooth access and reduces mistakes.
- Day 1: Perform a fuel pressure test using a gauge. Pressure reading below manufacturer specs confirms a pump issue.
- Day 2: Disconnect the battery and relieve fuel system pressure to reduce fire risk. Proceed only when all safety precautions are in place.
- Day 3: Access the fuel pump by removing the fuel tank or accessing the service panel. Verify no fuel leaks before continuing.
- Day 4: Disconnect wiring and fuel lines from the faulty pump, then remove the pump assembly. Inspect the old pump for obvious damage or wear.
- Day 5: Install the new or repaired pump, reattach all connections, and secure the fuel tank or panel. Double-check tightness and seals to prevent leaks.
- Day 6: Reconnect the battery and turn the ignition on without starting to prime the fuel system. Listen for pump operation and monitor for leaks.
- Day 7: Start the engine and verify steady fuel pressure and normal engine performance. The repair succeeded when the engine runs smoothly and no leaks appear.
Frequently Asked Questions
How Do You Test Fuel Pump Pressure at Home?
Use a fuel pressure gauge on the fuel rail; your reading should match the car manual’s specified psi range. A pressure outside this means the pump or filter may need attention.
Can a Clogged Fuel Filter Cause Fuel Pump Failure?
Yes, a clogged fuel filter can force the pump to work harder and potentially fail earlier. Replace filters regularly to avoid this extra strain on the pump.
What Fuel Pump Noises Indicate a Problem?
A whining or buzzing sound from the fuel tank area typically signals a failing fuel pump. These noises mean the pump is struggling or near failure.
Can a Bad Fuel Pump Cause Engine Stalling?
Yes, erratic fuel delivery from a faulty pump can cause the engine to stall, especially under load or acceleration. Consistent stalling often points to pump issues.
Does Fuel Quality Affect Fuel Pump Life?
Poor-quality fuel with contaminants can clog and wear out the fuel pump faster. Use clean, recommended fuel to extend pump lifespan.
Is It Safe to Drive with a Failing Fuel Pump?
No, driving with a failing pump risks stalling or a fire hazard. If you suspect pump trouble, limit driving and seek repairs promptly.
Wrapping Up
Fixing a fuel pump yourself can save money but takes careful attention to safety and detail. Focus on confirming the pump is the problem before replacing parts. Your next step should be picking one phase from the plan and starting with the safety checks to avoid hazards during your repair.