How to Stop Your Tonneau Cover from Leaking: 8 Proven Fixes That Work
How to stop your tonneau cover from leaking starts with identifying and fixing common leak points like seals, clamps, and rails. Most leaks can be fixed for under $150 using proper weather sealants and adjusting or replacing damaged parts. Testing your cover carefully helps pinpoint where water enters, so you can apply the right solutions effectively.
Key Takeaways
- Inspect seals and replace worn or cracked ones to prevent water infiltration around rail edges.
- Check clamp tightness with a torque wrench, aiming for 10, 12 ft-lbs to ensure a secure fit without damage.
- Use mild automotive soap or a dedicated cover cleaner, like 303 Tonneau Cover Cleaner, to gently maintain your cover’s surface.
- Perform a water test by spraying your cover with a hose to locate exact leak areas before repairing.
- Apply weather sealants or foam insulation to gaps once leak zones are identified, avoiding overuse to prevent mess.
- Consider the impact of your truck’s bed length, bedliner, and tailgate fit on potential leak points, especially on Ford F-150s.
How to Effectively Stop Leaks in Your Tonneau Cover
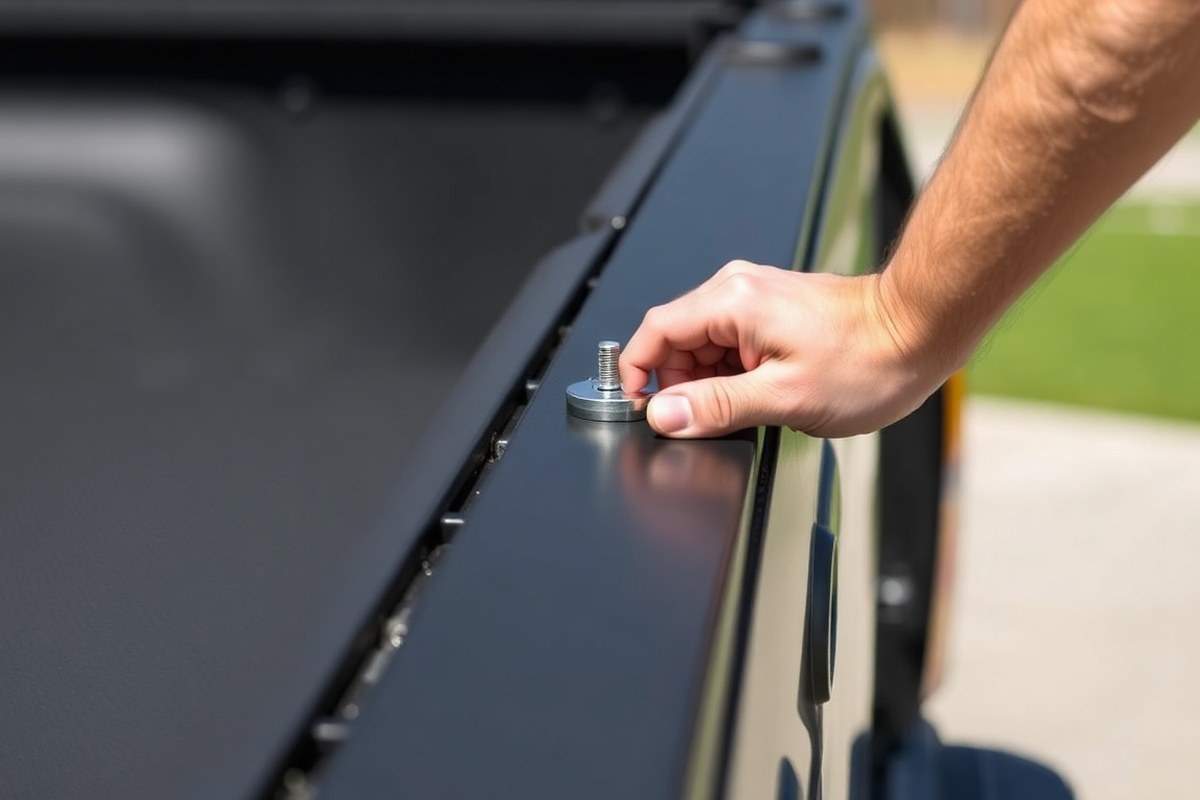
Stopping leaks in your tonneau cover relies on restoring proper seal compression, ensuring rail alignment, and clearing any drainage paths. Leaks commonly show up where seals don’t press evenly against the bed or where rails and clamps have shifted. Both soft and hard covers benefit from adjusting clamps and replacing seals to maintain pressure and block water entry effectively.
Soft tri-fold covers often leak at fold seams due to aged or uneven hinge seals, while hard covers may leak if panels don’t sit flush or seals along the edges are damaged. Clamp adjustments help by evenly compressing the cover’s seals and keeping rails stable. Replacing old or worn seals is important because compressed or torn seal material can no longer stop water effectively. Correctly routing and clearing drain tubes also prevents water from pooling and leaking into the bed.
- Locate the primary leak points. Use water tests or visual inspection to find the seams, rails, clamps, or tailgate areas where water enters. This step prevents treating the wrong parts and wasting effort.
- Adjust and realign the rails. Check that rails run parallel along the truck bed rails without gaps or uneven spacing. Rail misalignment can cause poor seal contact. Loosen clamps to reposition rails if needed, then retighten evenly.
- Reset clamp pressure. Loosen and then retighten clamps with even tension. Over-tightening can deform rails or seals; under-tightening leads to loose seals. Aim for firm but even clamp bite around the cover edges to compress seals uniformly.
- Inspect and replace seals as needed. Look for worn, cracked, or flattened seals on rails, fold seams, and tailgate edges. Replace seals with manufacturer-approved parts to restore waterproof compression. You may need to remove and reinstall cover panels to access seals.
- Clear and properly route drain tubes. Remove debris or blockages inside drain tubes under the rails. Re-seat or adjust tubes to direct water out of the bed. Clogged or misrouted drains can cause leaks even when seals are intact.
- Check tailgate alignment and seal contact. A gap or weak seal between the tonneu cover and tailgate is a frequent leak source. Adjust tailgate latch or hinges to close gaps and replace rear seals if they appear compressed or damaged.
- Test thoroughly after adjustments. Spray water over the cover while observing inside the bed to confirm no leaks remain. Repeat minor adjustments as necessary to achieve consistent seal pressure and rail stability.
These steps typically take between 1 to 3 hours and may require basic tools like a screwdriver, clamp tool, seal installation kit, or sealant if recommended by your cover brand. Soft covers usually need seal replacements every 2-5 years depending on wear. Hard covers may need occasional seal and hinge checks if panels begin to lift or shift. Consistent clamp pressure and rail alignment are the easiest ways to avoid leaks for any cover type. Skipping clamp resetting often lets leaks persist, even when seals look fine.
Identifying Common Leak Zones on Tonneau Covers

Leaks in a tonneau cover commonly occur at the front bulkhead, side rails, tailgate edges, and fold seams. These zones are vulnerable due to seal wear, improper clamp tension, misaligned rails, and gaps caused by vibrations or damage. Inspecting these areas carefully helps pinpoint where water is entering your truck bed.
Front Bulkhead Leaks Explained
The front bulkhead is where the tonneau cover meets the cab of the truck. This joint must create a tight seal to block rain and road spray. If the seal here is compressed unevenly or the cover is installed too high or low, water can enter between the cover and bulkhead.
Inspect this area by wiping it dry, then applying a soapy water solution along the seam. Look for bubbles indicating air or water passage. Pay attention to any gaps or damage to the rubber seal or foam strip. A misaligned front edge or worn seal can let water seep into the bed from the cab side.
Side Rails and Clamp Pressure Effects
The rails running along your truck bed’s sides guide and support the tonneau cover. The clamps hold the cover snug against these rails. Loose clamps or rails set too far apart create tiny openings where water can enter. Vibrations from driving often loosen clamps over time, increasing leak risk.
Check clamp tension by pressing firmly along the rails; the cover should feel tightly secured without sagging. Inspect rails for bending or uneven spacing, which can lift seals away from the bed. Clean away debris and tighten clamps where needed to maintain consistent seal compression.
- Clean the rails and clamps of dirt, rust, or debris
- Test clamp tightness every few months
- Measure rail spacing to confirm it matches your cover’s specifications
- Replace worn or damaged clamps immediately
- Check that side seals sit flat against the rail without gaps
Warning: Loose or misaligned rails can not only cause leaks but also reduce the cover’s lifespan by allowing excessive movement during driving.
Tailgate and Hinge Related Leaks
Leakage near the tailgate is often caused by gaps where the cover meets the tailgate or from degraded hinge seals. Tailgate gaps can allow rain or car wash water to enter the bed, especially if the tailgate isn’t aligned perfectly with the bed rails and cover. Damaged hinges can cause the cover to sit unevenly, opening up entry points.
Inspect the tailgate edge by checking the seal compression and alignment. With the cover closed, gently press the tailgate seal to verify it forms a continuous barrier. Also, examine the hinges for corrosion or broken seals, and ensure drain tubes are clear to effectively channel water away from the bed edges.
Seams and Stitching Vulnerabilities
Fold seams and stitching are often weak points for tonneau covers, especially those with multiple panels. These areas depend on seals or gaskets that must remain intact and properly aligned. Over time, stitching can wear, and seals can degrade, creating pathways for water infiltration.
Look for signs of water intrusion along seams by drying the cover’s underside first, then applying the soapy water test to seams and fold joints. Air bubbles or damp spots indicate leaks. Some folding covers route water sideways into drain channels, so confirm these drains are not clogged or blocked.
| Leak Zone | Common Cause | How to Inspect |
|---|---|---|
| Front bulkhead | Uneven seal compression or height mismatch | Dry area, apply soapy water, watch for bubbles |
| Side rails and clamps | Loose clamps, rail spacing too wide | Press rails, check clamp tightness and seal contact |
| Tailgate edge and hinges | Gaps from misalignment or damaged seals | Check seal compression, ensure tailgate alignment |
| Seams and stitching | Worn seals or stitching allowing water entry | Dry cover underside, test seams with soapy water |
Testing Your Tonneau Cover for Leaks Step-By-Step
Testing your tonneau cover for leaks involves simulating rainfall and carefully checking for water intrusion points. Using a water spray and a soapy water solution helps detect leaks without damaging the cover. Follow a zone-by-zone approach to locate exact leak spots and make targeted repairs.
Preparing Your Truck Bed and Cover for Testing
Begin with a completely dry truck bed and tonneau cover to spot any new moisture clearly. Remove any debris, dirt, or excess water using paper towels or cardboard strips. Have your clamps and seals in their normal positions, tightened as per manufacturer instructions, since loose components can cause leaks.
Gathering an assistant helps. One person sprays water while the other watches inside the truck bed for wet spots. Testing on a calm day avoids wind interference, allowing water to behave naturally during the test.
Applying Spray and Soapy Water Tests
Start by applying a gentle, low-pressure spray of water evenly over the tonneau cover. This simulates light rain and avoids forcing water through minor gaps unnaturally. If leaks are not obvious, switch to the soapy water method. Mix mild automotive soap with water to form bubbles around seams and seals when applied.
The soapy water is easy to prepare: combine about a tablespoon of mild soap with a cup of water in a spray bottle. Spray this solution along the edges, clamps, and seals of the cover. Look for bubbles that form continuously, which indicate air, or water, escaping through small gaps.
Observing and Recording Leak Locations
Open the cover after each spray or soapy water application to inspect the truck bed interior. Check carefully for damp spots, drips, or puddles. Focus on common zones such as near the cab, side rails, tailgate area, and any overlaps or clamps where leaks commonly occur.
Record every wet spot’s location, noting whether water entered near seals, clamps, or drain paths. This detailed record helps isolate problem areas efficiently. Testing sequentially from one end of the cover to the other pinpoints specific zones needing attention, avoiding unnecessary repairs.
Retesting After Minor Adjustments
After noting leaks, tighten any loose clamps and reposition seals as needed. Adding small foam strips or adjusting alignment may stop minor leaks immediately. Then repeat the spray and soapy water tests to confirm improvements.
Test again on a dry bed. Stop once no new wet spots appear inside the truck bed after spraying. This cycle of test, adjust, retest usually resolves 90% of leaks without replacing large parts or covers.
- Clear and dry the truck bed and tonneau cover completely.
- Check clamps and seals for proper fit and tighten if loose.
- Prepare a mild soapy water solution in a spray bottle.
- Spray the tonneau cover with low-pressure water across all zones.
- Spray soapy water on seams, edges, and clamps, watching for bubbles.
- Open the cover and inspect inside the truck bed for wet spots.
- Record leak locations and note the type of intrusion observed.
- Adjust clamps, seals, or add foam strips, then retest using steps 4, 6.
Fixing Seals, Clamps, and Rails to Stop Water Entry
Replacing your tonneau cover seals is necessary when you notice visible cracks, significant wear, or when the seals no longer compress properly against the rail or tailgate. Minor deformities or dirt on the seals can usually be cleaned or temporarily fixed with lubricant, but cracks and hardening mean the seal has lost its flexibility and water can easily bypass it. High-quality replacement seals designed specifically for your tonneau cover model ensure the best fit and leak prevention, with prices usually ranging between $20 and $50 depending on the brand and material.
Clamp tension must be firm enough to compress the seal evenly against the rail and tailgate, but not so tight that it causes rail deformation or gaps elsewhere. Over-tightening can bend the rails or warp the cover panel, creating paths for water entry. Loose clamps lead to inconsistent seal contact, so expect to turn the clamp bolts until you feel steady resistance without forcing them. Uneven pressure from clamps might cause one side to seal well while the other leaks, so balance is critical.
Adjustments to prevent uneven pressure and gaps include realigning the cover rails so that they sit flush along the bed rails and checking for interference from bed liners. Uneven or tilted rails create spaces where water can travel into the truck bed. Check drainage tubes if your cover model has them, but remember, they can’t compensate for poor rail positioning or worn seals. Before installing or replacing seals, clean the rails and tailgate edges thoroughly to remove dirt or grit that might prevent a tight seal.
- Inspect seals for cracks, brittleness, or thinning before each season
- Clean seal and rail surfaces with mild soap and water before tightening clamps
- Tighten clamps evenly on both sides to uniform resistance for balanced pressure
- Realign rails if they appear uneven or if bed liner adds thickness
- Use manufacturer-recommended seal replacements for your tonneau cover model
- Check for proper drainage tube placement and clear blockages
- Test for leaks after seal or clamp adjustments by running water over the cover
Tight, even clamp pressure combined with properly seated and intact seals create the best barrier against water intrusion. Seal replacement typically takes less than an hour and can be done with basic hand tools. Avoid adding extra foam tape or other materials before correcting rail alignment and clamp pressure, since altering one variable without balancing the others might trap water rather than shed it. Signs of a good result include no visible gaps along the seal and no dripping inside the bed after rain or spray testing.
Using Weather Sealants and Foam Insulation for Leak Prevention
Using weather sealants and foam insulation effectively helps close the gaps where water can sneak into your tonneau cover. For sealing cracks or worn spots, a water-based sealant designed for automotive surfaces is best. Brands like TruXedo offer a gentle, water-based rubber sealant free of harmful silicones, safe on vinyl, rubber, and other soft materials common in tonneau covers. Avoid liquid rubber or Flex Seal sprays that might contain harsh solvents damaging to your cover’s flexible parts. Applying these gentle sealants requires clean, dry surfaces and a thin, even layer using a soft brush or cloth. Let it dry fully for 24 hours before exposing to water or folding the cover.
Foam pipe insulation is one of the simplest and most cost-effective upgrades you can add to seal the front edge gaps of your truck bed under the cover. Use ½-inch pre-slit rubber pipe insulation, which costs under $5 for around 6 feet at hardware stores. Cut the foam to length, then snug it into the gap between the truck bed and the tonneau cover’s front edge. This blocks water from flowing in without interfering with cover movement or clamps. For added drainage protection, pairing pipe insulation with a proper drain tube installation can keep water from pooling, usually adding up to just $10 combined.
| Solution | Best Usage | Cost | Considerations |
|---|---|---|---|
| Water-based Sealant (e.g., TruXedo) | Sealing cracks, edges, and soft surfaces | $10, $20 per bottle | Safe on vinyl and rubber; requires full drying |
| ½-inch Rubber Pipe Insulation | Filling front edge gaps under tonneau cover | Under $5 for 6 feet | Easy installation; does not block cover movement |
| Liquid Rubber / Flex Seal | Not recommended; potential damage to flexible covers | Varies; usually $10, $25 | Contains solvents harmful to soft automotive parts |
| Drain Tube Installation | Redirects water from cover drainage channels | Under $5, $10 typically | Effective with pipe insulation; proper fit is essential |
Working carefully when applying sealant involves cleaning the area thoroughly with a mild detergent, rinsing, and letting it dry completely. Use painter’s tape to mask off areas to avoid accidental spread. Apply the sealant in a thin, consistent bead, and smooth it gently with a dampened finger or tool to avoid lumps. Over-application can cause sealant to squeeze out and wear prematurely, while under-application won’t close the gap properly. Avoid using harsh chemical cleaners or bleach before sealing, as they can degrade your cover’s material.
Always test any sealant on a small hidden area of your tonneau cover first to make sure it does not discolor or damage the material.
For foam insulation, avoid compressing the foam too tightly when fitting it into gaps as this reduces its effectiveness and can cause deformation. Check the foam yearly for cracking or compression and replace as needed, especially after cold winters when rubber tends to stiffen and crack. Regular maintenance extends how long these inexpensive weatherproofing materials keep your truck bed dry.
Maintaining and Cleaning Your Cover to Prevent Future Leaks
Cleaning and maintaining your tonneau cover regularly helps prevent leaks and extends its lifespan. You should clean your cover at least once a month, or more often if you drive in dusty or rainy conditions. Use a gentle spray of water to rinse off dirt and debris before applying any cleaners, avoiding harsh chemicals that can wear down waterproof coatings. A mild soap formulated for the cover material works best to preserve water resistance while removing grime. After washing, let the cover dry completely to prevent mold and mildew.
Conditioning the cover with a spray-on, wipe-off product every three months helps maintain the waterproof layer and keeps the material supple. These treatments repel water, dirt, and UV damage, which slows surface wear and cracking. For example, a silicone-based or vinyl protectant designed for automotive use can cost between $10 and $20 but offers added protection without damaging the surface. Conditioning is especially important if you have a vinyl or canvas cover that loses its water resistance over time. Canvas covers may also need re-proofing treatments if water no longer beads on the surface.
Cleaning the drains and rails around your tonneau cover is just as important as cleaning the cover itself. Debris like leaves or small stones can clog these channels, causing water to pool instead of flowing off properly. Every couple of months, check these areas and remove any buildup using a soft brush or compressed air. Keeping drains clear prevents water from seeping under the cover or pooling in spots that stress seals and fabric. Lubricating the hinges and locks with a silicone spray during this process also helps keep the cover secure and leak-resistant.
Follow a simple checklist during maintenance to ensure you cover all critical points: first, rinse the cover gently with water; second, clean with mild soap and wipe dry; third, apply a waterproofing conditioner; fourth, clear debris from rails and drains; and finally, lubricate moving parts. Repairs or seal replacements usually cost about $100 but can add 10 years or more to your cover’s life, so maintaining cleanliness and functionality pays off financially. Good results show as water beading on the surface, smooth operation of fasteners, and no water pooling near edges. Neglect can lead to hardened seals, fabric cracks, or persistent leaks that require costly repairs or replacements.
Troubleshooting Model-Specific and Hard-To-Fix Leak Issues
Leaks in tonneau covers vary widely depending on the type of cover and the truck model. Hard folding and retractable covers often face unique problems like hinge leaks and drainage failures, while truck-specific features such as bedliners and tailgate alignment can worsen water intrusion. Knowing these specific challenges helps you address leaks more effectively and decide when professional help is necessary.
Hard Folding Cover Hinge and Panel Leaks
Hard folding covers rely on multiple hinged panels that fold neatly over the truck bed. These hinges are commonly the biggest leak source, often mistaken for side rail problems. The hinges have seals that can wear down over time or become misaligned due to frequent folding and unfolding. Fixing these leaks means carefully inspecting the hinges for cracks or gaps and replacing worn rubber seals with OEM or high-quality aftermarket parts.
Panel alignment matters because the folded sections need a straight path without binding on the rails. Check that the folds close flush and the rails remain even. Tighten any loose bolts and ensure that bolts securing the hinges maintain the correct torque to prevent panel shifting. Leaks from hinges worsen when water pools along the joins and eventually seeps through. Using marine-grade sealants sparingly on hinge seams can help, but avoid over-application that could jam the folding action. These repairs typically cost under $50 for seal replacements, excluding professional labour if you cannot access mounting points easily.
Retractable Cover Drain Tube Problems
Retractable covers often feature drain tubes installed along the rails or in the canister to channel rainwater away from the bed. These tubes can become clogged with dirt, debris, or leaves, blocking drainage and leading to water leaking inside the bed. Routinely inspecting and cleaning drain tubes is essential. You can flush them with warm water or compressed air every few months, especially during wetter seasons.
Improper routing or damage to the drain tubes may require repositioning or replacement. Check for kinks or sagging that cause water to pool rather than flow out. Drain tube issues may also develop after off-road use or truck modifications that change ground clearance or bed angle. Your cover started leaking after installing a bedliner or changing suspension height; check for drain tube obstruction early in your troubleshooting process. Simple daily maintenance keeps these tubes functional, preventing costly water damage from prolonged leaks.
Effects of Tailgate Design and Bedliners
Tailgate shape and alignment significantly impact tonneau cover fitment and sealing performance. Some trucks, like the Ram 1500, have tailgates with specific curvatures or guard styles that challenge tight sealing. The tailgate sits unevenly or doesn’t close fully flush against the bed, which can let water seep through the gaps between the cover and tailgate. Checking the tailgate latch and hinge condition, then adjusting or lubricating them for even closure, reduces this risk.
Bedliners, especially spray-in or thick drop-in types, can interfere with the cover’s sealing surfaces or cause rail height variations. This interference can raise the rails so much that clamps no longer engage the frame properly, loosening the cover fit. In these cases, adjusting clamp positions or swapping out shorter clamps designed for thicker liners solves the problem. Some liners also block drain tube exits, so visually confirm that any drainage paths remain clear after bedliner installation to avoid trap water inside.
Model-Specific Clamp and Rail Adjustments
Each truck model comes with slightly different bed rail shapes, thicknesses, and mounting systems for tonneau covers, affecting clamp bite and rail alignment. Ram 1500 owners, for example, need to inspect bed rail shapes closely because a wider or irregular rail profile demands precise clamp adjustment. Assess clamp pressure and bite after installation by loosening clamps, reseating rails, and re-tightening clamps in small increments until the cover is snug but not warped.
Clamps that shift over time because of vibration or temperature changes lead to leaks by loosening the cover fit. Regularly verify clamp tightness, especially if you notice leaks developing after initial installation. Rails may also move if hardware loosens or the bedliner thickens unexpectedly. Use a torque wrench to ensure clamps hold factory-recommended inch-pounds (check your cover manual), which usually range from 50 to 80 inch-pounds for aluminum rails. Over-tightening distorts rails and causes new leaks. When adjustments fail to fix persistent leaks, especially on complex models, consider professional installation or repair services with model-specific expertise and the right tools.
Deciding Between Repairing or Replacing Your Tonneau Cover
Deciding whether to repair or replace your tonneau cover is mainly about assessing the condition of the fabric and seals, fitting accuracy, and comparing costs. Focus first on the fabric’s flexibility and seal effectiveness. If the fabric shows early signs of wear like a slightly open seam or minor cracking, repairs are affordable and usually effective. Small patches and re-sealing can often fix these issues for under $150, sparing you from spending $800 or more on a full replacement.
Check how well the cover still fits your truck bed. A cover that fits poorly, with wrinkled or sagging panels, usually won’t form a good seal even after repairs. Extensive brittleness, widespread cracking, or sun damage across most surfaces signals a need for replacement. Replacing a cover makes more sense if its core materials have degraded or if it never matched your truck bed properly to begin with.
Partial repairs are generally a good option when leaks are limited to seams or fasteners because these are typical weak spots. They can be a durable fix if done well and with high-quality materials. However, if leaks come from widespread fabric failure, partial repairs only delay the inevitable. Regular inspection and maintenance can prolong cover life but can’t restore a deeply aged or damaged cover. Use this decision table to guide your choice based on the cover condition, fit, and cost factors:
| Condition or Factor | Repair | Replacement |
|---|---|---|
| Seam just starting to open | Easy and cost-effective repair, under $150 parts | Not necessary |
| Fabric cracked or brittle over most of the cover | Temporary fix only | Recommended, cost $800+ |
| Cover fits truck bed well, panels and vinyl in good shape | Repair seams, seals, hardware easily | Not needed |
| Cover does not fit properly (sags, misaligned) | Repairs may be ineffective | Replacement advised |
| Leaks at fasteners or rails | Repair by tightening or replacing clamps and seals | Not usually required |
When inspecting your cover, pay close attention to its vinyl or poly-fabric faces. Look for stiffness or discoloration indicating sun damage. Test flexibility by bending sections gently, loss of elastic resilience means faster wear and poor waterproofing. Check plastic or metal fixings for rust, distortion, or loss of grip. Each piece affects overall sealing.
Frequent, simple checks for seam gaps and seal integrity every few months can catch leaks before they worsen, saving you repair costs down the road.
Repairs that fix developing seam leaks and replace worn-out seals can keep your cover watertight for years if the fabric remains supple and intact. Extensive fabric damage or bad fit wastes repair money, speeding your need for a new cover. Consult a professional experienced with canvas, PVC, or poly-fabric truck covers for an accurate condition assessment. They’ll match repairs or replacements to your cover’s wear stage and your truck’s dimensions.
Step-by-Step Action Plan to Stop Your Tonneau Cover Leaking
Follow these steps in order to quickly identify and fix leaks on your tonneau cover, ensuring your truck bed stays dry.
- Before you start: Clear out the truck bed and remove any debris from the cover. This helps you see leaks and prevents dirt from interfering with repairs.
- Day 1: Perform a water test by slowly running a hose over the closed cover. Look underneath for dripping or wet spots to locate leak zones.
- Day 2: Inspect seals, clamps, and rails for damage or misalignment. Check for cracks or gaps and tighten clamps as needed. Confirm you stopped leaks by re-testing with water after adjustments.
- Day 3: Apply weather sealant or replace foam insulation around problem areas. Allow time for curing if required, then retest with water to ensure leaks are sealed.
- Day 4: Clean and maintain the tonneau cover using manufacturer-approved cleaners. Keeping seals and surfaces clean prevents future leaks from dirt buildup.
- After 1 week: Monitor for any recurring damp spots inside the bed after rain. Address any stubborn leaks with model-specific troubleshooting or consider professional repair.
- After 2 weeks: If leaks persist despite all fixes, assess if a cover replacement is more cost-effective or practical than continuous repairs.
Frequently Asked Questions
How to Stop Your Tonneau Cover from Leaking?
Locate the leak carefully, adjust rails and clamps for even seal compression, and replace damaged seals to stop leaks effectively. Regularly check and secure your cover edges to prevent water entry caused by loosened parts.
How to Make a Tonneau Cover Watertight?
Achieving total watertightness is difficult; focus on proper seal compression, correct rail alignment, and clearing drain tubes to manage water effectively. Maintenance helps prevent water pooling and leaks during use.
Can You Use Flex Seal on a Tonneau Cover?
Using Flex Seal on a tonneau cover is generally not recommended as it can affect flexibility and may not bond well with all cover materials. Stick to sealants designed for automotive fabrics or rubber seals.
What Sealant to Use on a Tonneau Cover?
Use automotive-grade silicone or rubberized sealants suitable for flexible surfaces to maintain durability and water resistance. Avoid harsh chemicals that can damage the cover material or seals.
Do Most Tonneau Covers Leak?
Most tonneau covers are not 100% waterproof by design and may leak if seals wear or rails misalign. Good water management through proper installation and upkeep prevents significant leaks.
How Often Should I Replace the Seals on My Tonneau Cover?
Replace seals when you notice cracks, tears, or compression loss, usually every 2 to 5 years to maintain proper water resistance and cover performance.
Final Thoughts
Your tonneau cover leaks can be stopped by systematically testing, sealing, and maintaining your cover. Staying proactive with inspections and repairs will save you time and damage to your truck bed. Start by doing a water test today to identify where leaks are coming from and take the first step toward a fully sealed cover.