How Tight Should an Oil Filter Be: A Complete Guide for Safe Installation
How tight should an oil filter be? Tighten the oil filter by hand until the gasket contacts the mounting surface, then turn it an additional 1/4 to 3/4 of a turn. This creates an effective seal without causing damage or difficulty when removing the filter later. Always rub the gasket with fresh oil before installing to reduce friction and ensure a proper fit.
Key Takeaways
- Start by spinning the oil filter on until the gasket touches the filter housing surface.
- After contact, tighten the oil filter an additional 1/4 to 3/4 turn by hand for a secure seal.
- Apply fresh oil to the rubber gasket before installation to prevent it from sticking.
- Avoid over-tightening, as it compresses the gasket too much and can cause removal problems.
- If the filter feels tight after the recommended turns, stop tightening to prevent damage.
- Use an oil filter wrench only if the filter is stuck and cannot be turned by hand.
How Tight Should You Tighten an Oil Filter?

Tighten your oil filter by hand until the rubber gasket makes full contact with the engine’s filter housing, then turn it an additional 3/4 of a turn. This method ensures the gasket compresses just enough to create a reliable seal without damaging the rubber or making the filter too hard to remove later. Using only your hand avoids the risk of over-tightening, which can crush the filter’s thin metal walls or overly deform the gasket.
The rubber gasket on the oil filter is designed to seal the filter against the engine block. When you first thread the filter on, the gasket slides over the housing until it contacts the flat sealing surface. Hand tightening until this point feels like the point where resistance increases noticeably. After that, turning the filter another 3/4 of a turn applies sufficient compression to the gasket, creating a leak-proof seal. Compressing the gasket any less risks oil leaks, while tightening too much can cause gasket deformation or make the filter extremely difficult to remove at your next oil change.
Applying a thin film of clean engine oil to the gasket before installation helps it slide into place easily, preventing damage during tightening. You should avoid tools for tightening, as oil filter wrenches can easily over-tighten. The gentle hand-tightened plus 3/4 turn is usually enough for nearly every standard spin-on oil filter and engine type.
In some cases, manufacturers or mechanics will recommend going a bit lighter, such as just 1/4 turn past gasket contact. This can be appropriate on older or more delicate engines where the housing threads are fragile or when using a high-quality filter with a firmer gasket. However, the typical rule for most vehicles remains hand tight plus roughly 3/4 turn. Applying too little turns means risking leaks and poor sealing, while too many turns increase chances of filter damage and removal difficulty.
Hand tightening alone, stopping when gasket contact occurs, is usually not enough for a secure seal. The extra fraction of a turn compresses the gasket and locks the filter in place under normal engine vibrations and oil pressure. This precise tightness balances ease of replacement with sealing effectiveness, protecting your engine from leaks and contamination without causing damage or excessive effort at removal.
Why Over-Tightening an Oil Filter Causes Problems
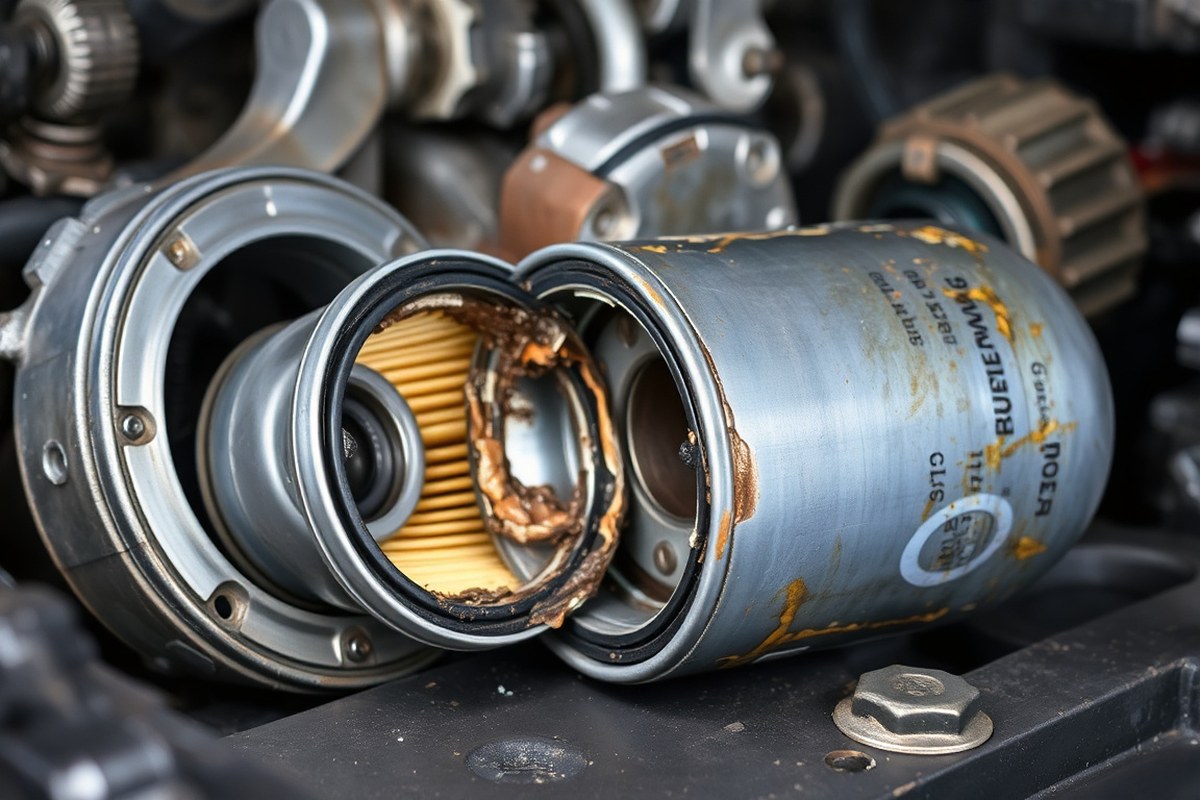
Over-tightening an oil filter can cause several problems that affect both the filter and your engine’s performance. It can damage the filter’s gasket, crush the filter body, lead to oil leaks, and make removal much harder when the time comes. These risks mean it’s important to apply the right amount of force during installation.
Damage to the Gasket Seal
The gasket on the oil filter seals the connection to the engine block. Tightening the filter too much can overly compress or deform the rubber gasket, preventing it from forming a proper seal. This damage lets oil leak out, potentially reducing oil pressure and leaving engine parts under-lubricated. A compromised gasket might also wear quickly due to heat cycles from the engine, promoting leaks over time. Proper gasket seating requires a firm but careful hand to avoid flattening or over-stretching it.
Crushing or Deforming the Filter Body
Oil filters have a metal casing designed to withstand pressure, but overtightening can crush or deform this thin shell. Applying excessive torque risks warping the filter’s walls or internal components, which can disrupt oil flow. A crushed filter may not fit correctly or fail prematurely, allowing unfiltered oil to pass through. The filter is exposed to constant heat, which weakens its material slightly. This means over-tightening even a brand-new filter can lead to cracks or collapses inside the filter assembly.
Leaks from Excessive Tightening
While a loose oil filter leaks because the gasket doesn’t seal, a filter tightened too much can also leak. Overly compressed gaskets can tear, and crushed filter attachments might not hold oil properly. Leaks risk dropping oil levels quickly during operation, leading to friction damage in engine components. Heat expansion and contraction make leaky gaskets worse over time, requiring maintenance or emergency fixes sooner than expected. Leaking oil on hot engine parts also raises fire risk and environmental concerns.
Difficulty Removing a Stuck Oil Filter
Over-tightening increases friction and causes the oil filter to bind tightly against the engine’s mounting surface. This often results in the filter becoming stuck when it needs removal. Filters with damaged or dried-out gaskets add to the problem by creating an almost welded seal. You may need special tools like an oil filter wrench or pliers to get them off, and sometimes repeated heat cycles make the filter almost impossible to remove without damaging surrounding parts. Difficulty removing a stuck filter costs extra time and can damage the engine or its components.
Apply only hand-tightening plus a slight turn, usually about 3/4 of a turn, to avoid damaging the gasket and ensure easy removal later.
How to Properly Prepare an Oil Filter Before Installing
Preparing the oil filter correctly before installation ensures a secure seal and prevents leaks. Lubricating the gasket with clean engine oil reduces friction and helps the filter seat properly. Checking for defects and cleaning the mounting surface prevents oil flow issues and damage.
Check the Rubber Gasket for Damage
Before installing the oil filter, examine the rubber gasket carefully. The gasket forms the seal between the filter and engine, so any cracks, tears, or distortions will lead to leaks. Ensure the gasket is clean, flexible, and free of debris.
If the gasket is damaged, replace the filter before proceeding. A compromised seal can cause oil loss, engine damage, or contamination. Take a few moments to feel the gasket surface for firmness or brittleness, which can indicate aging or drying out from storage or exposure.
Apply Clean Engine Oil to the Gasket
Lubricating the rubber gasket before installation is essential to reduce friction and help the filter seat evenly. A thin film of clean engine oil prevents the gasket from sticking firmly to the engine block when it heats up, avoiding damage when removing the filter during the next oil change. Follow these step-by-step instructions to lubricate the gasket properly:
- Open a fresh bottle of clean engine oil suitable for your vehicle.
- Pour a small amount of oil onto your finger or a clean rag.
- Lightly coat the entire gasket surface with the oil, ensuring no dry spots remain.
- Wipe off any excess oil to avoid over-lubrication, which can cause the filter to slip during tightening.
This process usually takes less than a minute and requires only a few drops of oil. Lubrication costs are minimal since you use the same oil type as your engine’s current oil.
Inspect the Oil Filter Base for Debris
The flat mounting surface or base where the filter screws onto the engine block needs a clean contact point for the gasket. Wiping this area with a clean rag removes old gasket fragments, dirt, or oil sludge that can prevent a proper seal.
Heated and pressurized oil flow can push debris into the filter base if it’s not cleaned, clogging oil passages. This restriction reduces oil circulation, which is critical to lubricating engine components. Avoid these issues by paying close attention to the filter base.
After wiping the surface, visually check for any damage such as nicks, dents, or corrosion on the metal. Replace the filter or consult a professional if you find significant damage, as it may affect the filter’s ability to seal correctly.
Common Mistakes When Tightening Oil Filters and How to Fix Them
One of the most common mistakes when tightening oil filters is cross-threading. This happens when the filter isn’t aligned correctly on the mounting threads and gets forced on at an angle. Cross-threading can strip the threads on the engine or the filter, causing leaks or making removal difficult later. To avoid this, start by hand-tightening the filter counterclockwise just until you feel the gasket touch the sealing surface. Then turn the filter clockwise slowly, feeling for resistance. It should screw on smoothly without catching.
Under-tightening is another frequent issue. A filter that is too loose can cause oil leaks, putting the engine at risk of damage. When the filter feels loose after installation, use an oil filter wrench to tighten it slowly, typically about 3/4 to 1 full turn after the gasket touches the engine. Be careful: less than half a turn usually isn’t enough. Over-tightening creates different problems like a damaged gasket or a cracked filter canister, making leaks worse or damaging the mounting threads.
Skipping gasket lubrication is a mistake that can cause leaks or make future removal very difficult. Before installation, spread a thin, even layer of fresh engine oil on the rubber gasket of the new filter. This helps the seal seat properly and prevents the gasket from sticking or tearing when you remove the filter in the future. Avoid using grease or other lubricants unless the manufacturer specifically allows it. Oil leaking from the filter after installation could be due to several issues; check these possible causes and solutions:
- Cross-threading: Remove the filter and inspect both the filter and engine threads for damage.
- Insufficient tightening: Tighten the filter gently by hand another 3/4 to 1 turn.
- Damaged gasket: Replace the filter and make sure the old gasket is not stuck on the engine surface.
- Improper gasket lubrication: Apply a thin layer of fresh oil to the new filter gasket before reinstalling.
- Using a low-quality or incorrect filter: Switch to a reputable brand matching your vehicle’s specs.
- Dirty or damaged sealing surface: Clean the surface thoroughly with a lint-free cloth before applying a new filter.
Detecting cross-threading early saves time and money. When the filter doesn’t spin on smoothly by hand within the first two or three turns, stop and realign. Forcing it risks costly repairs. Using good quality filters also reduces the risk of thread damage and ensures compatibility. Careful handling during installation is the best way to avoid leaks and headaches later.
How to Remove a Stuck Oil Filter Without Causing Damage
Removing a stuck oil filter requires careful effort to avoid damaging your engine or the filter housing. Start with applying penetrating oil to loosen corrosion or hardened residue. When that does not work, try using a strap or pliers wrench for better grip. As a last option, tapping the base of the filter with a hammer and chisel can break it free but requires extra caution.
Use Penetrating Oil and Wait
Penetrating oil helps dissolve rust, dirt, and old sealant that cause the oil filter to stick. This step is essential for filters stuck due to corrosion or heat-induced hardening. Use a spray oil made for loosening metal parts and allow it time to work before applying force.
- Spray the base of the oil filter where it threads into the engine block.
- Let the penetrating oil soak for at least 15 to 30 minutes to penetrate rust and debris.
- Repeat spraying if the filter remains tight after the initial wait.
- Wipe away excess oil before trying to remove the filter.
Use protective gloves to avoid skin contact with penetrating oil and prevent slipping during removal.
Try a Strap or Pliers Wrench
A strap wrench wraps around the oil filter and tightens as you twist, providing even pressure without crushing. Pliers can also work but may dent the filter if too much force is applied. Both tools offer more use than hand twisting alone.
- Choose a strap wrench or adjustable pliers with long handles for maximum use.
- Position the tool snugly around the oil filter’s body, near its base.
- Apply a steady, firm grip and turn counterclockwise to loosen.
- Maintain even pressure to avoid crushing or deforming the filter.
- Should the filter not budge, pause and apply more penetrating oil before trying again.
A damaged filter can be difficult to remove and may leave parts trapped inside, so apply controlled force and avoid forcing a stuck filter.
Last Resort: Tapping or Hammer and Chisel Method
When other methods fail, you can tap the metal base of the oil filter with a hammer and chisel to break the seal. This technique loosens filters stuck due to over-tightening or hardened sealant but risks damage if done incorrectly. Use tools carefully to avoid harming the engine block’s threads.
- Place a chisel or punch at the threaded base of the oil filter, near the engine block.
- Gently tap the chisel with a hammer to create slight movement, being careful not to dent the engine.
- After several taps, try turning the filter counterclockwise to see if it loosens.
- Repeat tapping and turning until the filter breaks free.
- Wear eye protection to prevent injury from metal shards or debris during tapping.
Use light, controlled hammer taps and avoid striking the filter’s body to minimize the risk of damage.
Differences in Oil Filter Tightness by Vehicle and Filter Type
Tightening an oil filter varies by vehicle brand and filter type, making it important to follow specific instructions for the best results. Different manufacturers provide unique torque or hand-tightening guidelines because engine designs and filter housings differ. For example, Toyota often recommends tightening the oil filter by hand, then turning it an additional three-quarters of a turn. Other brands may specify turning the filter by one full turn past gasket contact or applying a certain torque value, like 15 to 18 ft-lbs, especially on European cars such as BMW or Mercedes-Benz. Checking your owner’s manual or the instructions provided with the filter ensures you follow the recommended procedure for your vehicle.
The type of oil filter also affects how tight it should be. Synthetic oil filters sometimes have gaskets made from more pliable materials to seal better under high engine temperatures. These gaskets can compress more easily, meaning that over-tightening may crush the seal and cause leaks. Conventional oil filters use gaskets that are often firmer, so they might tolerate slightly more torque. To get the best seal, it’s important to lubricate the new gasket with fresh oil before installation. This step helps the gasket seat properly, reducing the installation force needed for a leak-free fit.
Applying the correct tightening force prevents common issues. Under-tightening can allow oil to leak, risking engine damage and messy cleanups, while over-tightening can damage the filter’s threads or crush the gasket. For hand tightening, a good approach is to first screw on the filter until the gasket contacts the mounting surface, then tighten it an additional three-quarters to one full turn. Before installing, confirm the recommended torque for your specific vehicle and filter combination when using a torque wrench or a filter wrench. Following these instructions usually costs no more than the price of the correct filter and requires only a basic toolset, a wrench or torque wrench, some clean oil, and your hands.
Brands like Honda often provide detailed instructions both in the owner’s manual and on the filter packaging, advising hand tight plus a specific fraction of a turn, while others like Ford might include torque values. These differences exist because of variations in filter design and engine mounting surfaces. Synthetic filters made for high-performance or heavy-duty use may also come with precise torque figures to prevent damage under extreme conditions. Switching filter types or brands during oil changes means you should adjust your tightening method to maintain a proper seal. Careful attention to these nuances ensures your oil filter performs correctly, securing your engine’s lubrication system without leaks or damage.
Checklist for Proper Oil Filter Installation
Start by preparing the oil filter gasket with a light coating of clean engine oil. Use your finger to spread a thin layer evenly around the rubber ring on the new filter. This helps the filter seal properly and prevents the gasket from sticking or tearing during installation. Avoid using old or dirty oil for this step.
Next, screw the oil filter onto the engine by hand. Turn the filter clockwise until the gasket just touches the mounting surface. Ensure the filter threads engage smoothly without forcing it, which helps avoid cross-threading. Cross-threading can damage the engine’s filter mount and cause leaks.
Once the gasket contacts the mounting surface, tighten the filter using a firm hand grip. Turn the filter an additional 3/4 to 1 full turn beyond this point. This method applies enough pressure for a secure seal without over-tightening. Over-tightening risks crushing the gasket or making future removal difficult.
- Apply clean engine oil evenly to the filter gasket before installation
- Screw the filter on by hand, stopping when the gasket contacts the mounting surface
- Ensure smooth threading to avoid cross-threading or damage
- Hand-tighten the filter 3/4 to 1 full additional turn past gasket contact
- Use an oil filter wrench only if extra use is required, and avoid excessive force
- Start the engine and check for leaks after installation
- Recheck and tighten slightly if a leak appears, but never force extra turns
Use an appropriately sized oil filter wrench if hand-tightening proves difficult. Choose a wrench that matches the filter’s diameter and provides a good grip, minimizing the risk of slipping or damaging the filter. Avoid using pliers or adjustable wrenches that can deform the filter housing.
After the filter is in place, start the engine and let it run for a few minutes. Carefully inspect the filter area for any signs of oil leakage. A properly installed filter will show no drips or wetness around the gasket. If you notice leaks, shut off the engine and check for cross-threading or loose fit. Sometimes a slight tightening with the wrench, no more than 1/4 turn, can fix minor leaks.
Allow the engine to cool before performing any tightening steps to avoid burns and ensure the filter components aren’t stressed by heat. Use gloves if possible to improve grip and protect your hands from oil and heat. The oil filter replacement process typically takes 20 to 30 minutes, depending on your experience and vehicle access.
When to Call a Professional Mechanic for Oil Filter Issues
Call a professional mechanic when your oil filter won’t loosen after several attempts using the correct tools and techniques. Persistent resistance often indicates it is stuck due to corrosion, over-tightening, or damage to the sealing surface. Forcing the filter can damage the filter housing or engine threads, leading to costly repairs. A mechanic has specialized tools, like an oil filter extractor or a strap wrench designed for tough cases, which reduce the risk of damage.
If you notice oil leaking even after replacing the filter or after careful tightening, it could mean the filter is cross-threaded, the gasket is damaged, or the filter housing is cracked. These problems require professional diagnosis to avoid engine damage, as improper seals can cause oil pressure loss or contamination. A reputable shop can inspect threads and housing condition, repair or replace components, and ensure the new filter sits correctly.
Safety matters significantly in oil filter issues. Engine oil temperatures can stay high even after the engine cools down, risking burns during filter removal or installation. Also, handling oil spills improperly can create slip hazards or environmental contamination. A mechanic follows safety protocols and disposes of used oil and filters per regulations, which might be stricter depending on your state. Trying risky removal methods without experience can lead to injury or worsen the damage, increasing repair costs well beyond the filter price.
Professional service on oil filter problems typically costs between $50 and $150, depending on labor rates and whether additional repairs are needed. This price covers proper inspection, safe removal, replacing damaged parts if necessary, and installing a new filter correctly. Investing upfront in professional help often prevents engine damage that could cost thousands in repairs later. Remember, oil filters are important for engine lubrication and cleanliness; improper handling can reduce engine life or performance dramatically.
Use an oil filter wrench sized specifically for your filter to avoid slipping and damaging the filter or housing during removal.
Step-by-Step Action Plan for Proper Oil Filter Tightening
Follow these steps to install your oil filter correctly and avoid common issues like leaks or stuck filters.
- Before you start: Check your vehicle’s manual for specific oil filter torque recommendations. This ensures you know how tight to turn the filter.
- During installation: Apply a thin layer of clean engine oil to the rubber gasket on the new filter. This prevents leaks and helps the seal.
- Right after seating the filter: Screw the oil filter onto the engine by hand until the gasket contacts the mounting surface. It should feel snug but not forced.
- Once tightened by hand: Rotate the filter an additional 3/4 to 1 full turn by hand, unless your manual specifies otherwise. This amount of tightness helps prevent leaks without causing damage.
- After installation: Start the engine and check around the oil filter for leaks. No oil spots or drips mean you tightened it properly.
- After 100 miles (160 km) of driving: Stop and inspect the oil filter again for leaks or looseness. Hand-tightened filters can loosen slightly as they settle.
- If the filter feels loose or leaks: Turn off the engine and tighten the filter by hand in small increments, never use a wrench to overtighten.
Frequently Asked Questions
What Happens If I Tighten My Oil Filter Too Much?
Over-tightening an oil filter can compress the gasket excessively, causing leaks and making the filter difficult to remove during your next oil change. It may also damage the filter’s casing or the engine’s mounting threads, leading to costly repairs.
What Happens If the Oil Filter Is Not Tight Enough?
A loosely installed oil filter might leak oil, causing engine damage from low oil pressure. It can also come off while driving, risking severe engine harm. Always ensure the filter is snug but not forced.
How Tight Should You Tighten a New Oil Filter?
Tighten a new oil filter by hand until the gasket contacts the mounting surface, then turn it an additional 1/4 turn. This hand-tight method ensures a proper seal without risking damage from overtightening.
Can You Overtighten an Oil Filter by Hand?
It’s rare to overtighten an oil filter by hand because the force applied is limited. Using tools to tighten can easily cause overtightening and damage. Hand tightening is the safest method to secure the filter.
How Tight Should Your Oil Filter Be?
Your oil filter should be hand-tight plus about a quarter turn more after the gasket touches the base. Avoid tools unless removing a stuck filter to maintain the proper seal and prevent damage.
Is It Necessary to Lubricate the Oil Filter Gasket Before Installation?
Yes, applying a light coat of fresh oil to the gasket reduces friction and helps create a better seal, making future removal easier and preventing leaks.
Before You Go
Getting your oil filter tightness right protects your engine from leaks and damage. Pay attention to your vehicle’s specific instructions and use your hand to tighten the filter properly without forcing it. Next time you change your oil filter, take the time to prepare and install it carefully, your engine will thank you with reliable performance and fewer headaches.