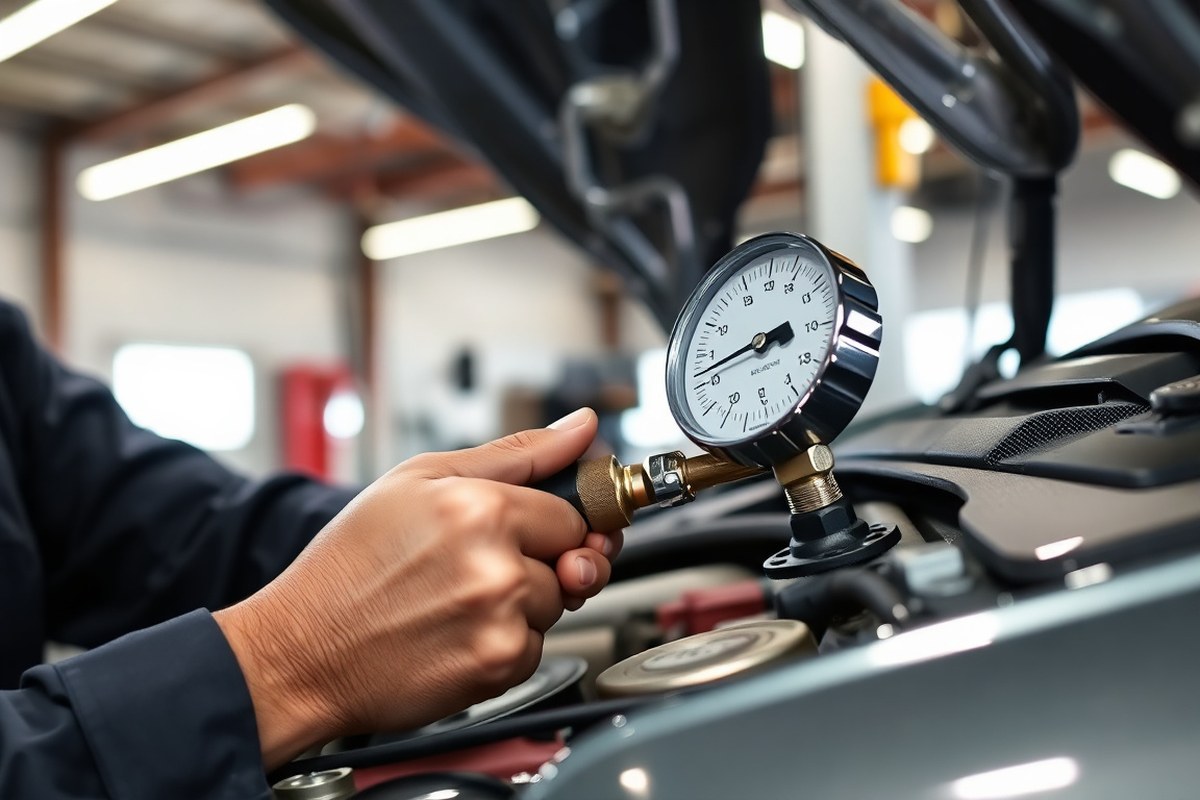
How Check Fuel Pressure Step-By-Step Safe Methods, Tools & Troubleshooting
Knowing how check fuel pressure helps you identify issues affecting your engine’s performance like stalling or poor acceleration. Use a properly rated fuel pressure gauge connected safely to the fuel rail or line while the engine runs. Start by locating the Schrader valve or test port on your fuel system for a correct and secure connection.
Key Takeaways
- Use a fuel pressure gauge designed for your vehicle’s fuel system type, gasoline or diesel, to get accurate readings.
- Check fuel pressure with the engine running to ensure you measure actual operating pressure under load.
- Normal fuel pressure for gasoline port injection ranges from 40, 60 psi; diesel systems run much higher, often over 2,500 psi.
- Digital scan tools offer more precise readings and real-time data logging compared to traditional analog gauges.
- A drop in fuel pressure below the normal range can indicate a failing fuel pump or clogged fuel filter.
- High fuel pressure might signal a faulty pressure regulator or blockage in the return fuel line.
How to Check Fuel Pressure Step-by-Step Safely

Checking fuel pressure requires the right tools and safety steps to avoid damage and injury. Use a dedicated fuel pressure gauge with the proper adapter, connect it to the test port on the fuel rail, and follow a careful sequence to measure pressure while the engine runs. After the test, make sure to properly disconnect the gauge and relieve system pressure to prevent fuel spray and ensure smooth engine restart.
Essential Tools and Safety Gear
To measure fuel pressure safely and precisely, gather the right tools and safety gear first. A manual fuel pressure gauge equipped with a Schrader valve adapter lets you get accurate, hands-on readings. This type of gauge typically attaches to the test port on the fuel rail of most cars. Use safety glasses to guard your eyes against fuel spray, and wear gloves to prevent skin contact with the flammable and irritating fuel.
Have a set of hand tools available to access the fuel rail test port, and make sure your work area is well-ventilated. Avoid sparks or open flames near the testing zone because fuel vapors ignite easily. Always follow any vehicle-specific guidelines regarding fuel system work.
Locating the Fuel Rail Test Port
Most modern vehicles come equipped with a test port on the fuel rail, which looks like a tire valve with a Schrader valve core inside. This port is usually positioned along the fuel rail near the firewall or close to the engine’s intake manifold. It allows you to attach a fuel pressure gauge without disconnecting fuel lines, reducing the risk of fuel leaks.
Locate this port by first checking under the hood near the fuel injectors. Consult your vehicle’s service manual for the exact location if it’s not obvious. Older vehicles without a test port may require disconnecting the fuel line, which demands extra caution and safety steps.
Step-By-Step Fuel Pressure Test Procedure
Follow these steps to check fuel pressure safely. This procedure applies to most gasoline direct injection or port injection systems with a fuel rail test port.
- Relieve fuel system pressure. Turn the ignition on and let the engine run until it stalls to use up residual pressure in the lines. This reduces the risk of high-pressure fuel spray.
- Wear safety glasses and gloves. Personal protection is key when working around pressurized fuel.
- Locate and connect the fuel pressure gauge. Attach the gauge to the fuel rail test port securely using the Schrader valve adapter. Make sure connections are tight to prevent leaks.
- Turn the ignition on without starting the engine. This energizes the fuel pump and pressurizes the system. Watch the gauge for pressure buildup.
- Start the engine. Observe the fuel pressure gauge while the engine runs at idle. Note the pressure reading and compare it with your vehicle’s specified fuel pressure range, typically 40, 60 psi for port injection systems.
- Rev the engine slightly if needed. Some tests require checking pressure at higher RPMs (around 2000 RPM) to assess pump performance under load.
- Turn off the engine and ignition. Leave the gauge connected for a minute to see if the pressure holds steady. Pressure drop may indicate leaks or a failing pump check valve.
Post-Test Safety Checks and Resetting the System
After measuring and recording the fuel pressure, carefully remove the fuel pressure gauge. Wear safety glasses and cover the test port with the original cap or a protective plug immediately. Avoid disconnecting any lines while pressure remains in the system.
Prime the fuel system next by turning the ignition on and cranking the engine until fuel flows freely at the rail. This step helps ensure no air pockets remain and the fuel system operates normally. Check for any fuel leaks at the gauge connection or test port. Reconnect any fuel lines if disconnected, and verify the engine runs smoothly without hesitation or rough idle.
What Is Normal Fuel Pressure and How to Interpret It

Normal fuel pressure for gasoline engines usually falls between 40 and 60 psi at idle, with increases up to around 60 to 70 psi at wide-open throttle (WOT). Diesel engines operate at significantly higher pressures, often several hundred to over a thousand psi, depending on the injection system. These differences arise because diesel engines rely on direct injection with precise timing, requiring high-pressure pumps and specialized gauges rated for these levels.
Fuel pressure changes with engine state because the fuel demand and regulator behavior shift. For example, at idle, pressure is lower as the engine uses less fuel, while WOT demands a higher flow, increasing pressure. Cranking pressure can be slightly lower or unstable since the engine isn’t fully running and the fuel pump may not maintain steady pressure. Comparing readings at these three conditions reveals issues like pump weakness, clogged filters, or regulator faults.
A fuel pressure regulator keeps pressure steady by adjusting return fuel flow. A faulty regulator often causes constant pressure across idle to WOT or a pressure drop when vacuum is applied during deceleration. Excessively high pressure may indicate a stuck-open regulator or clogged return line. Observing how the pressure varies can help decide if the regulator works properly. For instance, if the pressure doesn’t increase from idle to WOT, the regulator might be failing. If pressure stays high with the engine off, that also suggests a stuck regulator.
Fluctuating or inconsistent readings may point to an intermittent pump failure, a faulty check valve, or wiring issues with the fuel pump control. Pressure should hold steady during steady throttle and not drop suddenly. A drop of more than a few psi in seconds can mean leaks or failing components. Testing under several engine conditions allows a reliable interpretation: consistent pressure within the normal range signals good system health, while significant variation requires further diagnosis.
Checking fuel pressure with the right gauge matching your engine type is important. Using a low-pressure gauge designed for tires won’t give accurate readings. For gasoline engines, expect 40-60 psi at idle, rising under load; for diesels, use the manufacturer’s specifications that can range in the hundreds to thousands of psi. A simple rule: if pressure is outside normal ranges or doesn’t change with engine state, troubleshoot the regulator, pump, or filter.
Fuel pressure that remains constant from idle to wide-open throttle often indicates a failing regulator, so always test at multiple engine states to get accurate diagnostic insight.
Differences Between Checking Gasoline and Diesel Fuel Pressure
Gasoline and diesel engines require different approaches when checking fuel pressure, due to distinct fuel system designs and operating pressures. Gasoline fuel systems typically operate at lower pressures, ranging from about 30 to 60 psi in most modern vehicles, while diesel fuel systems function at significantly higher pressures, often from 1,000 psi up to 30,000 psi or more in common rail diesel setups.
The tools used for measuring pressure differ considerably. Gasoline engines generally allow the use of a standard fuel pressure gauge connected to the Schrader valve located on the fuel rail. This gauge is relatively affordable, often costing between $20 and $50. Diesel engines, however, need specialized high-pressure gauges capable of safely measuring extreme pressures without damage. These gauges tend to be more expensive and often require adapters to connect to test ports on the fuel injection pump or rail.
Locating the test point also varies. Gasoline fuel pressure can usually be checked at the fuel rail’s Schrader valve accessible near the engine bay. Diesel fuel systems lack Schrader valves and typically require connection to a test port specifically designed for diagnostics on the injection pump or fuel rail. This can be in more confined spaces, requiring some disassembly or use of extension fittings. Always consult the manufacturer’s service manual for exact locations and connection procedures.
Safety risks during testing differ between the two fuel types. Gasoline is highly flammable and its vapors can ignite easily, so it’s important to perform the test in a well-ventilated area with the engine off until the gauge is securely connected. Avoid creating sparks or open flames nearby. Diesel fuel is less volatile but operates under much higher pressure, which can cause serious injury if a line or fitting bursts. Use protective goggles and gloves, and relieve system pressure carefully before disconnecting any hoses. Confirm that the gauge and hoses are rated for diesel fuel pressure to prevent hose failure or leaks.
When checking gasoline fuel pressure, first locate the Schrader valve on the fuel rail. Turn off the ignition and attach the fuel pressure gauge. Turn the key to the “on” position without starting the engine to pressurize the system and record the reading. Repeat with the engine running for a dynamic check. For diesel, identify the correct test port and attach the high-pressure gauge with proper adapters. Follow the manufacturer’s startup procedure to activate the fuel pump. Never exceed recommended pressure limits on gauges, and use a slow, controlled release of pressure after testing.
A checklist for both systems includes verifying you have the right gauge and adapters, confirming the engine and ignition state required, wearing appropriate PPE, and double-checking connections for leaks before running the engine. Expect stable fuel pressure readings within the manufacturer’s specifications: for gasoline, usually around 40-60 psi, and for diesel, hundreds to thousands of psi depending on the system. Significant deviations or fluctuations can indicate failing pumps, clogged filters, or leaks. Understanding these differences ensures accurate diagnostics and safe testing procedures across fuel types.
Common Mistakes When Checking Fuel Pressure and How to Avoid Them
Using a tire pressure gauge to check fuel pressure is a common mistake. Tire gauges are not designed for the high pressure or the chemical nature of gasoline or diesel fuel. Using one can give inaccurate readings and damage the gauge permanently. You should always use a fuel pressure gauge rated for your vehicle’s fuel system to avoid contamination and faulty results.
The most common error when checking fuel pressure is not properly relieving fuel system pressure before attaching the gauge. Failing to do so risks fuel spray that can cause injury or fire and leads to false pressure readings. Another frequent issue is parking the vehicle in a position or temperature that affects pressure, especially when testing cold engines. Measuring fuel pressure right after shutdown or without the engine running may show pressures that don’t reflect normal operation.
Air pockets trapped in the fuel system can skew your readings by causing fluctuating or unstable fuel pressure. Avoiding air pockets requires careful bleeding after testing. Most systems have a special bleeding valve or require cycling the ignition to activate the fuel pump without starting the engine, which pushes air out through the fuel return line or specialized vent. If your vehicle lacks a dedicated bleed point, carefully loosen the fuel return hose connection until fuel flows steadily without bubbles, then retighten. After you finish testing, the correct way to bleed air is often to:
- Turn the ignition key to the “on” position (without starting the engine) multiple times for about 5 seconds each to engage the fuel pump and push air out.
- Check the fuel lines for leaks or bubbles; repeat ignition cycling if needed.
- Start the engine and let it idle for a few minutes to stabilize fuel flow and pressure.
- Inspect for any fuel smell or leaks before wrapping up.
- Consult the vehicle’s service manual for specific purge procedures to prevent causing engine hesitation or stalling.
Not bleeding the air correctly can cause rough idling, stalling, or inaccurate pressure readings on any follow-up tests. It may also introduce fuel delivery problems that require professional attention. Avoid rushing this step even though it may add a few minutes because the costs of running with trapped air in the fuel system include erratic engine performance and potential damage over time.
Tools and Methods: Comparing Fuel Pressure Gauges and Scan Tools
You can measure fuel pressure using either analog gauges or digital scan tools. Each has its advantages based on cost, precision, and ease of use, while some DIY methods exist but come with notable limitations. Selecting the right tool depends on your budget, mechanical skill level, and the type of vehicle you work on.
Analog Fuel Pressure Gauges
Analog gauges are the traditional tool for measuring fuel pressure. They connect directly to the fuel rail or test port and display pressure on a dial. These gauges offer good precision and provide real-time readings, which can be important for diagnosing fuel delivery problems.
Their cost generally ranges from $20 to $80 for a basic gauge set, making them affordable for most DIY mechanics. Installation requires basic hand tools and some understanding of vehicle fuel systems, but they do not require electrical power or a computer connection.
Use analog gauges when you need a straightforward, immediate pressure reading on gasoline engines. They are less common for diesel vehicles that might need specialized pressure ranges or connections.
Digital Scan Tools and OBD-II Adapters
Digital scan tools connect to the vehicle’s OBD-II port and can read data from the fuel pressure sensors already installed in many modern vehicles. These tools provide diagnostic information alongside fuel pressure, offering a broader view of engine health.
Prices vary widely: simple OBD-II adapters start around $20, while professional-grade scan tools with improve diagnostic capabilities can cost hundreds of dollars. Scan tools are user-friendly since they typically provide digital readings and may alert you to pressure anomalies automatically.
Scan tools are best for vehicles equipped with electronic fuel pressure sensors, especially complex or late-model cars. They allow you to monitor trends over time rather than just instantaneous pressure. However, they rely on the vehicle’s sensors and may not detect issues like a faulty pressure regulator that a direct gauge would catch.
DIY Alternatives and Their Limitations
Checking fuel pressure without a dedicated gauge or scan tool generally involves less accurate methods like observing fuel delivery from loosened connectors or testing engine performance symptoms. These approaches don’t provide exact pressure measurements, which limits their usefulness for troubleshooting fuel system issues.
Some DIYers attempt to use tire pressure gauges on modified fittings, but this practice is risky due to incompatible pressure ranges and the potential for leaks or fuel spills, creating safety hazards. Without proper tools, you can miss subtle pressure drops or spikes that indicate early system problems.
Always ensure the vehicle and area are well ventilated when working on fuel systems to reduce fire risks associated with fuel exposure.
The table below outlines key differences between fuel pressure measurement methods, highlighting their typical cost range, precision, and recommended usage scenarios.
| Tool/Method | Cost Range (USD) | Precision | Ease of Use | Recommended For |
|---|---|---|---|---|
| Analog fuel pressure gauge | $20 – $80 | High | Moderate (requires manual setup) | Gasoline engines needing direct measurement |
| Digital scan tool / OBD-II adapter | $20 – $400+ | Moderate (dependent on sensor accuracy) | Easy (plug-and-play) | Modern vehicles with electronic fuel sensors |
| DIY methods (visual checks, improvised gauges) | Minimal (mostly free) | Low | Easy but unreliable | Basic fault indication; not for precise measurement |
Select an analog gauge if you want a reliable, real-time view of fuel pressure on classic or gasoline vehicles without onboard sensors. Use a digital scan tool for complete monitoring on newer models or to combine fuel pressure data with other engine diagnostics. Avoid DIY alternatives when pressure accuracy and safety are priorities.
When Low or High Fuel Pressure Indicates a Problem
Low or high fuel pressure usually signals an underlying problem in your vehicle’s fuel system that needs prompt attention. Low fuel pressure often results from a clogged fuel filter, a failing fuel pump, or a defective pressure regulator. This condition creates a lean air-fuel mixture, causing rough idling, hesitation under acceleration, and even engine knocking. Chronic low pressure risks serious engine damage like overheating and carbon buildup on pistons and valves, so acting quickly helps prevent costly repairs.
High fuel pressure typically points to a malfunctioning fuel pressure regulator or a blockage in the return line. Excessive pressure forces too much fuel into the engine, leading to black smoke, poor fuel economy, and fouled spark plugs. This overpressure can stress the fuel pump and injectors, shortening their lifespan.
When you spot abnormal fuel pressure readings, verify them against your vehicle’s specified range, available in the service manual or online databases. A pressure gauge reading below the minimum or above the maximum specification confirms a problem. Use this simple decision checklist: confirm the pressure level; inspect the fuel filter for clogging; check the fuel pump voltage and flow; test the pressure regulator’s function; and examine fuel lines for leaks or blockages.
Begin by replacing a clogged fuel filter when your fuel pressure is too low, with parts costing between $15 and $50. Test the fuel pump’s output using a current meter if pressure is still low; a failing pump often requires replacement, costing $100 to $400 based on your vehicle. For high pressure, inspect or replace the fuel pressure regulator, which typically costs around $50 to $100. Avoid replacing injectors or sensors before confirming fuel pressure issues to prevent unnecessary expenses.
It’s important to intervene when abnormal pressure readings persist after basic checks. Low pressure leading to lean conditions can cause engine damage if left unresolved. High pressure can damage fuel system components and degrade engine performance. When troubleshooting does not isolate the problem, consulting a professional technician is recommended. They have specialized tools to perform advanced diagnostics like smoke testing for leaks or electronic testing of pressure regulators.
How Engine Conditions Affect Fuel Pressure Readings
Checking fuel pressure at different engine conditions, idle, cranking, and wide-open throttle (WOT), reveals how the fuel system performs under various loads and demands. Each state produces unique pressure readings, highlighting specific issues like flow restriction, pump weakness, or regulator failure. Monitoring these variations helps isolate problems that might not appear when measuring fuel pressure under just one condition.
Fuel Pressure at Engine Idle
Fuel pressure at idle reflects how the system maintains a baseline supply when the engine runs with minimal load. The pump needs to provide steady pressure to keep the fuel rail and injectors ready for smooth engine operation. Stable idle pressure indicates the fuel pump and pressure regulator are working properly and there’s no significant blockage in the fuel lines or filter.
To check pressure at idle, attach a fuel pressure gauge to the test port, start the engine, and let it idle until the reading stabilizes, usually within 30 seconds. Typical gasoline engines show around 35 to 45 psi at idle, but exact values depend on vehicle specs. If the pressure fluctuates greatly or is below specifications, suspect a weak pump, clogged filter, or faulty regulator.
Fuel Pressure During Engine Cranking
During cranking, the fuel pump activates but the engine isn’t fully running, so fuel pressure must build quickly to prime the injectors. This test reveals the pump’s ability to pressurize the system under initial conditions before combustion starts. Low or inconsistent pressure during cranking can cause hard starting or no start conditions.
To capture this reading, connect the fuel pressure gauge before turning the ignition key to start. Observe the pressure as the engine cranks; it should reach a level close to or slightly below normal idle pressure within 5 to 10 seconds. A slow rise or rapid drop during cranking may indicate a weak fuel pump, electrical supply issues, or leaks in the fuel system.
- Check pump relay and fuse if pressure stays low during cranking
- Watch for pressure dropping quickly after initial rise, signaling possible leaks
- Compare cranking pressure to idle, should be similar or slightly lower
- Note unusual delays in pressure build-up for potential pump wear
- Perform test quickly to avoid draining battery or flooding injectors
Abnormal cranking pressure often points to pump or wiring problems, as the system has less time to compensate than at idle or WOT.
Fuel Pressure at Wide-Open Throttle
The pressure at wide-open throttle tests the fuel system’s ability to deliver maximum flow when the engine demands full power. Fuel pressure may rise slightly or remain steady, depending on whether the system’s regulator adjusts to maintain constant pressure or varies according to load. A drop in fuel pressure at WOT suggests the pump or fuel lines can’t keep up with increased flow, causing engine hesitation or power loss.
To test, hold the throttle fully open while watching the fuel pressure gauge. Reliable systems usually maintain pressure within 5 psi of the idle reading or show a slight increase of up to 5 psi. Large pressure drops, more than 10 psi below idle, indicate fuel starvation under load. Possible causes include failing fuel pump, restricted filter, or pressure regulator problems.
When to Call a Professional for Fuel Pressure Issues
You should call a professional to check fuel pressure when your engine shows symptoms like rough idling, stalling, hesitation under acceleration, or difficulty starting that you cannot explain through basic inspections. These signs may indicate issues such as a failing fuel pump, clogged fuel filter deep in the system, or leaks that require specialized diagnostic tools and experience. A professional technician can access parts of the fuel system that are often hard to reach or dangerous to handle yourself.
Fuel systems operate under high pressure, sometimes exceeding 50 psi in gasoline engines and even higher in diesel systems. Handling pressurized fuel lines incorrectly can cause serious injuries or fires. Proper fuel pressure testing often requires equipment that can safely contain fuel sprays and drains, as well as the ability to monitor engine performance under load, rather than just sitting idle. Experts use tools like fuel pressure gauges with pressure relief valves and scan tools that detect intermittent or load-specific problems, which are difficult to diagnose with a basic gauge.
Cost is another factor to consider. A professional fuel pressure test usually ranges from $50 to $150, depending on your vehicle and location. If the test reveals deeper issues like a bad fuel pump or injectors, parts and labor costs can easily exceed $400 or more. Paying upfront for professional diagnostics can save money by pinpointing the exact cause rather than replacing parts one by one.
Use this checklist as a decision rule: If your car exhibits repeated engine hesitation, stalls especially under acceleration or heavy load, shows codes related to the fuel system from an OBD-II scanner, or if you suspect a fuel leak or smell gasoline strongly, schedule professional testing. Also, call a professional if your vehicle is a diesel or a high-pressure gasoline direct injection engine, since these systems require different tools and safety measures.
Avoid testing fuel pressure yourself if there’s any chance of fuel leaks, smoking, or fire hazards; these situations need professional handling immediately.
Step-by-Step Action Plan for Checking Fuel Pressure
Follow these steps to accurately measure your vehicle’s fuel pressure and interpret the results confidently.
- Before you start: Gather all necessary tools, including a fuel pressure gauge or a compatible scan tool, safety gloves, and eye protection to prevent injury from fuel spray.
- Preparation: Locate the fuel rail or test port in your engine bay, then relieve fuel system pressure following your vehicle manufacturer’s instructions to avoid hazards.
- Initial test: Connect the fuel pressure gauge to the test port securely. Turn the ignition key to the “on” position without starting the engine, and observe the gauge reading. The pressure should match your vehicle’s specified range; if it doesn’t, proceed to troubleshooting.
- Engine running check: Start the engine while watching the fuel pressure gauge. Pressure should remain steady within specs. Fluctuations or abnormal readings suggest possible fuel pump or regulator issues.
- Under load test: With the engine running, rev the engine to about 2,500 rpm and hold it steady. The fuel pressure should maintain a stable reading; if it drops or spikes, this may indicate a problem with the fuel delivery system.
- After testing: Turn off the engine and carefully disconnect the gauge, avoiding fuel spray. Inspect connections for leaks and reassemble any removed components.
- Review your findings: Compare all your readings to the manufacturer’s specifications. Consistent low or high pressure points to specific repairs needed, while stable, correct readings verify your fuel system’s health.
- Next steps: If you encounter uncertain or problematic readings beyond your skill level, schedule a professional diagnostic to prevent costly repairs or safety risks.
Frequently Asked Questions
How Much Does It Cost to Check Fuel Pressure?
The cost typically ranges from $50 to $150 for a basic fuel pressure gauge kit. Professional diagnostic tools are more expensive but offer higher precision and real-time monitoring features.
What Is the Normal Fuel Rail Pressure Psi?
Normal fuel rail pressure depends on the system, usually 40, 60 psi for traditional port injection and up to 30,000 psi for modern direct-injection engines. Always check your vehicle specs for exact values.
How to Pressurize a Fuel Tank?
Pressurize a fuel tank by turning the key to the “on” position without starting the engine, activating the electric fuel pump. For other systems, consult the manufacturer for safe pressurization methods.
How to Check Fuel Pressure Without a Fuel Pressure Gauge?
You can sometimes check fuel pressure by listening for the fuel pump sound or checking engine performance, but this is not precise. Using a proper gauge is the safest method for accurate readings.
Can a Faulty Fuel Pressure Regulator Cause Engine Stalling?
Yes, a bad fuel pressure regulator can cause inconsistent pressure, leading to stalling or poor engine performance. It’s a common cause of such issues in fuel-injected engines.
Is It Safe to Check Fuel Pressure Near a Hot Engine?
No, always check fuel pressure in a well-ventilated, cool area to avoid fire hazards. Follow safety guidelines to prevent fuel vapor ignition or burns.
Final Thoughts
Checking your vehicle’s fuel pressure accurately is key to diagnosing fuel system issues before they worsen. Use the right tools, follow safety procedures, and interpret your readings carefully to avoid unnecessary repairs. If your pressure readings seem off or if you lack confidence, booking a professional inspection is the safest way to ensure your vehicle runs smoothly and reliably.