How Do I Test a Fuel Pump Relay: Complete Guide with Proven Testing Steps
How do I test a fuel pump relay? Start by locating the relay in your vehicle’s fuse box, usually a green or gray cube. You can test it by swapping it with a similar relay from another circuit or using a multimeter to check for continuity and proper voltage flow during relay activation. Begin with the relay’s click sound to confirm it’s receiving power before deeper testing.
Key Takeaways
- Locate the fuel pump relay in the fuse box, referencing the vehicle manual if needed.
- Swap the relay with another identical relay to check if the problem shifts with the relay.
- Listen for a clicking sound when turning the ignition to test relay activation.
- Use a multimeter to check continuity between relay terminals for proper function.
- Check relevant OBD2 codes P0230 to P0233 to identify relay circuit faults.
- A bad relay can mimic fuel pump failure symptoms and cause intermittent no-starts.
How to Test a Fuel Pump Relay Step-by-Step

Testing a fuel pump relay requires basic tools and a systematic approach to confirm whether the relay is functioning correctly. You’ll need a multimeter set to measure resistance and continuity, needle-nose pliers to remove the relay, and optionally, a replacement relay from a similar circuit for a swap test. The relay’s job is to send electrical power to the fuel pump when you turn the key to the ON position, so testing focuses on verifying the relay coil’s resistance, checking the continuity of the switching contacts, and confirming the relay activates properly.
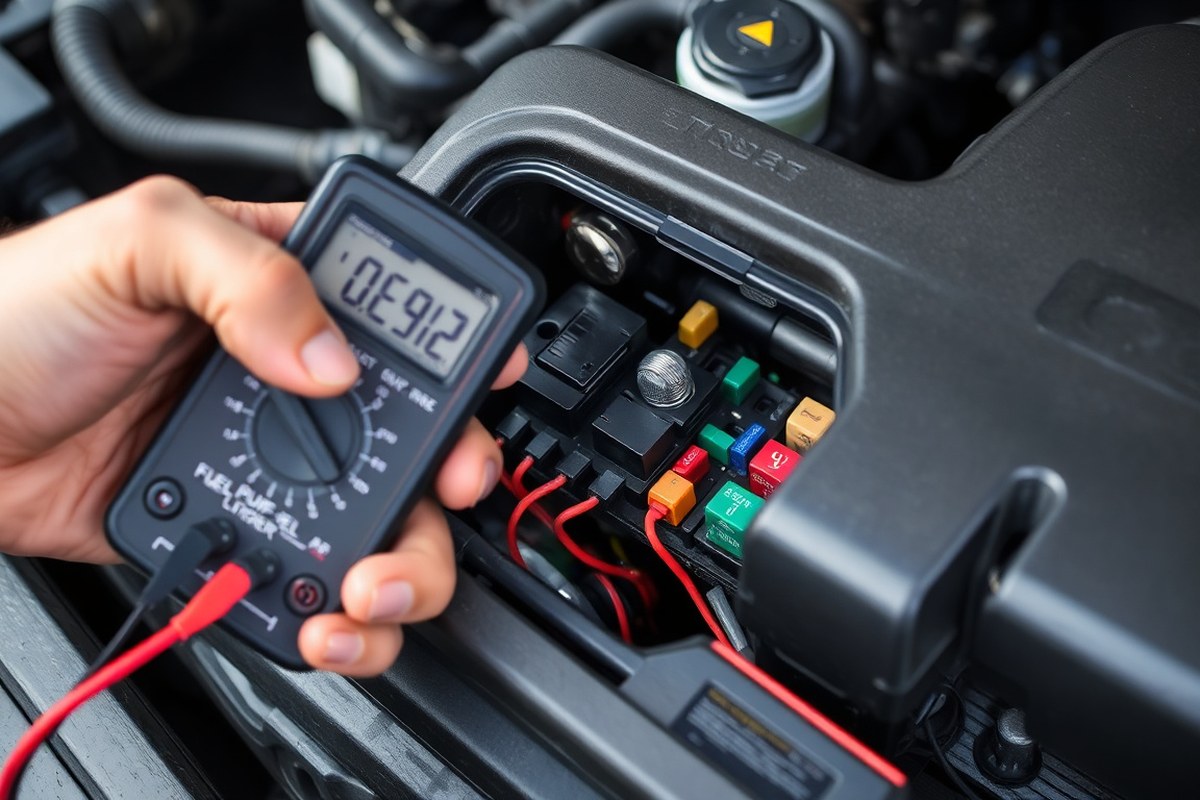
Start by locating the fuel pump relay, usually found in the fuse box under the hood or near the passenger side kick panel. The relay is commonly green or gray. Consult your vehicle’s manual if you have trouble locating it. Testing involves using a multimeter on the coil terminals to check proper resistance and measuring contact continuity with the relay energized.
- Turn off the engine and disconnect the negative battery cable. This prevents electrical shorts during testing and keeps you safe while removing the relay.
- Locate and remove the fuel pump relay using needle-nose pliers if needed. Identify the relay based on your car’s fuse box diagram or manual. Pull the relay straight out without twisting to avoid damage.
- Identify the coil terminals on the relay (usually marked as 85 and 86) with your manual or relay diagram. Set your multimeter to measure resistance (ohms) and place the probes on these two terminals.
- Check the coil resistance, which typically ranges from 50 to 120 ohms depending on the relay. A reading outside this range suggests the coil is damaged. Infinite resistance indicates a broken coil wire.
- Next, test continuity across the relay’s switch terminals (often marked 30 and 87) with the multimeter set to continuity mode or lowest resistance. Without power, there should be no continuity (open circuit). Continuity indicates that the relay contacts have remained closed and may be stuck.
- Apply 12 volts DC to the coil terminals using a power source like your car battery or a 12V bench supply while measuring continuity across switch terminals. When powered, continuity should exist between the switch terminals. No continuity means the relay does not activate properly.
- Swap the fuel pump relay with an identical one from another system, such as the A/C clutch relay, to test its function. Turn the ignition ON and listen for the fuel pump hum. Hearing the pump run shows the original relay was defective.
- Reinstall the tested relay or a new relay, reconnect the battery, and verify the fuel pump operates when the ignition key is turned on.
Good results include coil resistance within specification, switch terminals opening and closing correctly with power applied, and audible fuel pump activation when the relay is installed. Common issues include burnt contacts, broken coil wires, or stuck switch terminals. A relay showing signs of failure should be replaced, costing about $15 to $25, to avoid the higher expense of a fuel pump replacement, which can exceed $1,000.
Symptoms and Signs of a Bad Fuel Pump Relay

The most common symptoms of a faulty fuel pump relay include the engine failing to start, intermittent stalling, and weak engine performance. You might also notice the absence of the usual buzzing or humming sound from the fuel pump when turning the key to the “on” position. Sometimes, the pump may keep running after the engine stops, or the vehicle’s dashboard could display fuel system or engine warning lights. These signs matter because the relay controls the power sent to the fuel pump, so a bad relay interrupts fuel delivery needed for starting and running the engine.
It can be challenging to distinguish between a bad fuel pump and a bad relay because their symptoms often mimic each other. Both problems may cause difficulty starting or stalling, but a fuel pump relay failure tends to cause sudden, intermittent issues like stalling after the engine heats up or during vibrations, whereas a failing fuel pump usually shows gradual weakening performance over time. Unlike a pump failure, relay failure may also result in the fuel pump running continuously, draining the battery.
Fuel pump relays do not always fail completely; they can fail intermittently due to loose connections, corrosion, or heat-related issues. Catching intermittent relay failure requires careful observation under different conditions such as engine temperature changes or after driving over rough roads. You might hear the relay click inconsistently or notice sudden stalls that don’t happen regularly.
- No start or crank-no-start condition
- Engine stalls unexpectedly, especially after warming up or on rough roads
- Weak engine power or hesitation during acceleration
- No fuel pump sound when turning the key to “on”
- Fuel pump running continuously even after engine off
- Fuel system or engine warning lights illuminated
- Intermittent fuel delivery causing unpredictable engine behavior
Always check the relay terminals for rust or corrosion and ensure tight connections before concluding the relay is bad.
Identifying the difference starts with testing the relay by swapping it with a known good relay, which is relatively inexpensive and quick. If the engine starts normally after the swap, the original relay is likely faulty. A bad relay typically costs between $15 and $45 to replace plus a $50 to $100 diagnostic range, making it a lower-cost repair than replacing the fuel pump itself, which may exceed $800 for parts and labor. Because symptoms of relay and pump failure closely overlap, combined with wiring issues that can mimic these symptoms, following a methodical diagnostic approach prevents unnecessary and costly fuel pump replacements. In cases with two-speed pumps, a defective relay may cause fuel starvation during high load, another symptom to note.
Understanding Fuel Pump Relay Terminals and Their Functions
Fuel pump relays have specific terminals that control how power flows to your fuel pump. Knowing each terminal’s number and function helps you test the relay correctly with a multimeter or test light. Relay wiring diagrams show these terminal assignments so you can identify pins during testing and troubleshooting.
Standard Terminal Numbering and Roles
Most fuel pump relays use four terminals, numbered 85, 86, 30, and 87. Terminals 85 and 86 connect to the relay coil, which creates a magnetic field when energized. This magnetic field switches the internal contacts between terminals 30 and 87. Terminal 30 is the power input from the battery or fuse box, while terminal 87 sends the switched power output to the fuel pump or fuel pump wiring harness.
Understanding this layout helps you locate the supply, control, and output terminals for testing continuity and voltage. For example, applying 12 volts across terminals 85 and 86 should make the relay click and connect terminal 30 to 87, supplying power to the pump.
Relay Variations and 5-Pin Relays Explained
Some vehicles, including certain Toyota models, use 5-pin fuel pump relays. These usually have two output terminals to allow the fuel pump to run at different speeds during startup or normal operation. In this case, terminals 87 and 87a control different power outputs.
A 5-pin relay adds terminal 87a, which is normally closed when the relay is off, while 87 is normally open and closes when energized. This setup allows the relay to send power to the pump at a lower or higher speed depending on the relay position. Pin 85 and 86 still control the coil, and pin 30 remains the power input.
Using Vehicle Wiring Diagrams Effectively
Relay wiring diagrams are essential for pinpointing terminals during testing, especially if your relay differs from the standard four-terminal design. When you consult the diagram, identify terminals 30 and 87 for power input and output, 85 and 86 for coil activation, and 87a if present.
Compare your relay’s physical terminals with the diagram before testing. You can then measure resistance across coil terminals (85 to 86) or check for continuity between switched terminals (30 to 87/87a) when the relay is energized. This step ensures you are testing the right pins, avoiding false diagnosis.
| Terminal Number | Function | What to Test |
|---|---|---|
| 85 | Relay coil ground | Continuity to chassis ground or control circuit |
| 86 | Relay coil power from ECU or control switch | 12 V signal when activating fuel pump |
| 30 | Power supply (battery or fused source) | 12 V constant power input |
| 87 | Switched power output to fuel pump | Voltage output when relay is activated |
| 87a (if present) | Normally closed output for low-speed pump operation | Continuity with 30 terminal when relay is not energized |
After identifying the pin assignments, you can test each terminal for proper voltage and continuity based on relay state. This prevents mistakes caused by confusing terminals and ensures that you check the coil activation and switched power circuits accurately.
Testing a Fuel Pump Relay Without a Multimeter
You can test a fuel pump relay without a multimeter by using a 12V test light or by swapping the relay with another identical one. These methods help verify if the relay is engaging and sending power to the fuel pump. They require minimal tools and offer quick results, though they may not be as precise as using a multimeter.
Using a 12V Test Light to Check Relay Power
A 12V test light is a simple, affordable tool that lights up when it detects voltage. It helps you confirm whether the relay is delivering power from the battery to the fuel pump. Testing with a test light avoids the need for voltage measurement skills and still shows if the relay closes the circuit properly.
- Turn the ignition key to the “ON” position without starting the engine to activate the relay.
- Locate the fuel pump relay in the fuse box or relay panel; refer to the vehicle manual for its exact location.
- Identify the terminal on the relay that outputs power to the fuel pump (usually the terminal connected to the pump’s positive wire).
- Connect the test light clip to a good ground point on the vehicle’s chassis or battery negative terminal.
- Touch the test light probe to the relay output terminal while the ignition is “ON.”
- Observe if the test light illuminates brightly, indicating power is reaching the output terminal.
- Turn the ignition “OFF” and disconnect the test light after testing.
A bright and steady test light glow means the relay is closing the circuit and allowing voltage to pass through. A weak or non-existent light indicates a possible relay failure or a wiring issue.
Relay Swapping Procedure Safely
Relay swapping involves exchanging the suspect fuel pump relay with another identical relay in the vehicle. Many cars have multiple relays of the same type, such as those controlling the horn or headlights. This method gives a quick indication if the relay is the source of the problem without any special tools.
- Turn the ignition key to the “OFF” position and remove it to prevent electrical shorts.
- Open the vehicle’s fuse and relay panel to locate the fuel pump relay and a known-good relay of the same model and amperage rating.
- Carefully pull the fuel pump relay straight out of its socket.
- Remove the other identical relay from its socket.
- Plug the suspect relay into the other relay’s socket and the good relay into the fuel pump relay socket.
- Turn the ignition key to the “ON” position and listen for the fuel pump activation or try starting the engine.
- Check if the fuel pump operates correctly with the swapped relay; failure to run suggests the original relay was likely defective.
- Replace relays back to their original positions after testing to avoid confusion.
Relay swapping offers a reliable, immediate test with no tools beyond the relays already in the car. It might not work if the vehicle uses unique relays or a fuel pump module instead of a relay.
Listening for Relay Activation Sounds
Simply listening for the fuel pump relay engaging can be an effective test if other tools aren’t available. The fuel pump relay usually makes a distinct clicking or humming sound right after the ignition turns to “ON.”
- Ensure the vehicle is in “OFF” mode with all accessories turned off.
- Have someone turn the ignition key to the “ON” position without starting the engine.
- Place your ear near the fuel tank area or listen closely near the rear of the vehicle where the fuel pump is located.
- Identify a humming or buzzing sound lasting about 2 to 3 seconds, which signals the fuel pump is powered by the relay.
- Turn the ignition back to “OFF” and note whether the sound disappears immediately.
The absence of the humming or clicking sound can mean the relay isn’t activating, indicating a potential relay failure or related electrical problem. This acoustic check doesn’t confirm voltage levels but helps pinpoint if power reaches the pump.
Common Fuel Pump Relay Testing Mistakes and How to Fix Them
Testing a fuel pump relay can easily lead to misdiagnosis if certain common mistakes are overlooked. One frequent error is failing to clean relay contacts before testing. Dirt, corrosion, or moisture on the relay terminals can cause false readings such as intermittent continuity or resistance spikes. It’s important to remove the relay and inspect the contacts; cleaning them with electrical contact cleaner and a small brush ensures reliable electrical connection and accurate testing results.
Another problem arises from ignoring the condition of the relay socket and the wiring harness. Even if the relay is functioning correctly, a loose or corroded socket can cause voltage drops or erratic relay operation. During testing, visually and physically check the relay socket for bent, broken, or oxidized pins. Wiggle the wiring harness gently to detect loose connections while monitoring voltage or using a test light. Repair or replace damaged wiring and sockets before concluding the relay is faulty.
- Don’t rely solely on relay clicking sounds, listen but verify with a multimeter
- Always test both coil and contact terminals for continuity and resistance
- Check relay operation under appropriate voltage conditions for accurate results
- Inspect and clean relay contacts with electrical contact cleaner before testing
- Verify the relay socket and wiring harness are free of corrosion and damage
- Use OBD2 codes like P0231 or P0232 to check for voltage issues that affect relay performance
Dirty relay contacts can introduce resistance that mimics a faulty relay or causes poor fuel pump activation. Cleaning contacts can often fix issues without relay replacement, saving time and money. Checking the relay socket is equally important because a defective socket can cause “phantom” relay faults, where the relay itself tests good but the circuit won’t complete properly in the vehicle.
Always disconnect the battery before removing or cleaning the relay to avoid shorts and ensure accurate testing.
Testing the relay coil resistance helps confirm the relay is not open or short-circuited. Typical coil resistance ranges from 50 to 150 ohms; significantly higher or lower readings indicate internal problems. Testing relay contacts for continuity when energized confirms the relay opens and closes as designed. Performing these checks with power applied and under load conditions produces the most reliable results.
Using OBD2 Codes to Confirm Relay and Fuel System Issues
Reading OBD2 diagnostic trouble codes (DTCs) is a practical way to pinpoint fuel pump relay problems alongside related fuel system issues. A simple OBD-II scanner, which costs between $20 and $60, can retrieve these codes from your vehicle’s engine control unit (ECU). Codes linked to the fuel pump relay help you figure out if the issue lies in the relay itself, the wiring, or elsewhere in the circuit.
For example, codes from P0230 to P0233 specifically relate to fuel pump relay or circuit faults. Code P0230 means “Fuel Pump Primary Circuit Malfunction” and indicates a wiring or relay failure that disrupts power to the pump. P0233 signals an intermittent fault in the fuel pump relay circuit, showing that the relay may work sometimes but has unreliable connections or internal damage.
| OBD2 Code | Description | Likely Issue |
|---|---|---|
| P0230 | Fuel Pump Primary Circuit Malfunction | Relay failure, blown fuse, wiring problem |
| P0231 | Fuel Pump Secondary Circuit Low | Short in wiring or relay control circuit |
| P0232 | Fuel Pump Secondary Circuit High | Open circuit or relay driver fault |
| P0233 | Intermittent Fuel Pump Relay Circuit Fault | Faulty relay contacts or loose wiring |
To interpret these codes correctly, connect your OBD-II scanner to the port, usually located under the dashboard, and retrieve any stored codes. After noting the codes, consult the table to identify potential relay and wiring issues. Trust these codes more when the engine exhibits relevant symptoms, like no fuel pump sound during startup or stalling. However, a code alone is not a definitive diagnosis. For example, a P0230 with no fuel pump noise likely points to a failed relay or blown fuse rather than a pump motor failure.
Use these codes as a starting point. Check relay clicking sounds, inspect related fuses, and test relay terminals to confirm the problem. In complex 2025 vehicles with multiple relays and control modules, codes help narrow down the fault path but should be combined with electrical tests. Reliable confirmation comes from matching a relevant DTC to physical relay failure signs or wiring faults. For urgent repairs, a professional mechanic can cross-reference the scanner output with vehicle-specific wiring diagrams to avoid wasted parts.
Preventing Fuel Pump Relay Failures and Extending Relay Life
Fuel pump relay failures often stem from electrical overload, heat exposure, corrosion, or mechanical wear inside the relay. Excessive current can cause the contacts to burn or weld, while repeated cycling and vibration lead to internal spring fatigue and poor connectivity. Dirt and moisture intrusion accelerate corrosion, disrupting the relay’s electromagnetic function. Preventing these failures helps avoid no-start conditions and costly troubleshooting or repairs that may reach $1,000 to $2,500 if misdiagnosed.
Maintaining reliable relay operation begins with choosing a high-quality relay that matches or exceeds your vehicle manufacturer’s specifications. OEM relays are designed to handle the exact voltage and current requirements of your fuel pump, reducing the risk of premature wear. Substituting lower-grade or incompatible relays increases stress on the internal components, shortening service life.
Proper maintenance also reduces failure risk. This includes inspecting the relay socket and terminals for corrosion or looseness every 12 months, especially in regions with high humidity or road salt exposure. Cleaning contacts and applying dielectric grease prevents oxidation and ensures good electrical flow. Also, avoid modifications that increase current draw, such as aftermarket fuel pumps without upgrading the relay and wiring harness to handle the load.
- Use OEM or manufacturer-recommended fuel pump relays for best compatibility.
- Inspect relay contacts and socket annually for corrosion and wear.
- Keep relay terminals clean and apply dielectric grease to prevent moisture damage.
- Avoid electrical overloads by not upgrading fuel system components without proper relay and wiring upgrades.
- Replace relays proactively every 5 years or 60,000 miles under normal operating conditions.
- Ensure proper installation and fit to prevent vibration damage.
Replacing fuel pump relays as part of regular maintenance reduces the chance of unexpected failures. A typical proactive replacement interval is every 5 years or about 60,000 miles, whichever comes first. Vehicles used in harsher conditions, such as extreme heat or frequent short trips, may require earlier relay replacement. When installing a new relay, verify the relay number matches the OEM part exactly. Testing the relay before installation confirms it is functioning and prevents unnecessary downtime.
Voltage drops caused by loose or corroded terminals or wiring faults can mimic relay failure symptoms, so following correct troubleshooting steps is key. Preventing fuel pump relay failure saves money by reducing unnecessary fuel pump replacements and diagnostic expenses. Monitoring relay condition and using proper components ensures your fuel system remains reliable and efficient for years.
When to Seek Professional Help for Fuel Pump Relay Problems
Calling a professional for fuel pump relay issues makes sense when your troubleshooting reaches the limits of basic tests or when symptoms suggest complex electrical problems. Skilled technicians have the advanced tools and experience needed to trace faults beyond the relay itself. They also help avoid unnecessary parts replacement and ensure accurate diagnosis for a lasting repair.
Indicators That You Need Professional Diagnostics
You should seek professional help if simple relay tests with a multimeter or swap tests don’t solve the problem. Persistent starting difficulties, intermittent power loss, or electrical shorts can signal wiring or control module faults that go beyond the relay. When your car’s fuel system warning light stays on despite relay replacement, a professional diagnostic approach is necessary.
Another clear sign is inconsistent relay click sounds when the key turns, especially if you can’t detect clear voltage signals at the relay terminals during your tests. Professionals use specialized tools that can check relay coil resistance while simulating ECU commands, detecting subtle faults you can’t see with basic meters.
Advanced Electrical Troubleshooting Techniques
Experienced technicians use automotive diagnostic scanners able to read live fuel pump circuit data, voltage drops, and relay activation signals. Oscilloscopes can monitor relay coil voltage waveforms to reveal intermittent faults caused by worn contacts or wiring shorts. These methods require specific equipment and training beyond a home toolkit.
Technicians may perform controlled load tests on the relay circuit, measure current draw at the fuel pump, and inspect grounding points for resistance issues. They also access manufacturer wiring diagrams to verify signal timings from the ECU to the relay and relay output to the fuel pump. Such complete analysis locates causes hidden to simple continuity or voltage checks.
Typical Costs and Repair Expectations
Professional diagnostic services for fuel pump relay and related electrical faults usually range from $100 to $150. This fee covers electrical testing and thorough circuit analysis using advanced tools. The cost may vary by region, vehicle type, and the complexity of the problem discovered. Some shops apply this fee toward parts replacement if you proceed with their repair service.
Fuel pump relay replacement itself is generally straightforward and does not involve ECU reprogramming, keeping parts costs and labor relatively low. However, if diagnostics reveal wiring harness damage or ECU faults, repairs can be more time-consuming and expensive. Good repair outcomes depend on precise fault location and proper parts use, preventing repeat fuel system failures.
Never ignore warning signs like no relay clicking or persistent fuel issues after replacement, early professional diagnosis prevents costly downstream damage in the fuel system.
Step-by-Step Action Plan for Testing Your Fuel Pump Relay
Follow these steps to quickly check your fuel pump relay and confirm if it’s causing your fuel delivery issues.
- Before beginning: Use your vehicle’s owner’s manual or fuse box label to find the fuel pump relay. Identifying its exact location simplifies the testing process and prevents mistakes.
- Preparation: Disconnect the relay from the socket carefully to prevent damage. Visual inspection can reveal obvious signs like corrosion or burnt marks.
- Testing with a multimeter: Use the continuity or resistance setting to check the relay’s coil and switch terminals as shown in your manual. Correct readings typically mean the relay is functional.
- Testing without a multimeter: Swap your relay with an identical one in the fuse box. Start the engine; if the problem disappears, the relay is likely faulty.
- Next action: Check for fuel pump operation by listening for a humming sound or feeling fuel pressure at the rail. This confirms the relay successfully powers the pump.
- Confirm with OBD2 scan: Use a scanner to read any fuel system trouble codes that might point to relay or pump problems.
- Post-test maintenance: Clean connections as needed and reassemble carefully. Keep relay contacts dry and free from debris to extend relay life.
Frequently Asked Questions
How to Check If Fuel Pump Relay?
Listen for a 2-3 second fuel pump hum when turning the key to “ON” without starting the engine; no sound often means the relay or circuit failed. Swapping with a similar relay and checking for 12V at the pump can confirm the issue.
What Are the Symptoms of a Bad Fuel Pump Relay?
Symptoms include no start, stalling after heat or vibration, weak engine performance, no pump sound, or a pump that stays on constantly. These mimic fuel pump problems but originate from relay or wiring faults.
Is It Possible to Bypass a Fuel Pump Relay?
Bypassing a fuel pump relay is generally unsafe and not recommended since it bypasses important safety circuits, risking fuel delivery control and potential fire hazards. Use proper relay testing and replacement instead.
How to Start a Car with a Bad Fuel Pump Relay?
Starting a car with a bad relay isn’t practical; temporary fixes might involve jump-starting the relay circuit, but this risks damage and should only be attempted in emergencies with caution.
Why Is the Fuel Pump Relay Not Getting Power?
The relay may not get power due to blown fuses, faulty wiring, or issues in the vehicle’s control modules that interrupt the fuel pump circuit’s power supply.
Can Swapping Relays Test Fuel Pump Relay Issues?
Yes, swapping the fuel pump relay with a similar relay from another circuit can quickly identify relay faults before further testing.
The Bottom Line
Testing your fuel pump relay helps diagnose whether it is the cause of your fuel delivery problem. Taking the correct steps ensures you avoid unnecessary replacements and costly repairs. Start by locating your relay and performing a simple swap test if you don’t have tools. Confirm results with sound or pressure checks before moving on. This targeted approach saves time and gives you confidence in your next diagnostic move.