How to Paint a Fiberglass Tonneau Cover: A Complete Guide for Durable, Smooth Finishes
How to paint a fiberglass tonneau cover starts with thorough surface preparation, choosing compatible primer and paint, and applying multiple light coats for durability. Proper sanding removes imperfections and improves paint adhesion. Starting with clean, dry surfaces ensures a smooth, lasting finish that resists cracking and peeling.
Key Takeaways
- Use a high-quality epoxy or urethane primer specifically designed for fiberglass surfaces to ensure strong adhesion.
- Sand the cover with 220-320 grit sandpaper after primer dries to create a smooth surface for paint.
- Apply paint in several thin, even coats from 10 to 12 inches away to prevent runs and uneven finish.
- Allow 24 to 48 hours for curing before handling or reinstalling the tonneau cover for optimal durability.
- Protect hardware and hinges with masking tape or plastic sheeting before painting to avoid damage.
- Use 100% mineral spirits to clean the cover after staining or sanding but before painting to remove residues.
Step-By-Step Process to Paint a Fiberglass Tonneau Cover

Painting a fiberglass tonneau cover requires careful preparation and gradual application of primer and paint to ensure a smooth, durable finish. First, make sure the cover is clean and dry. Light sanding before priming improve adhesion. Use an appropriate primer and paint designed for fiberglass. Multiple thin coats spaced with enough drying time between them help avoid runs and drips. A proper finish not only looks professional but protects against UV damage and moisture. Follow these step-by-step instructions for the best results:
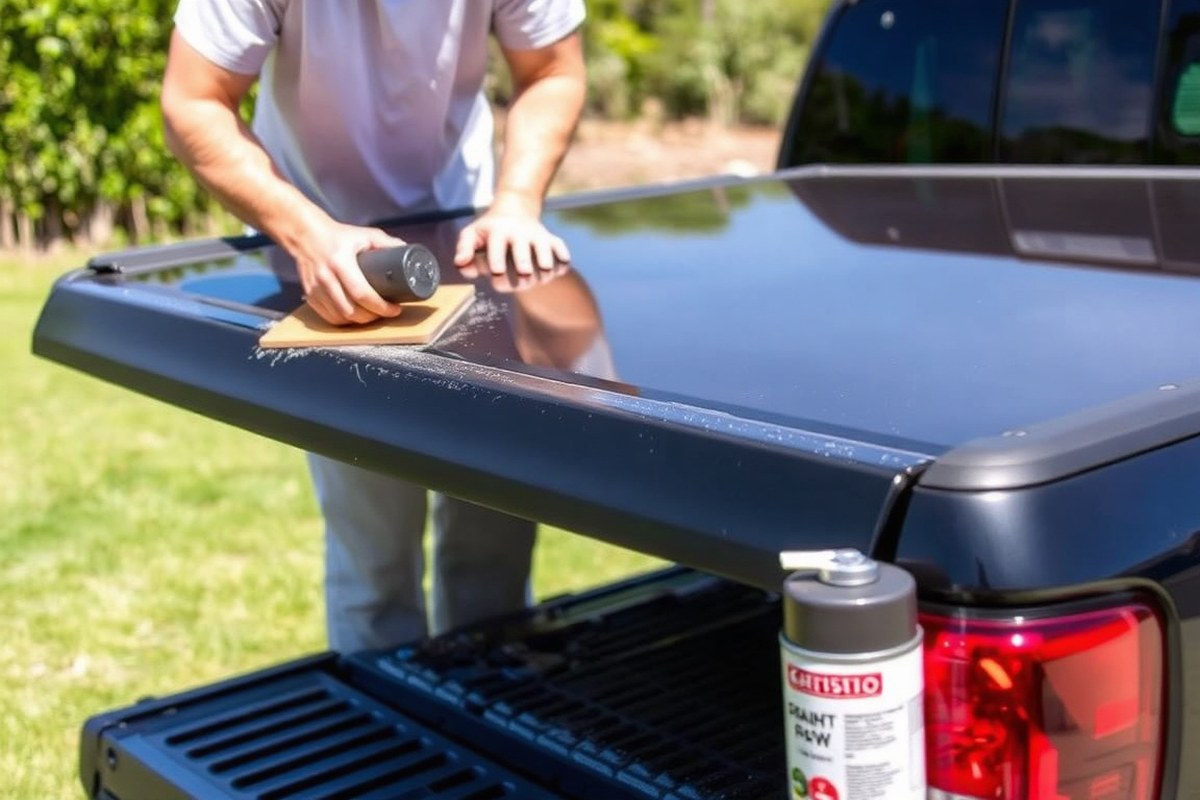
- Clean and sand the surface. Wash the tonneau cover thoroughly to remove all dirt, grease, and wax. Let it dry completely. Then sand lightly with 320 to 400 grit sandpaper to dull the surface and improve paint adhesion. Wipe away dust with a tack cloth or damp microfiber towel. This step typically takes about 30 to 60 minutes.
- Apply a fiberglass-compatible primer. Use a spray primer made specifically for fiberglass surfaces. Hold the spray can or gun about 10 to 12 inches away and apply light, even coats. Apply two to three coats of primer, allowing 15 to 30 minutes of drying time between coats, or follow the manufacturer’s directions. The primer sets the foundation for paint to stick properly.
- Lightly sand the primed surface. After the primer dries completely (usually 1 to 2 hours), sand gently with 400 to 600 grit sandpaper to smooth out any imperfections. Clean off sanding dust thoroughly before proceeding. This step helps ensure a smooth final paint layer.
- Spray multiple coats of paint. Apply the paint in thin, even layers from 10 to 12 inches away, using a light spray technique to avoid runs. Allow each coat to dry about 20 to 30 minutes before applying the next. Three to four coats are typical for good coverage and durability. Use paint formulated for automotive or marine fiberglass applications for weather resistance.
- Let the paint cure fully. After the final coat, let the paint cure for at least 24 hours in a dust-free, well-ventilated area. Avoid handling the cover during this time to prevent blemishes. Full curing can take longer depending on temperature and humidity.
- Apply a protective clear coat (optional). For extra gloss and protection from UV rays and scratches, spray a clear automotive-grade polyurethane topcoat in two or three thin coats. Allow 30 minutes of drying time between coats and 24 hours curing after the last coat.
Following these steps ensures a professionally finished fiberglass tonneau cover with long-lasting protection. Drying times vary depending on temperature, humidity, and product specifications, so always check the instructions on the paint and primer you choose. Light sanding between coats and a steady spray technique strongly improve the final appearance and durability.
Choosing the Right Paint and Primer for Fiberglass Tonneau Covers

Choosing the right paint and primer is essential for ensuring strong adhesion and lasting weather resistance on your fiberglass tonneau cover. Fiberglass surfaces need coatings formulated to bond well with composite materials and withstand UV exposure, moisture, and temperature changes common in outdoor truck use.
Spray paints designed specifically for composites, such as Krylon H2O, stand out because they offer excellent durability and direct adhesion to foam and fiberglass. This paint reduces peeling and flaking risks, which are common with ordinary paints not made for composite surfaces. Using a suitable primer is necessary to create a smooth, bonding base that improve paint adhesion and extends the finish’s life, especially under harsh weather conditions.
Primers formulated for fiberglass often contain adhesion promoters and flexible resins that accommodate the slight surface movement of fiberglass. A high-quality primer also helps protect the surface from moisture infiltration, which can degrade the fiberglass over time. Both primer and paint should be UV-resistant to prevent fading and chalking.
Some common consumer spray paint brands like Rustoleum are popular but may not perform as well on fiberglass without a compatible primer. Rustoleum has primer and paint lines for plastic and composite surfaces, but Krylon H2O is generally better formulated for foam and fiberglass with superior weather resistance. For best results, pair products designed for composite materials rather than generic auto paints or household sprays.
| Product | Type | Durability | UV Resistance | Finish Options | Best Use Case |
|---|---|---|---|---|---|
| Krylon H2O | Spray Paint for Composites | High | Excellent | Flat, Satin | Fiberglass and foam surfaces on tonneau covers |
| Rustoleum Painter’s Touch 2X Primer | Adhesion Primer | Moderate | Good | Flat | Prepping plastic or composite surfaces before topcoat |
| Rustoleum Universal All Surface Primer | Multi-surface Primer | Moderate | Good | Flat | Many surfaces, including fiberglass (with proper prep) |
| Automotive Flexible Acrylic Primer | Flexible Primer | High | Excellent | Flat, Satin | Outdoor fiberglass requiring flexibility and weather resistance |
Select primer based on how flexible and weather-resistant it is, as fiberglass expands and contracts with temperature changes. If your cover sees strong sun exposure, prioritize UV resistance to avoid color fading. For best adhesion, clean the fiberglass and lightly sand the surface before applying primer. Let the primer dry fully, usually 30 minutes to 1 hour, before painting with your chosen composite-friendly spray paint.
Use 100% mineral spirits to clean your surface before priming and painting, avoiding generic paint thinners that can leave residues and affect adhesion.
Preparing Your Fiberglass Tonneau Cover Surface for Painting
You should never paint directly over fiberglass without preparation. Proper cleaning, sanding, and priming ensure the paint sticks well and gives a smooth, even finish that lasts. Skipping these steps can lead to peeling, rough texture, or uneven color.
Cleaning Techniques for Fiberglass
Start by removing dirt, grease, and wax from the cover’s surface. Use 100% mineral spirits applied with a clean cloth to thoroughly clean the fiberglass, since this solvent removes oils that interfere with paint adhesion. Avoid water or soapy detergents at this stage because they can leave residues that block primer bonding.
After wiping with mineral spirits, let the cover dry completely at room temperature (70°F to 80°F) for at least 30 minutes. This step is essential to avoid trapping moisture beneath the paint, which causes bubbling and peeling later.
- Clean rag or lint-free cloths
- 100% mineral spirits
- Gloves to protect your skin
- Brush or compressed air for dust removal
- Dry, dust-free workspace
Once the surface is dry, use a brush or compressed air to clear away any dust or particles before sanding.
Sanding Grits and Methods
Light sanding provides a mechanical key for the primer to grip the fiberglass surface. Begin with 180-grit sandpaper to smooth any rough spots or gloss from the gel coat layer. Make sure to sand evenly over the entire cover to avoid visible lumps after painting.
After the initial sanding, follow with a finer grit of 320 to 400 to refine the surface and remove 180-grit scratches. Sand by hand or use a random orbital sander with moderate pressure. Over-sanding can expose fiberglass fibers or cause low spots that show through paint, so keep sanding consistent and gentle.
- Start with 180-grit sandpaper for initial smoothing
- Use 320 to 400-grit to refine the surface
- Sanding by hand near edges to avoid gouging
- Work in a well-ventilated area to reduce dust inhalation
- Remove all sanding dust with a tack cloth before priming
Maintain moderate sanding pressure to keep the cover’s surface flush and to prevent cutting into edges or contours.
Protecting Hardware and Edges
Before painting, cover any clamps, rails, or hardware with painter’s tape and plastic sheeting to protect them from primer and paint overspray. Apply tape carefully along edges to maintain the clean, flush lines of the cover’s top surface. The cold cut method helps create chip-free edges, preserving the smooth appearance after painting.
Handle edges gently during sanding to prevent damage to the cured fiberglass. Use fingertip sanding with fine-grit paper near corners and sharp edges. Damage to edges can cause paint to peel prematurely or look uneven, so take your time and check frequently for chips or cracks.
- Painters’ tape for hardware and edges
- Plastic sheeting or paper to cover clamps and rails
- Gentle sanding with fine grit near curves and corners
- Inspect edges after sanding for chips or rough spots
- Keep edges flush and smooth for a professional finish
Common Painting Mistakes and How to Avoid Them
Common painting mistakes on fiberglass tonneau covers usually cause peeling, bubbling, or poor adhesion that ruins the finish and shortens durability. Avoiding these problems depends mostly on surface prep, correct paint choice, and applying coatings in the right conditions. Fixing paint defects requires careful repair steps to restore a lasting finish.
Skipping Proper Surface Preparation
Paint adherence depends heavily on cleaning and sanding the fiberglass cover thoroughly before you paint. Dirt, wax, or old peeling paint create a barrier that leads to bubbling or delamination. Use a degreaser or isopropyl alcohol to clean the surface, sanding it with 320- to 400-grit sandpaper to provide texture for the new paint to grip. Rinse well and allow the cover to dry completely, since moisture trapped under paint promotes bubbling and peeling.
Failing this, the paint will often lift within weeks, requiring rework. Spend the extra hour preparing your cover for a professional result that lasts years outdoors.
Ignoring Environmental Conditions During Painting
Painting fiberglass in temperatures below 50°F or above 85°F can cause poor drying, uneven curing, and visible defects. High humidity over 70% also leads to bubbling and cloudiness. Applying paint in direct sunlight causes premature drying and adhesion problems. Aim to paint in mild temperatures around 65, 75°F and 40, 60% humidity.
Use a clean, dust-free, and well-ventilated spot. Paint in several thin coats instead of one thick layer. Each coat should dry 10 to 15 minutes before recoating to avoid runs or sagging.
Applying the Wrong Paint or Primer
Use a primer designed specifically for fiberglass and a topcoat formulated for outdoor durability, such as marine spar urethane for UV and moisture resistance. Paints that do not flex with fiberglass can crack and peel. Avoid oil-based paints unless fully cured for at least 72 hours before priming and painting, as uncured solvents trap moisture or cause poor bonding.
Multiple thin coats of quality marine varnish or urethane provide a longer-lasting finish compared to spray paints or automotive paint without suitable UV inhibitors. Follow manufacturer mixing ratios closely. For example, mixing epoxy resin at a 4:1 ratio of resin to hardener ensures optimal cure and adhesion.
Common Painting Mistakes and How to Fix Them
Here are frequent painting errors you should avoid and how to fix them if they occur:
- Painting over glossy or old paint without sanding: Sand the surface smooth and clean before repainting to ensure new layers bond properly.
- Applying thick coats quickly: Re-sand lightly and apply multiple thin coats for an even finish without runs or bubbles.
- Ignoring bubbling or peeling early signs: Remove the affected paint area with sandpaper, clean the substrate, and reapply primer and paint gradually.
- Not allowing sufficient curing time: Let oil-based primers and paints cure 72 hours minimum; faster painting leads to delamination.
- Painting in poor weather: Wait for suitable temperature and humidity conditions to avoid defects.
Fixing defects requires patience and every step of surface prep, priming, and painting repeated carefully. Spot repairs on a modular tonneau cover can be done on one section at a time without removing the whole panel.
Painting over an Already Painted Fiberglass Cover
It is safe to paint over an existing painted fiberglass cover if you prepare the surface correctly. Begin by inspecting the current paint for cracks, flaking, or peeling. Remove any loose or compromised paint entirely by sanding with 320-grit sandpaper. After sanding, clean the surface with a degreaser or isopropyl alcohol to remove dust and oils.
Apply a fiberglass-compatible primer over the sanded surface. Use thin coats and allow full drying before adding your new paint. Avoid painting over glossy surfaces without dulling them first. Following these steps improve adhesion and prevents peeling. Periodic maintenance, such as washing the tonneau cover with mild soap and rinsing after exposure to road salt or chemicals, helps protect the painted surface over time and prevents early wear or bubbling.
Safety Precautions and Tools Needed for Painting Fiberglass Covers
Painting a fiberglass tonneau cover safely and effectively requires the right protective gear and tools. Fiberglass dust and paint fumes can irritate your skin, eyes, and lungs, so you need to protect yourself with proper safety equipment. Before you start, gather all necessary tools and materials to avoid interruptions during your project.
To keep yourself safe, use personal protective equipment (PPE) that covers your respiratory system, eyes, and skin. This includes a high-quality respirator mask rated for organic vapors and dust, chemical-resistant gloves, and safety goggles or a full-face shield. Wear long sleeves and pants to protect your skin from paint and sanding dust.
- Respirator mask rated for paint fumes and dust (N95 or higher with organic vapor cartridges)
- Safety goggles or a full-face shield
- Chemical-resistant gloves (nitrile or latex)
- Sanding block or electric sander with fine-grit sandpaper (320 to 400 grit)
- Tack cloth or microfiber cloths for wiping dust and debris
- High-quality spray gun or aerosol spray paint designed for fiberglass
- Drop cloth or plastic sheeting to protect surrounding areas
Setting up your paint area requires good ventilation to avoid buildup of toxic fumes. Choose a well-ventilated garage or outdoor space sheltered from wind and dust. Open windows and doors to allow fresh air to circulate. Use fans to push fumes away from your breathing zone. Avoid painting inside a closed vehicle or small, enclosed room as fumes can concentrate quickly and pose health risks.
Cover any nearby surfaces with drop cloths to capture overspray and keep your workspace clean. Ensure you have adequate lighting so you can see coverage clearly without straining your eyes. Work during mild weather, preferably between 60°F and 80°F, which is the ideal range for paint adhesion and drying on fiberglass.
Never skip wearing a respirator when sanding or spraying paint on fiberglass; inhaling dust or fumes can cause serious respiratory issues.
Investing $20 to $50 in proper safety gear and tools protects your health and improves the finish quality of your painted tonneau cover. If you must paint indoors, using a portable fume extractor or spraying in a professionally ventilated booth is safer but usually not necessary for DIY projects.
How Weather and Maintenance Impact Your Painted Tonneau Cover
Sunlight, rain, and temperature changes can affect the longevity and look of your painted fiberglass tonneau cover. Ultraviolet (UV) rays from the sun can cause paint to fade and lose gloss over time. Prolonged exposure to sunlight breaks down the paint’s protective layer, leading to chalking and color dullness. Rain and moisture, especially if the paint surface develops cracks, can seep in and cause the fiberglass underneath to degrade or swell. Temperature swings, such as freezing winters and hot summers, may cause the paint to expand and contract, increasing the risk of cracking or peeling.
Maintaining your painted tonneau cover starts with routine cleaning to remove dirt, grime, and environmental contaminants that can wear down the paint. Use a mild automotive soap mixed with water and a soft cloth or sponge to clean the surface at least once a month, or more often if you drive in dusty or salty environments. Avoid harsh detergents, abrasive pads, or strong solvents that can strip the finish. After rinsing thoroughly, dry the cover with a microfiber towel to prevent water spots.
Waxing is highly recommended to protect the painted surface and maintain its shine. Apply a high-quality automotive wax specifically formulated for painted surfaces every three to four months. Wax forms a protective barrier against UV rays, moisture, and pollutants, slowing down paint degradation. To wax, spread a thin layer of product with a foam applicator, let it haze according to the instructions, and buff it off with a clean microfiber cloth. Avoid waxing under direct sunlight or on a hot surface, as it can cause streaking or spotting.
Besides regular cleaning and waxing, inspect your cover seasonally for chips, cracks, or peeling paint. Address any small imperfections with touch-up paint to prevent moisture from reaching the fiberglass. During winter, quickly remove snow and ice buildup to reduce freeze-thaw damage. When parking for extended periods in strong sunlight, consider using a breathable tonneau cover or a vehicle cover to block UV exposure.
By sticking to this maintenance routine, your painted fiberglass tonneau cover should retain its glossy look and protective qualities for several years. Neglect can lead to premature fading, cracks, and the need for costly repainting or repairs. Keeping a cleaning kit with automotive soap, microfiber towels, and wax handy helps make these upkeep tasks simple and effective.
How Long Does Painting and Curing a Fiberglass Tonneau Cover Take?
Painting and curing a fiberglass tonneau cover is a multi-step process that typically takes several days to complete properly. Each stage of drying and curing has its own ideal timeframe, which affects the final durability and finish quality. Rushing any of these steps can lead to problems like peeling, cracking, or uneven colour.
After applying a coat of primer, wait at least 24 hours before adding the next coat or switching to paint. This delay allows the primer to partially dry and accept the paint without lifting. For best results, waiting 72 hours between coats helps the primer fully cross-link and cure, which strengthens its bond to the fiberglass surface. Similarly, paint coats require about 24 to 72 hours between applications, depending on product recommendations and environmental conditions.
The complete curing time for the painted tonneau cover typically ranges from 7 to 14 days at room temperature (70°F). Curing means the paint system fully hardens through a chemical process, not just surface drying. This step ensures the cover’s paint can handle regular use, weather exposure, and folding without damage. Handling or installing the cover before paint cures can cause fingerprints, scratches, or adhesion failures.
Temperature and humidity impact drying and curing speed significantly. Higher temperatures near 80°F and low humidity below 50% speed up drying and curing times. Cooler temperatures below 60°F or high humidity above 70% slow the process and increase the risk of moisture trapping, which can cause bubbles or uneven texture. Allow extra drying and curing time in cooler or humid conditions to avoid these issues.
Exact timing varies by paint brand and product type, so always follow the label instructions for drying and curing times. For example, some polyurethane paints may dry to the touch in 6 hours but still need a full week to cure completely. Oil-based paints usually take longer than water-based alternatives. Aggressive drying methods, like heat lamps or forced air, can speed drying but might result in uneven curing.
Properly cured paint on your fiberglass tonneau cover will feel smooth, hard, and resistant to most scratches. It should flex slightly without cracking, which is important because folding tonneau covers flex during use. If you notice tackiness, softness, or excessive dust attraction after the recommended curing period, the paint likely needs more time to cure.
Waiting between coats and for full curing adds time to a DIY painting project but ensures a professional-quality, durable finish. Cutting corners shortens paint life and may require costly repairs or repainting. Plan your project timeline with at least a week for complete curing after the last paint coat, considering your local temperature and humidity conditions.
Tips for Painting Different Colors and Protecting Hardware on the Cover
Painting a fiberglass tonneau cover white or black is straightforward when you follow specific preparation and application techniques. Protecting your cover’s hardware during painting prevents damage and ensures a clean finish. Using the right methods helps avoid color inconsistencies and preserves moving parts like hinges and latches.
Best Practices for White and Black Paint
White paint highlights any imperfections on a surface, so thorough sanding and cleaning before painting are essential to achieve a smooth look. Use a high-quality white primer designed for fiberglass to prevent yellowing and promote paint adhesion. Applying multiple thin coats of white paint rather than one thick coat reduces streaks and improves coverage.
Black paint tends to show dust and fingerprints easily, so working in a clean, dust-free space is critical. Black usually offers better hiding power, requiring fewer coats than white. Choose a black paint with UV-resistant properties to protect the cover from fading under sunlight. For both colors, use spray equipment or aerosol cans to apply even coats, holding the nozzle 8 to 12 inches from the surface.
Masking Hardware and Edges
Your tonneau cover has hinges, seals, and latches that should stay paint-free to work properly and maintain their seal. Cover these areas carefully with high-quality painter’s tape and thin plastic sheeting or masking paper. Avoid using low-grade tape that can leave adhesive residue or peel away paint when removed. Follow this hardware masking checklist:
- Apply painter’s tape along all hinge edges and around latch mechanisms
- Cover any rubber seals fully with tape and plastic wrap
- Use masking paper to protect larger hardware areas and truck bed edges
- Press tape firmly to ensure no paint seeps underneath
- Remove tape within one hour after the final coat dries to avoid paint peeling
Masking properly minimizes cleanup time and prevents hardware malfunction caused by paint buildup.
Avoiding Color Streaks and Uneven Spots
Achieving an even paint finish requires steady, overlapping passes. Apply each coat with a consistent speed and distance from the surface to avoid heavy spots or thin patches. When using white paint, especially, uneven application can leave noticeable streaks or shadowing. Keep these tips in mind to maintain color uniformity:
- Spray in long, smooth strokes running parallel to the cover’s length
- Overlap each pass by about 50% to blend edges
- Allow recommended dry time between coats, usually 15 to 30 minutes for spray paints
- Sand lightly with fine-grit paper between coats to smooth any raised texture
- Use multiple thin coats rather than one thick coat to reduce drips
Applying too much paint at once often leads to runs and uneven coverage that are hard to fix without sanding and repainting.
Step-by-Step Action Plan for Painting Your Fiberglass Tonneau Cover
Follow these steps to paint your fiberglass tonneau cover and achieve a durable, professional finish at home.
- Day 1: Prepare the surface, Clean the cover thoroughly with soap and water, then sand it with 320-grit sandpaper. The surface should feel smooth and free of dirt or grease when done.
- Day 2: Apply primer, Use a bonding primer made for fiberglass, spraying in even coats. Wait for the primer to dry fully, usually 24 hours, ensuring no tackiness remains.
- Day 3: Sand the primer, Lightly sand the primed surface with 400-grit sandpaper to remove any rough spots. The primer should feel smooth to the touch before painting.
- Day 4: Paint the cover, Spray 2 to 3 thin coats of automotive-grade acrylic urethane paint, allowing 10-15 minutes between coats. The paint should look even and cover the primer fully.
- Day 5: Protect hardware, Use masking tape or plastic covers to shield hinges and locks before painting to avoid damage. Remove coverings carefully once the paint cures.
- Days 6-7: Let the paint cure, Allow 48 to 72 hours for the paint to fully harden at temperatures above 60°F with low humidity. The paint should feel hard and not tacky.
- Day 8: Apply a clear coat (optional), For extra protection and shine, spray a clear automotive urethane coat in 2 even layers. Let it cure 48 hours before using the cover.
- After 2 weeks: Maintain your cover, Wash the cover regularly with gentle soap and avoid harsh chemicals to preserve the paint. Inspect it monthly for chips and touch up as needed.
Frequently Asked Questions
Can You Paint a Fiberglass Tonneau Cover Yourself?
Yes, you can paint it yourself by properly preparing the surface, using the right primer and paint designed for fiberglass, and following a careful application and curing process to ensure durability and a smooth finish. Proper preparation and patience are key to professional results.
What Kind of Paint Sticks Best to Fiberglass Tonneau Covers?
Acrylic urethane or automotive-grade epoxy paints stick best to fiberglass, providing flexibility and resistance to cracking. These paints bond well after proper priming, maintaining the toneau cover’s durability and appearance under outdoor conditions.
Can You Paint Directly over Fiberglass Without Primer?
No, priming is essential because primer creates a strong bond between the fiberglass and paint, which prevents peeling and improves paint adhesion. Skipping this step may result in uneven coverage and peeling.
Will Rust-Oleum Paint Adhere Well to a Fiberglass Tonneau Cover?
Rust-Oleum can work if you choose the right variant made for plastic or fiberglass and apply suitable primer first. Always test a small area to check adhesion before painting the entire cover.
How Long Should You Wait Before Using Your Truck After Painting the Tonneau Cover?
Wait at least 24 to 48 hours for paint curing, depending on the paint type and weather conditions, to avoid damaging the finish. Cooler, humid weather can increase drying time.
What’s the Best Way to Avoid Paint Runs and Drips on a Tonneau Cover?
Apply several thin, even coats rather than one thick coat to avoid runs and drips. Use a spray gun or aerosol designed for fiberglass for the most consistent finish.
Key Points to Remember
Painting a fiberglass tonneau cover yourself can save money and improve your truck’s look when done carefully. Choose the right materials, work patiently through each step, and protect the cover during cure time. Start today by prepping your cover’s surface to set the foundation for a long-lasting finish you’ll be proud of.