How to Tell My Spark Plugs Is Old or New: 8 Clear Signs and Inspection Steps
You can identify old versus new spark plugs mostly by examining their appearance and the space between the electrodes. Worn plugs typically display signs of wear, buildup, or damage, while new ones remain clean with a gap set precisely by the maker. Recognizing spark plug age helps vehicle owners keep engines running efficiently and smoothly.
This information suits car owners and DIY enthusiasts who want to inspect their spark plugs confidently and avoid common engine problems caused by worn plugs. You’ll learn simple steps to identify plug condition and understand when replacement is necessary to keep your engine running properly.
Key Takeaways
- Inspect spark plugs every 30,000 miles or as your vehicle manual recommends to catch wear early.
- Look for visible signs of wear like carbon deposits, burned electrodes, or cracked insulators to spot old plugs.
- Check the electrode gap, as new spark plugs have a designated distance ranging from 0.028 to 0.060 inches based on the engine’s requirements.
- Check for uneven electrode wear or buildup which indicates your plug isn’t firing efficiently.
- Engine misfires, rough idling, and poor acceleration often signal spark plug aging or fouling.
- Use a spark plug gap tool to verify the gap matches manufacturer specs before installation.
1. How to Visually Identify Old vs New Spark Plugs

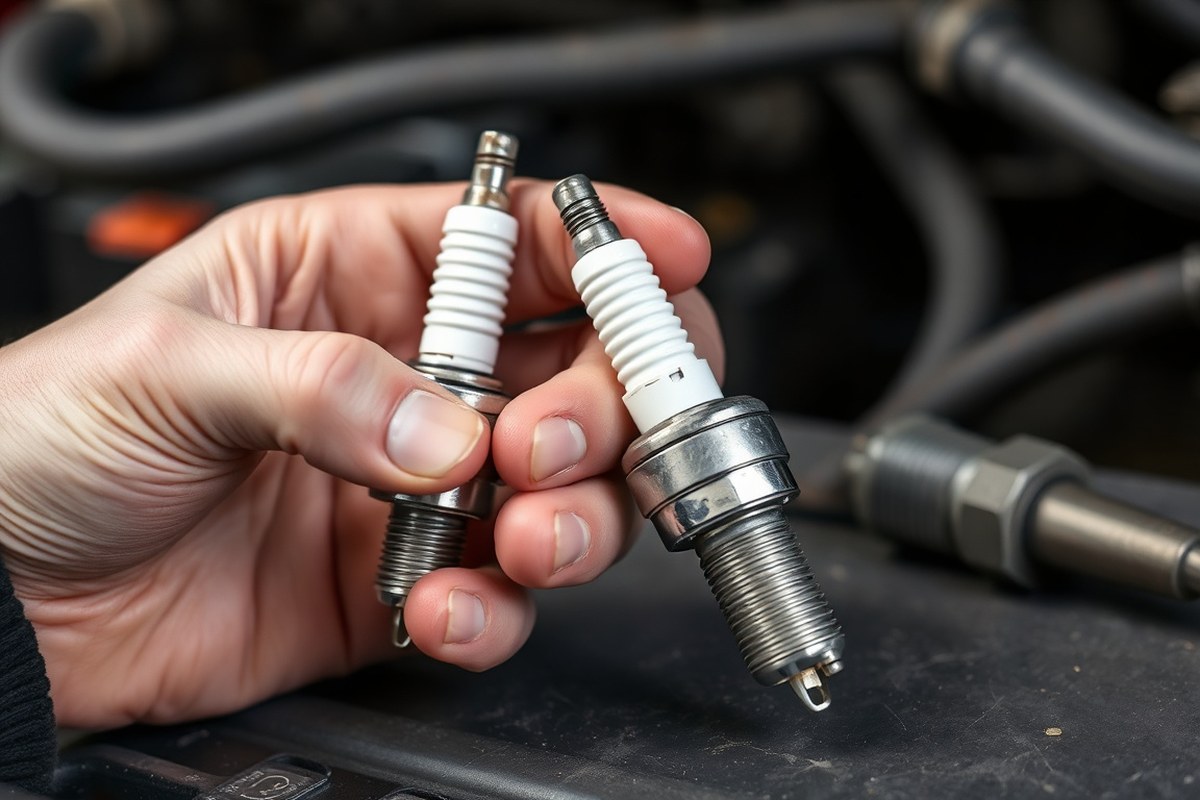
New spark plugs have a clean, shiny appearance with sharp, well-defined electrode edges and smooth, white ceramic insulators. The electrodes are free from any deposits or corrosion. Over time, spark plugs wear down as the electrode tips become rounded or eroded due to the constant sparking and high temperatures inside the engine.
Old spark plugs usually show several clear signs that indicate wear or fouling. The electrodes become dull and sometimes uneven in shape. You might observe black, sooty carbon deposits on the electrode and insulator if the engine is running rich or burning oil. White, blistered discoloration can signal overheating, while oily deposits point to oil leakage in the combustion chamber. Cracks in the ceramic insulator are also a sign of an aged or damaged plug. Visually inspecting spark plugs after removing them one at a time with a spark plug socket wrench provides the most reliable method of determining their condition. Here are key visual cues to check:
- Sharp electrode tips suggest the spark plug is new and ready for dependable use.
- Rounded or eroded electrode edges signal that the plug is worn and likely needs replacement.
- A clean surface without deposits indicates the spark plug is in good condition.
- Black soot or oily deposits mean the plug is fouled, affecting engine performance.
- White or blistered insulator tips usually point to overheating issues.
- Corrosion on the metal parts shows damage and potential ignition problems.
- Even electrode wear denotes balanced use but still needs monitoring over time.
| Condition | Visual Cue | Meaning |
|---|---|---|
| New Spark Plug | Sharp, clean electrode tips and white ceramic insulator | Ready for reliable ignition and peak engine performance |
| Worn Spark Plug | Rounded or eroded electrodes, dull metal | Reduced spark quality; replacement recommended |
| Fouled Spark Plug | Black carbon or oily deposits on electrode and insulator | Indicates poor combustion, possible engine issues |
| Overheated Spark Plug | White or blistered insulator tip | Signs of excessive engine temperature or incorrect heat range |
| Damaged Spark Plug | Cracked ceramic or corroded metal | Unsafe to use; must be replaced immediately |
Checking the condition visually takes only a few minutes but offers valuable insight into your engine’s health. Matching the part number on the new spark plug to the old one ensures you are comparing the correct type. A worn or fouled spark plug can cause misfires, poor fuel economy, hard starting, and other engine problems. Maintaining spark plugs with sharp electrodes and clean surfaces helps your engine run efficiently and smoothly, saving you time and repair costs in the long run.
2. Understanding Spark Plug Gap and What It Tells You

The spark plug gap is the space between the center and ground electrodes where the spark ignites the fuel-air mixture. Car makers specify a gap size for new spark plugs, generally between 0.028 and 0.060 inches based on the engine model. It’s important to inspect and adjust this gap since a gap that’s too large or small can reduce spark strength, decrease engine performance, or indicate a worn plug needing replacement.
How to Measure Spark Plug Gap Correctly
Measuring the spark plug gap requires a spark plug gap gauge or feeler gauge that matches the range of your plugs’ specifications. Use this tool to check the distance between the electrodes carefully without damaging the plug. Accurately measuring the gap helps you determine if the plug is still suitable or needs replacement due to wear or fouling.
- Use a spark plug socket attached to a ratchet and extension to carefully unscrew and take out the spark plug from the engine.
- Clean any dirt or deposits from the spark plug to get an accurate reading.
- Place the gauge blade or wire between the center and ground electrodes to measure the gap size.
- Slide the gauge back and forth gently to feel resistance; the plug gap should match the size where slight drag is felt.
- Note the gauge size if it passes through without resistance (gap too large) or does not fit (gap too small).
Only use a spark plug gap gauge designed for your plug type to avoid bending or damaging the electrodes during measurement.
Expected Gap Sizes for Common Spark Plug Types
New spark plugs usually come pre-gapped from the manufacturer, but the exact range varies by engine and plug model. For passenger vehicles, the gap commonly ranges from 0.028 to 0.060 inches. Your vehicle’s owner manual lists the exact gap size needed to maintain strong ignition and combustion.
As spark plugs age, the electrode gap tends to widen. Normal wear gradually erodes the electrodes, increasing the gap beyond spec, which causes weaker sparks and misfires. A gap larger than the recommended range typically means the plugs are old or worn out and should be replaced to restore engine performance.
When and How to Adjust the Spark Plug Gap
Adjust the gap before installing new or reused spark plugs if it does not match your engine’s specifications. Narrowing or widening the gap can restore spark strength, but repeated adjustments and excessive gaps indicate it is time to replace the plug. Use a gap tool to bend the ground electrode carefully without touching the centre electrode.
- Hold the spark plug firmly with the electrodes facing upward.
- Use the appropriate gap gauge wire to measure the current gap.
- To increase the gap, gently tap the ground electrode on a hard surface or use the gauge’s tool to bend it outward.
- To decrease the gap, press the ground electrode inward slowly using the gauge or a gap tool.
- Recheck the gap size frequently until it matches the recommended measurement precisely.
- Install the spark plug carefully to avoid bending the gap again.
Adjusting the gap too far from specifications can cause poor engine performance; only tweak the gap slightly to meet the required range.
3. Common Engine Symptoms Indicating Old Spark Plugs
Worn spark plugs often lead to engine issues like uneven idling, misfiring cylinders, and difficulty starting the vehicle. Such problems happen because old plugs can’t spark the fuel-air mix properly, reducing engine efficiency. Spotting these symptoms early lets you save fuel and prevent harm to your engine.
Rough Idle and Engine Misfire Symptoms
A rough idle feels like your engine is shaking or running unevenly when the vehicle is stationary. This happens when old spark plugs have worn electrodes that create weaker sparks, causing incomplete combustion. Engine misfires occur when the fuel does not ignite properly, resulting in jerking, hesitation, or a noticeable drop in power. These issues often emerge together and signal spark plug wear that needs attention.
Other common indicators include uneven RPM. When the spark plugs cannot fire consistently, engine speed fluctuates unpredictably, contributing to an unstable driving experience. Recognizing these symptoms early helps you avoid bigger engine problems later.
Impact of Old Spark Plugs on Fuel Economy
Worn spark plugs reduce your engine’s ability to burn fuel efficiently. This inefficiency leads to increased fuel consumption and higher emissions because unburned fuel escapes through the exhaust system. Drivers often notice a decrease in miles per gallon and sluggish acceleration before inspecting their spark plugs.
Regularly replacing spark plugs according to your vehicle manufacturer’s schedule keeps fuel efficiency optimal and prevents costly repairs. Ignoring spark plug wear can lead to misfires that waste fuel and may cause emission control systems to work harder, increasing your overall maintenance costs.
Warning Signs from Engine Diagnostic Codes
Modern vehicles use onboard diagnostics to detect misfires and ignition problems. When spark plugs wear out, the engine control unit may trigger codes like P0300 (random misfire) or P0301-P0308 (cylinder-specific misfires). These warning codes provide a clear prompt to check the spark plugs.
Listening for unusual engine noises or erratic performance accompanied by a check engine light can guide you toward spark plug inspection. Diagnostic trouble codes offer a precise method to identify which cylinder or cylinders are affected, helping you decide if replacing spark plugs will solve the issue.
| Symptom | Cause | Effect |
|---|---|---|
| Rough idle | Worn electrodes | Engine vibration |
| Engine misfire | Carbon buildup | Shaking and noise |
| Uneven RPM | Weak spark | Unstable engine speed |
Using this symptom table as a reference helps you connect what your engine is doing with potential spark plug issues. Understanding these causes and effects can save time and money by identifying worn plugs early and preventing damage to other parts of your vehicle’s ignition and fuel systems.
4. Tools and Safety Tips for Inspecting Spark Plugs
Before inspecting spark plugs, you need a few specific tools for safe removal and accurate examination. The main tool is a spark plug socket, usually with a rubber insert or magnet, that grips the plug securely without damaging it. Attach this to a ratchet or socket wrench, allowing you to loosen and remove plugs with controlled torque. Insulated tools are also recommended to reduce the risk of electric shock, especially if the ignition system hasn’t fully powered down. Also, a spark plug gap gauge might be helpful if you plan to measure the gap after removal.
Checking your spark plugs safely means waiting at least 30 minutes after turning off the engine, or longer after hard driving, to let parts cool down and prevent burns. Always disconnect the battery first to avoid electric shocks or accidental system activation. When removing spark plug wires or ignition coils, hold the boot firmly but carefully to avoid wire damage. Wear gloves and safety glasses, and work somewhere well-lit and ventilated to protect against debris and chemicals.
- Spark plug socket with rubber insert or magnet
- Ratchet or socket wrench with a long handle
- Insulated tools to reduce shock risk
- Spark plug gap gauge (optional)
- Gloves and safety glasses
- Battery terminal wrench to disconnect the battery
- Clean cloth to wipe plugs and engine parts
When removing spark plugs, use steady, moderate force on the wrench to avoid stripping the threads in the cylinder head. Spray some penetrating lubricant at the base of a stubborn spark plug and wait 15 to 20 minutes before attempting to remove it again. Avoid using excessive force or twisting at odd angles, which can break the ceramic insulator or damage threads, leading to costly repairs. After removal, handle the plug carefully to prevent electrode damage; inspect it on a clean surface to avoid losing small parts.
Organizing your workspace with all tools handy minimizes the time plugs are out of the engine, reducing contamination risk. Proper preparation also speeds the job and reduces frustration. Use a properly fitting spark plug socket; a loose one can damage the plug or threads, so switch to the correct size if it doesn’t fit tightly. Taking these precautions will help you remove and inspect your spark plugs efficiently, ensuring a safe and accurate assessment of their condition without causing injury or vehicle damage.
5. Step-by-Step Guide to Inspect Spark Plugs Properly
Properly inspecting spark plugs involves safely removing them without damage, carefully examining the electrode and insulator for signs of wear or deposits, and interpreting the findings to assess their condition. Following a precise routine helps you decide if the plugs are still good or need replacement.
Removing Spark Plugs Safely
Removing spark plugs requires caution to avoid damaging the plug or your engine components. Make sure the engine is cool before starting, as hot components can cause burns and affect the plug threads.
- Allow the engine to cool for at least 30 minutes to prevent burns and ensure safe handling.
- Disconnect the negative battery terminal to avoid electrical shocks or short circuits.
- Remove any engine covers or components blocking full access to the spark plugs.
- Use a spark plug socket attached to a ratchet with an extension to fit securely over the spark plug.
- Turn the ratchet counterclockwise gently; avoid excessive force to prevent stripping the threads.
- Once loosened, unscrew by hand and carefully pull out the spark plug straight to avoid damaging the electrode.
Never attempt to remove spark plugs while the engine is hot to reduce the risk of damaging the threads or receiving burns.
Inspecting Electrode and Insulator Condition
After removing the spark plugs, clean any loose dirt or grime gently with a soft brush before inspecting. Use a wire brush or spark plug cleaner only if carbon deposits obscure the electrode or insulator.
Look closely at the ceramic insulator and the electrodes. A new or good spark plug typically shows a white or light gray insulator with no cracks or color changes. The center and ground electrodes should be sharp and free of buildup.
Check for black, oily, or sooty deposits around the electrodes, which suggest incomplete combustion or oil fouling. Heat damage appears as blistering or melting on the electrodes or insulator.
Recording and Interpreting Wear Patterns
Take notes or photos of each spark plug’s condition to compare against manufacturer guidelines or standard wear patterns. Light tan or grayish deposits on the electrodes indicate good combustion and healthy spark plug function.
Thick black carbon deposits signal a rich fuel mixture or oil leakage. White, blistered deposits or cracked insulators suggest overheating and require plug replacement. Worn or rounded electrodes reduce spark efficiency and also mean it’s time to replace the plug. Organize your observations in a checklist to decide quickly if the spark plugs still perform well or need changing to maintain engine performance.
6. How Spark Plug Types Affect Wear and Inspection
Spark plug materials like copper, platinum, and iridium differ in how they wear and how often you should check or replace them. Copper plugs wear the fastest, usually around 20,000 to 30,000 miles, while platinum and iridium extend the timeline significantly. These differences affect inspection schedules and the signs you look for in worn plugs. Here’s a detailed look at common spark plug types, their lifespan, wear characteristics, and inspection tips:
| Type | Typical Lifespan (Miles) | Wear Signs | Inspection & Replacement Tips |
|---|---|---|---|
| Copper | 20,000 – 30,000 | Electrode erosion, heavy deposits, larger gap | Inspect every 15,000 miles. Replace promptly if electrode tip wears down, as combustion efficiency drops quickly. |
| Platinum | 60,000 – 100,000 | Minor electrode wear, light deposits | Inspect every 30,000 miles. Look for uneven electrode wear or fouling. Replace within 60,000 miles or per manufacturer. |
| Iridium | 90,000 – 100,000+ | Minimal wear, stable gap, slight deposits possible | Inspect every 40,000 miles for cleaning. Replace at 90,000 to 100,000 miles, or if misfires occur. |
Copper plugs wear faster because copper conducts heat well but is softer. That leads to quicker electrode erosion. Look for enlarged gaps and electrode shape changes when you inspect. Platinum plugs last much longer since platinum resists wear and corrosion better. They show slower gap changes and less build-up. Iridium, being even harder and more heat resistant, maintains its shape and gap more steadily.
The type of spark plug also guides how often you should inspect. Checking copper plugs every 15,000 miles helps catch wear early, while platinum or iridium require less frequent but still regular inspection, usually every 30,000 to 40,000 miles. Always inspect for deposits, cracks, or rough electrode edges regardless of type.
Special tips include avoiding cleaning tight gaps on iridium plugs since damaging the thin electrodes can reduce their lifespan. Instead, replace if fouled or worn. Copper plugs often benefit from cleaning because electrodes are thicker and less delicate but replace if erosion is severe. For platinum plugs, minor cleaning is acceptable, but replacements are recommended closer to the upper mileage limit.
Always replace spark plugs with the same type recommended by your vehicle manufacturer. Using the wrong type or neglecting inspection can reduce fuel efficiency and engine performance. Applying anti-seize compound on the threads helps prevent corrosion and makes future removal easier, especially important for longer-lasting iridium and platinum plugs.
7. Mistakes to Avoid When Checking Spark Plug Condition
One of the most frequent mistakes when checking spark plugs is misinterpreting normal wear as damage or vice versa. This can lead to unnecessary replacements or missed signs of failing plugs. To avoid this, compare the plugs against manufacturer guidelines for colour and electrode wear rather than guessing their condition. Taking photos and consulting your vehicle’s manual can help you make a more accurate judgment.
A frequent mistake occurs while measuring and adjusting the spark plug gap. Excessive pressure on the ground electrode can harm the spark plug or affect how it works. Use a dedicated spark plug gap tool and make adjustments slowly, aiming for the gap recommended for your engine, which typically falls between 0.028 and 0.060 inches based on the vehicle. Do not use low-quality or homemade tools, as they may produce inaccurate measurements.
- Don’t assume all plugs wear the same; check each one individually for consistent wear and fouling.
- Avoid touching the electrode with your fingers to prevent contaminating it with oils, which can affect spark quality.
- Never inspect plugs immediately after engine use; allow them to cool for at least 30 minutes to avoid burns and ensure accurate visual assessment.
- Don’t use excessive force when removing spark plugs to prevent thread damage; apply penetrating oil if plugs are difficult to unscrew.
- Check your gap with the vehicle off and the ignition set to avoid electrical shocks or damage to the ignition system.
- Always clean the plug’s surface gently with a wire brush or plug cleaning tool before inspection, but avoid harsh abrasives that wear down electrodes.
Visual checks can be skewed by dirt or oily deposits on the plugs, so cleaning is essential before making any judgements. Use a wire brush lightly and avoid any abrasive cleaners that can harm ceramic insulators. For engines running lean or rich, the plugs may exhibit different wear patterns, so know your engine’s normal spark plug conditions. Remember, inspecting spark plugs every 30,000 miles or according to your vehicle’s schedule ensures timely detection without unnecessary intervention.
Finally, failing to note changes in spark plug types when replacing them affects your overall evaluation. A copper plug will wear differently than a platinum or iridium one, so treat each according to its material and expected lifespan. Keeping a detailed record of the spark plug brand, type, mileage, and condition during each check helps track wear trends and prevents misdiagnosis. Taking these measures reduces errors and protects your engine’s performance and fuel efficiency.
8. When to Call a Professional for Spark Plug Issues
Engine misfires, rough idling, and poor acceleration may signal deeper issues than worn spark plugs, especially if replacing the plugs doesn’t improve performance. When your vehicle struggles to start or runs unevenly despite installing new spark plugs, the problem often lies elsewhere in the ignition or fuel system. At this point, professional diagnostics can pinpoint whether coils, wires, or fuel injectors need attention.
Replacing spark plugs generally falls between 30,000 and 50,000 miles, varying with the car model and plug type. Approaching these mileage markers or experiencing ongoing engine troubles after a spark plug inspection suggests a full engine tune-up might be needed. This usually covers checks of the ignition system, fuel delivery, and combustion processes to improve performance and avoid damage from postponed upkeep. Expect tune-up costs to range from $100 to $300, depending on the depth of work and your vehicle’s make.
Choosing a reliable mechanic ensures quality service and protects your engine. Look for a shop with certified technicians who offer clear explanations of diagnostics and repairs. Consider checking review sites, asking for recommendations, and verifying that they use OEM or high-quality spark plugs and parts. Avoid quick, low-cost spark plug swaps without thorough diagnostics, which might overlook underlying issues and lead to recurring problems and higher long-term costs.
When symptoms like engine stalling, backfiring, or poor fuel efficiency persist after a DIY spark plug inspection or replacement, it’s time to take your vehicle to a professional. Electrical components in the ignition system handle voltages up to 30,000 volts, so expert handling reduces the risk of damage or improper installation. Mechanics can also test the spark plug gap and ignition coil output with specialized tools to ensure everything meets your engine’s exact specifications.
Don’t delay professional help if your new spark plugs don’t fix engine issues; unresolved ignition or fuel system faults can cause costly damage over time.
Step-by-Step Action Plan to Check Your Spark Plugs
Use this method to quickly tell if your spark plugs need replacing, helping your engine perform at its best.
- Before you start: Gather necessary tools like a spark plug socket, ratchet, and gap gauge. Make sure the engine is cool to avoid burns.
- Day 1: Remove one spark plug carefully using the socket. Inspect its color and electrode wear to decide if it looks old or new.
- Day 1: Measure the spark plug gap with a gap gauge. Check if it matches the recommended specification for your vehicle; a larger gap often means wear.
- Day 2: Replace any spark plugs that show heavy deposits, corrosion, or damaged electrodes with new ones from your vehicle’s parts list.
- Week 1: Start your engine and watch for smooth idling and easy starts. These signs indicate your spark plugs are functioning well.
- Week 2: Monitor for engine symptoms like misfires or poor acceleration. Symptoms that persist after checking the spark plugs should prompt a visit to a qualified technician.
- Month 3: Schedule a visual check and gap measurement for all spark plugs during routine maintenance to avoid unexpected engine issues.
Frequently Asked Questions
How Can I Tell If My Spark Plugs Are Old Just by Looking at Them?
Old spark plugs often show a worn electrode, deposits, or discoloration, unlike new ones which look clean. Inspect the tip for corrosion, burn marks, or buildup to identify wear.
Does Engine Performance Indicate If Spark Plugs Are Old or New?
Yes, old spark plugs can cause rough idling, misfires, or difficulty starting, while new plugs help the engine run smoothly. Noticeable performance issues often point to worn plugs.
How Does the Spark Plug Gap Relate to Its Age?
The gap on old spark plugs may be wider or uneven due to electrode wear, affecting ignition efficiency. Checking the gap helps determine if plugs need replacing.
Can the Type of Spark Plug Affect How Fast It Wears Out?
Different spark plug types like copper, platinum, or iridium wear at varying rates, with copper wearing faster. Knowing your plug type helps anticipate inspection and replacement intervals.
Is There a Way to Identify Spark Plug Age Without Removing Them?
It’s challenging to judge spark plug age without removal since visual signs appear on the plug tip. Listening for engine issues and mileage since last change can offer clues.
What Are Common Inspection Mistakes That Hide the True Condition of Spark Plugs?
Cleaning spark plugs before inspection can mask wear signs. Avoid trying to judge plug condition solely by engine sounds or mileage without physical inspection.
The Bottom Line
Knowing the condition of your spark plugs helps you maintain engine performance and fuel efficiency. Take the step today to inspect one spark plug carefully, you’ll get a clear sign if it’s time for a replacement. This simple check can prevent many common engine problems down the road.