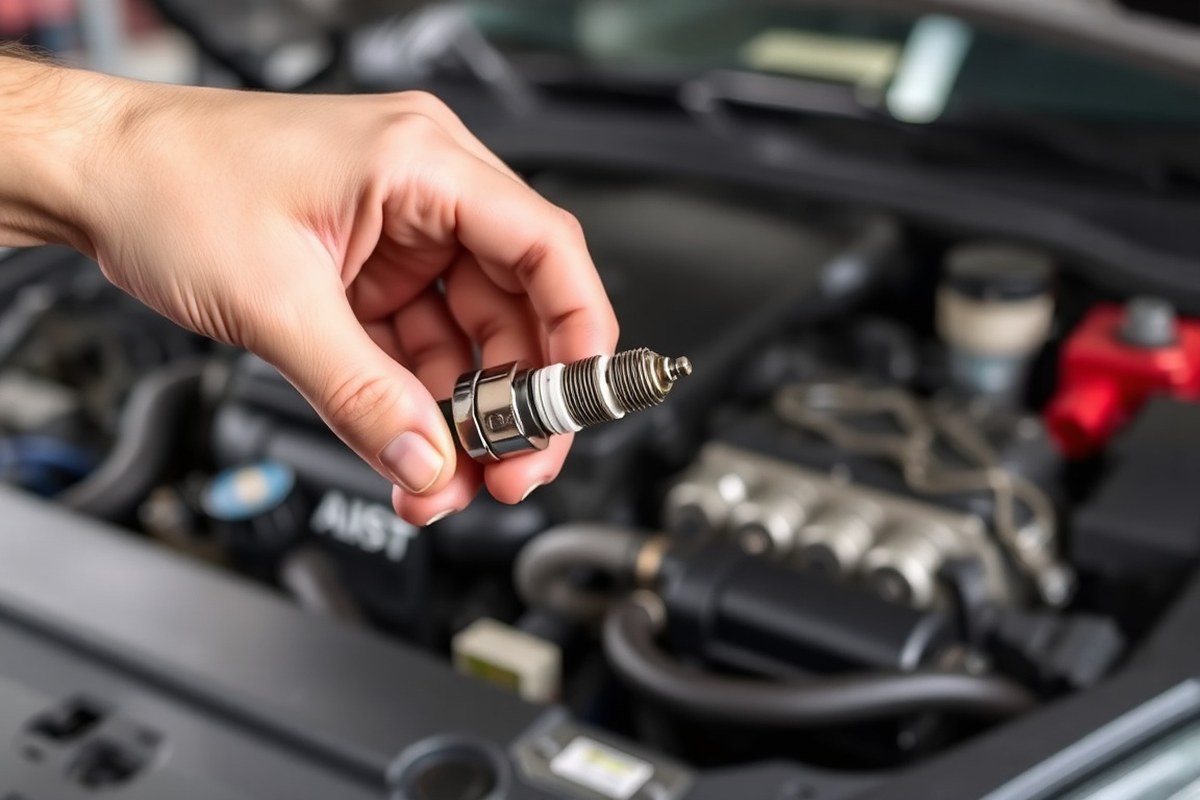
How to Fix Spark Plugs: A Complete Guide with Repair Tips and Tools
How to fix spark plugs starts by identifying worn or fouled plugs and safely removing them with the correct tools. Clean or replace the plugs, check and adjust the gap as needed, then reinstall them securely. Proper spark plug maintenance improves engine performance and fuel efficiency. Begin by disconnecting the battery and letting the engine cool to avoid burns or electrical shock during the process.
Key Takeaways
- Inspect spark plugs regularly for signs like rough idling, poor acceleration, or engine misfires.
- Use a spark plug socket and ratchet to remove plugs without damaging the threads or porcelain.
- Clean fouled plugs with a wire brush or spark plug cleaner to remove carbon deposits carefully.
- Set the spark plug gap using a feeler gauge based on your vehicle’s specifications.
- Apply a small amount of anti-seize compound on the plug threads to prevent them from seizing.
- Be cautious removing stuck plugs; consider thread lubricant and gentle taps to loosen them.
How to Fix Spark Plugs: Step-by-Step Repair Process

Fixing spark plugs involves inspecting, cleaning, repairing if necessary, and reinstalling them correctly to ensure your engine runs efficiently. You’ll need basic tools such as a ratchet wrench with a spark plug socket, a gap gauge, a wire brush or spark plug cleaner, and in some cases, anti-seize compound. Plan for about 30 to 60 minutes to complete the task, depending on access to the plugs and your experience level. Follow these steps carefully to fix your spark plugs:
- Remove the spark plug wire or ignition coil. Pull the wire boot off the plug or remove the coil carefully to avoid damage. Label the wires if necessary to keep track of their order.
- Use a ratchet with the spark plug socket to unscrew the spark plug. Turn counterclockwise until it loosens, then carefully remove it to avoid breaking the ceramic insulator.
- Inspect the spark plug. Look for signs of wear such as carbon deposits, oil fouling, or a worn electrode. If the plug is cracked or heavily damaged, replacement is recommended instead of repair.
- Clean the spark plug. Use a wire brush or spark plug cleaner to remove carbon build-up on the electrode and threads. Avoid abrasive techniques that can damage the electrode.
- Check and adjust the spark plug gap with a feeler gauge. The correct gap is often specified in your vehicle’s owner manual, typically between 0.028 and 0.060 inches. Adjust carefully by bending the ground electrode.
- Apply a small amount of anti-seize compound on the threads if recommended. This helps prevent the plug from sticking in the cylinder head, but some manufacturers advise against it, verify first.
- Reinstall the spark plug. Thread it in by hand to avoid cross-threading, then tighten it with the ratchet to the torque specified in your vehicle’s manual, usually between 13 to 22 ft-lbs.
- Reconnect the spark plug wire or ignition coil. Ensure a secure fit to maintain proper electrical connection and engine performance.
A good result means the engine runs smoothly, with easy starts and stable idling. Common problems after repair include misfires caused by improper gap adjustment or loose plugs. Using the right torque prevents thread damage and ensures proper compression. For engines with difficult-to-access spark plugs, extra time may be needed, and care taken to avoid damaging surrounding components.
Signs Your Spark Plugs Need Repair or Replacement

Faulty spark plugs cause rough idling, engine misfires, and poor fuel economy. You can tell if spark plugs need repair or replacement by inspecting their condition and noting symptoms such as hard starting or engine hesitation. Deciding between cleaning, repairing, or replacing depends on visible wear, deposits, and overall spark plug health.
Common Signs of Bad Spark Plugs
Bad spark plugs often lead to engine performance issues. You might notice your engine misfires, struggles to start, or idles unevenly. Reduced power during acceleration and a drop in gas mileage also point to spark plug problems. These symptoms occur because worn or fouled plugs fail to ignite the air-fuel mixture efficiently.
Pay attention to any dashboard warning lights, especially the check engine light, as they can indicate ignition system faults linked to spark plugs. Listening for unusual sounds like backfiring or pinging may also help identify plug issues early.
How to Inspect Spark Plugs for Faults
Remove the spark plugs after the engine is cool and visually inspect them under good lighting. Look for these key signs:
- Black, sooty deposits indicating carbon fouling from a rich fuel mixture
- Oily residue, which may suggest leaking valve seals or worn pistons
- Worn or rounded electrodes, which reduce spark efficiency
- Cracks or chips in the ceramic insulator
- Excessive gap erosion exceeding manufacturer specs, usually above 0.060 inches
Compare the color of the spark plug’s ceramic insulator. A light tan or gray color reflects normal combustion. Dark black or wet grounds show problems.
When to Repair and When to Replace Spark Plugs
Repairing spark plugs mainly means cleaning fouled plugs or adjusting the spark gap. Cleaning is best for plugs with light deposits or carbon buildup that don’t show electrode wear or damage. Use a wire brush or spark plug cleaner and avoid harsh chemicals that can damage the insulator. Replace spark plugs when:
- Electrodes are visibly worn or rounded
- The ceramic insulator is cracked or broken
- Oil fouling is present, indicating internal engine issues
- Gap is worn beyond adjustment capability
- The plug has been used beyond the manufacturer’s recommended mileage, usually 30,000 to 100,000 miles depending on the type
Using old or damaged spark plugs can cause poor engine performance and even damage ignition coils. New plugs cost between $2 and $15 each, depending on model and vehicle. Replacing plugs every few years or according to your owner’s manual helps maintain engine health.
Checklist for Deciding Spark Plug Action
Use this checklist to determine repair or replacement:
- Check engine performance: misfires, hard starts, poor fuel economy
- Visual inspection: electrode wear, deposits, cracks, oil fouling
- Measure spark plug gap and compare with specifications
- Clean if minor carbon buildup present and plugs otherwise sound
- Replace if significant wear, damage, or fouling that indicates engine problems
- Follow manufacturer’s mileage recommendations for replacement intervals
Following these steps will help you catch spark plug problems before they cause severe engine damage or breakdowns.
Always inspect spark plugs after about 30,000 miles or if your engine displays symptoms. Neglecting worn plugs can damage ignition coils and increase repair costs.
Cleaning Spark Plugs Effectively and Safely
Cleaning spark plugs effectively involves removing carbon deposits and debris without damaging the ceramic insulator or the electrode. Use gentle, non-abrasive methods and avoid harsh chemicals or high-pressure blasting that can weaken the spark plug. You can safely reuse spark plugs after proper cleaning if they show no signs of wear or damage.
Tools and Materials Needed for Cleaning
Gather these items before starting: a wire brush or a spark plug cleaning brush, carburetor or brake cleaner, a soft cloth or paper towels, safety goggles, and gloves to protect your eyes and hands from chemicals. Avoid using abrasive sandpaper, harsh solvents, or high-pressure airblasters, which can harm the spark plug’s delicate parts. A small container or tray can help keep parts organized during cleaning.
Cleaning Procedure Step-By-Step
Follow these steps to clean spark plugs thoroughly and safely, especially for plugs that are heavily fouled with carbon and oil deposits. Be gentle to preserve the integrity of the plug’s electrodes and ceramic.
- Remove loose debris: Use a wire brush to gently scrub the electrode and the threaded portion to remove loose carbon buildup and dirt.
- Apply cleaner: Spray carburetor or brake cleaner on the electrode, insulator, and threads to dissolve oil and stubborn deposits. Let it soak for about 2 to 3 minutes.
- Scrub the plug: Using the brush again, carefully scrub the spark plug, focusing on the firing end but avoiding excessive force to prevent chipping the ceramic.
- Wipe dry: Use a clean cloth or paper towels to wipe away loosened debris and cleaner residue. Avoid compressed air blasting directly on the electrode, as it can cause damage.
- Inspect the plug: Check for cracks, excessive wear, or damaged electrodes. Any signs of damage mean the spark plug should be replaced, not reused.
- Check the gap: Measure the spark plug gap with a gap gauge and adjust if necessary to your vehicle manufacturer’s specifications.
- Reinstall carefully: Thread the spark plug by hand at first to avoid cross-threading, then tighten it using a torque wrench to the recommended torque (typically 13 to 22 ft-lbs for most passenger vehicles).
Common Mistakes and How to Avoid Them
One frequent error is using abrasive methods like sandblasting or steel wool, which can roughen or damage the electrode and ceramic insulator. Avoid this to prevent misfires or early plug failure. Another mistake is neglecting safety precautions; always wear goggles and gloves and work in a well-ventilated area when using cleaners.
Over-tightening spark plugs after cleaning can strip threads or crack the ceramic. Use a torque wrench to apply the manufacturer’s recommended tightness. Also, reusing spark plugs with visible cracks, worn electrodes, or damaged insulators can lead to engine performance issues, so replace rather than clean in those cases.
Adjusting Spark Plug Gap: Why and How to Do It
The spark plug gap is the distance between the center electrode and the ground electrode at the firing end of the plug. This gap is critical because it determines the size and strength of the spark that ignites the air-fuel mixture in the engine’s combustion chamber. A gap that is too wide can cause misfires or weak sparks, leading to poor engine performance and increased fuel consumption. A gap that is too narrow might result in incomplete combustion and rough idling.
The correct spark plug gap varies by engine and spark plug model but typically ranges from 0.028 to 0.060 inches. You should consult your vehicle’s owner manual or the spark plug manufacturer’s specifications to find the exact gap required. This specification is essential because using the wrong gap can reduce engine efficiency and potentially damage the ignition system.
Measuring and adjusting the spark plug gap requires precision tools. The most common tools include a wire-type feeler gauge or a tapered (cone-shaped) gap tool. A wire-type feeler gauge provides specific thickness measurements, making it easy to check if the gap matches the recommended size. A tapered tool can also measure and adjust the gap by bending the electrode carefully. Follow these steps to set the spark plug gap accurately:
- Check the correct gap: Look up the recommended gap for your vehicle’s spark plugs in the owner’s manual or on the spark plug box. Record this measurement (e.g., 0.035 inches).
- Measure the existing gap: Slide the wire gauge of the correct thickness between the electrodes. The gap is correct when it fits snugly without forcing. When it’s too tight or loose, you need to adjust.
- Adjust the gap carefully: Use the gap tool or a small flathead screwdriver to gently bend the ground electrode. To increase the gap, push the electrode outward. To decrease, gently tap it inward. Adjust by small increments, checking with the gauge after each adjustment.
- Re-check the gap: After adjustment, measure the gap again with the gauge to ensure it matches the required specification.
- Repeat if necessary: Continue adjusting and measuring until the gap is accurate without forcing the gauge. Over-bending can damage the electrode or cause misfires.
- Inspect the plug for damage: Look for cracks or distorted electrodes before reinstalling. Damaged plugs should be replaced rather than re-gapped.
Accurately setting the gap improves engine power, fuel efficiency, and reduces emissions. Inconsistent or incorrect gaps often cause rough running, difficulty starting, or increased engine deposits. The cost to adjust the gap yourself is minimal, generally under $10 for a quality feeler gauge or gap tool, and it usually takes less than 15 minutes per plug if you work carefully.
Differences Between Spark Plug Types and Repair Considerations
Spark plugs come in several common types, each with unique materials, lifespans, and repair options. The main types include copper, platinum, iridium, and double platinum plugs. Copper plugs typically last 20,000 to 30,000 miles and are easier to clean or re-gap. Platinum and iridium plugs, designed for modern ignition systems, tend to last 60,000 to 100,000 miles and are more durable but rarely benefit from cleaning or regapping due to their fine electrode designs. Double platinum plugs offer extended life and better performance in distributorless ignition systems. Repair methods vary accordingly, as modern iridium and platinum plugs mainly require replacement rather than repair.
Driving conditions affect spark plug wear significantly. Frequent short trips cause carbon buildup, while high-performance driving or heavy loads raise combustion temperatures, accelerating electrode erosion. These factors shorten the effective lifespan and influence whether cleaning suffices or full replacement is necessary. The table below compares the characteristics of these spark plug types, focusing on lifespan, repairability, cost, and system compatibility.
| Type | Lifespan (miles) | Repairability | Typical Cost per Plug | Best For |
|---|---|---|---|---|
| Copper | 20,000, 30,000 | Re-gapping and cleaning practical | $2, $5 | Older vehicles with standard ignition |
| Platinum | 60,000, 100,000 | Cleaning possible, but re-gapping limited | $8, $15 | Modern vehicles with distributorless ignition |
| Iridium | 60,000, 100,000+ | Generally not recommended to repair | $15, $25 | High-performance, fuel-efficient engines |
| Double Platinum | 60,000, 100,000 | Cleaning limited; replacement preferred | $10, $20 | Distributorless ignition systems |
DIY spark plug fixing focuses on cleaning and adjusting copper plugs, where electrode wear can be reversed by careful scraping and re-gapping. For iridium and platinum types, cleaning with a wire brush or spark plug cleaner is possible but often only extends life marginally. These plugs require precise gap settings often specified in hundredths of a millimeter; specialized gauges help adjust them correctly without damage. Repair attempts on iridium plugs risk damaging the delicate electrode and reducing performance.
Modern ignition systems rely on consistent, precise spark delivery. Faulty spark plugs in these systems produce weak ignition or misfires, so replacement is usually the best choice instead of repair. A well-maintained spark plug electrode ensures optimal combustion and fuel efficiency. Driving constantly under harsh conditions, stop-and-go traffic, towing, or cold starts, speeds up wear and means plugs should be checked and replaced sooner. Spark plugs exposed to extreme heat (up to 1,200°F inside the cylinder) degrade faster, especially if the engine runs rich or has oil leaks.
Always check your vehicle’s service manual for the exact spark plug gap and recommended replacement intervals to avoid engine damage or decreased performance.
How to Remove Stuck or Damaged Spark Plugs Safely
Safely removing stuck or damaged spark plugs requires patience, the right tools, and careful technique to avoid damaging the engine or the spark plug threads. Using penetrating oil, gentle tapping, and a proper spark plug socket can free the plug without causing harm.
Preparation and Safety Gear
Before starting, make sure the engine is cool to prevent burns and avoid heat-related damage to the spark plug threads. Wear safety glasses to protect your eyes from debris and gloves to improve grip and protect your hands from sharp engine parts and hot surfaces. Disconnect the vehicle’s battery to prevent electrical shock or accidental engine startup while working on the spark plugs.
Techniques for Loosening Stuck Spark Plugs
Begin by applying a penetrating oil, such as PB Blaster or Liquid Wrench, around the spark plug base to help loosen rust and corrosion. Allow the oil to soak in for at least 15 to 30 minutes. Use a spark plug socket attached to a ratchet with an extension to provide better use and control. Follow this step-by-step process to loosen a stuck spark plug:
- Spray penetrating oil around the spark plug’s threads and wait 15 to 30 minutes.
- Attach the spark plug socket to a ratchet with a swivel or extension for better access.
- Turn the plug counterclockwise slowly to break the seal without applying excessive force.
- If it doesn’t move, give gentle taps to the spark plug socket with a rubber mallet to help break corrosion.
- Apply heat carefully using a heat gun on the area surrounding the spark plug to expand the metal, but do not overheat or use an open flame.
- Try loosening the plug again, alternating between slightly turning and gentle tapping.
- Once loosened, continue to unscrew by hand to avoid cross-threading during removal.
What to Avoid During Removal
Never force the spark plug with excessive torque; this risks breaking the plug in the cylinder head or stripping the threads. Avoid using an impact wrench, which can snap the plug or damage the threads. Do not heat the spark plug with an open flame as it can warp or damage nearby components. Avoid attempting to remove spark plugs immediately after driving when the engine is hot to prevent burns and damage to the threads due to thermal expansion.
Testing Spark Plugs After Repair or Cleaning
Confirming a spark plug works correctly after repair or cleaning is essential to ensure your engine runs smoothly. A common way to test performance is by using a spark plug tester, which checks if the spark plug produces a strong, consistent spark. This tool is affordable, typically costing $10 to $30, and reliable for a quick performance check before reinstalling the plug.
To test the spark plug, first connect it to the tester according to the tool’s instructions. Ground the plug against a metal surface on the engine block. Crank the engine while watching for a bright, blue spark jumping across the plug gap. A weak or yellowish spark indicates the plug may still have issues, such as fouling or electrode damage. No spark at all means the spark plug is likely non-functional and should be replaced.
Besides using a spark plug tester, you can inspect the plug visually. Look for clean electrodes without heavy deposits or cracks. The gap should remain within the manufacturer’s recommended range after cleaning and adjustment. Typical spark plug gaps run between 0.028 to 0.060 inches depending on your vehicle. A properly gapped plug that ignites a steady spark confirms repair success.
- Use a dedicated spark plug tester while grounding the plug properly
- Watch for a strong blue spark during engine cranking
- Visually inspect the plug for cracks and residue buildup
- Measure and adjust the spark plug gap after cleaning
- Test drive the vehicle to check for smooth engine performance and responsiveness
You can generally reuse spark plugs after cleaning if they show no mechanical damage and pass a spark and gap test. However, cleaned plugs may still perform worse than new ones if heavily worn or if deposits cannot be fully removed. If engine issues persist after fixing spark plugs, check the ignition wires, coil pack, or fuel system next because other factors could cause misfires or rough running.
Regularly testing spark plugs helps avoid repeated failures and costly repairs later. You don’t need advanced tools for basic checking, but the spark plug tester and a feeler gauge are recommended tools for confirming successful repair or cleaning. Make sure the engine is off and cool when removing and testing plugs to stay safe.
When to Call a Professional Mechanic for Spark Plug Issues
Attempting to fix spark plugs on your own can save money, but calling a professional mechanic is advisable in several scenarios. Complex issues such as damaged spark plug threads inside the cylinder head, recurring misfires after new plugs are installed, or difficulty removing seized plugs require specialized tools and experience. These problems often involve risks like stripping threads, breaking the plug off inside the engine, or causing ignition system damage.
The decision rule to call a mechanic centers on risk versus skill and tool availability. When you don’t have a proper spark plug socket, torque wrench, or anti-seize compound, or if the plugs are deeply recessed or the engine is hard to reach, professional service can lower the risk of expensive repairs. Mechanics have tools like thread chasers, broken plug extractors, and diagnostic scanners that identify ignition problems beyond what visual inspection can reveal.
Common mistakes when fixing spark plugs yourself include over-tightening, under-tightening, and improperly gapping the plugs. Over-tightening can strip threads, especially in aluminum cylinder heads. Most spark plugs require torque between 13 and 20 foot-pounds; check your vehicle’s service manual for the exact spec. Under-tightening causes poor sealing and can lead to compression loss or carbon build-up. Skipping the recommended gap adjustment may reduce engine efficiency or cause misfires.
Another frequent error is reusing damaged or heavily fouled spark plugs after cleaning. Some plugs may look salvageable but have electrode wear, porcelain cracks, or corrosion invisible to the naked eye. Installing such plugs shortens ignition component life and performance, which a pro can detect using testing tools or visual inspection under magnification.
Costs for professional spark plug service vary by vehicle make and location but typically range from $100 to $300. This includes labor, replacement plugs that match manufacturer specs, and diagnostics if needed. Given this, call a mechanic when you notice symptoms like persistent engine stumbling after DIY replacement or if your vehicle’s ignition coil or wiring shows wear, since these parts often require simultaneous evaluation.
Always apply anti-seize compound sparingly on spark plug threads only when recommended, as too much can lead to over-tightening and thread damage.
Knowing when to stop and seek professional help prevents turning a simple plug replacement into expensive engine repairs. When the procedure seems unclear or complicated, a certified mechanic will make sure the installation is correct using the right tools, torque, and gap settings, protecting your engine’s health and performance.
Step-by-Step Action Plan to Fix Spark Plugs
Follow these steps to correctly diagnose and repair your spark plugs, ensuring better engine performance and fuel efficiency.
- Before you start: Gather the right tools, spark plug socket, gap gauge, ratchet, and replacement plugs if needed. Check your vehicle’s manual for the correct spark plug type and gap specifications.
- Day 1: Remove one spark plug using a socket and inspect it for wear, deposits, or damage. Know it worked if the plug looks either worn or fouled, indicating need for cleaning or replacement.
- Day 1 continued: Clean the spark plug gently with a wire brush or spark plug cleaner. After cleaning, test for consistent spark with a spark tester to confirm a good firing.
- Day 2: Measure and adjust the spark plug gap using a gap gauge to the vehicle’s recommended setting. Correct adjustment is confirmed when the electrode spacing matches specifications without forcing the gauge.
- Day 3: Install cleaned or new spark plugs carefully by hand to avoid cross-threading, then tighten with a torque wrench to the manufacturer’s torque value. Installation success is when plugs are snug and secure but not over-tightened.
- After installation: Start the engine and listen for smooth idle and normal acceleration. A smooth engine response shows your spark plugs are working properly.
- After 500 miles: Recheck the plugs for signs of fouling or damage again once the engine has run with the new or repaired plugs. Consistent performance means your work is holding up well.
Frequently Asked Questions
Can I Use the Same Spark Plug Type in All Cylinders?
No, use the spark plug type specified for your engine model. Using the wrong type can cause poor performance or damage.
How Often Should I Check the Spark Plug Gap?
Check the gap every time you replace or clean the plugs. Proper gap ensures efficient combustion and engine performance.
Can a Spark Plug Cause My Car Not to Start?
Yes, a faulty spark plug can prevent ignition and cause starting issues. Testing plugs can help identify the problem.
Is It Necessary to Replace Spark Plug Wires When Fixing Plugs?
Not always, but inspect wires for wear or damage during plug service. Damaged wires affect spark delivery and engine function.
Can I Reuse Spark Plug Gaskets or Seals?
Typically, replace gaskets or seals when changing spark plugs. Old seals may not provide a proper seal, causing leaks.
Will Fixing Spark Plugs Improve Fuel Efficiency?
Yes, properly functioning spark plugs optimize combustion, improving fuel economy. Dirty or faulty plugs can waste fuel.
Final Thoughts
Fixing your spark plugs yourself can restore engine performance and improve fuel economy. Keep your vehicle’s specifications on hand and work carefully to avoid damaging parts. Try diagnosing and cleaning one spark plug to see improvements before proceeding with the others. Replacing or repairing spark plugs can save you time and money compared to a professional visit when done properly.