How to Patch a Tonneau Cover: Simple Steps for Durable Repairs
Knowing how to patch a tonneau cover lets you quickly fix tears or holes without removing the entire cover. Use a properly sized patch and a strong adhesive to seal the damage effectively. Start by cleaning the damaged area thoroughly to ensure the patch sticks well and lasts longer.
Key Takeaways
- Patch your tonneau cover without removal by cleaning the area and applying an adhesive patch directly over the damage.
- Trim a patch that extends at least 2 inches beyond the edges of the tear to provide complete coverage and secure bonding.
- Gather essential tools including a durable patch material, strong adhesive compatible with your cover, scissors, and measuring tape.
- Assess damage carefully by measuring length and width, then recording these to select the right patch size.
- Allow adhesive to cure for a full 24 hours before exposing the cover to water or stress for a lasting repair.
- Regularly clean and apply UV protectant to your tonneau cover to prevent up to 80% of future damage.
Can You Patch a Tonneau Cover Without Removing It?
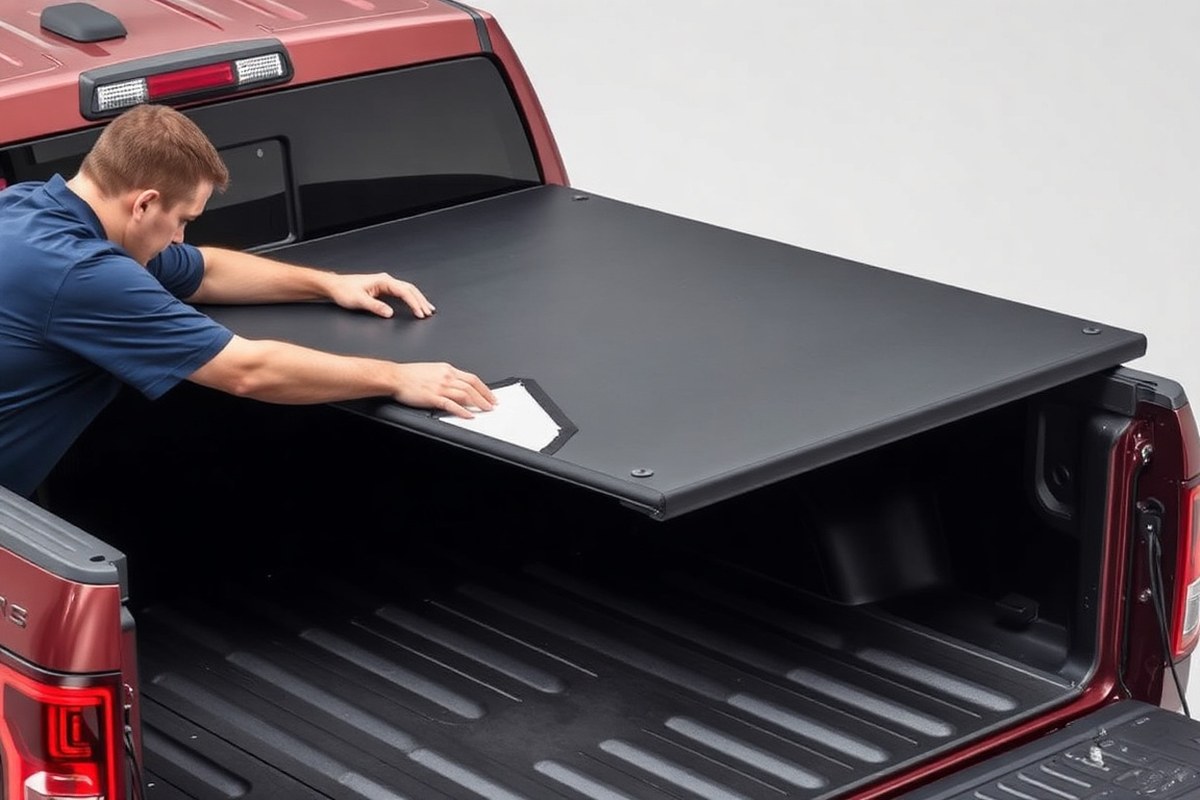
You can repair a tonneau cover without taking it off your truck, but you need to stabilize it carefully to get the patch to hold well. Keeping the cover attached saves time and effort, especially with soft covers that unclip with 4-6 clamps along the bed rails. However, patching the cover while still mounted may make it harder to apply the patch evenly because the cover can flex or move during repair.
Repairing the cover without removing it saves the hassle of detaching clamps and the risk of losing small parts. The tradeoff is less room to work, which can make it more difficult to clean the damaged spot completely and apply the patch so it sticks properly. Sealing the patch edges well is also harder if the cover can’t lie flat.
To get the best results with the cover still mounted, start by placing the truck on level ground and closing the tailgate to keep the cover taut. Use soft blocks or cushions under the cover near the damage to support it and reduce flexing. This setup creates a firm surface to apply the adhesive and patch. Clean the area with mild detergent and allow it to dry fully before you begin the repair.
- Clear the damage zone by removing dirt and debris, then wipe the area with isopropyl alcohol to remove oils and residue. Let it air dry for 10-15 minutes.
- Support the cover from underneath with foam blocks or folded towels to hold the material steady and flat around the tear or hole.
- Cut a patch that extends at least 2 inches beyond the damaged edges on all sides, matching the cover’s material as closely as possible.
- Apply a flexible, weather-resistant adhesive recommended for your cover’s fabric or vinyl to the back of the patch.
- Press the patch firmly onto the supported area, smoothing from the center outward to remove air bubbles and wrinkles.
- Seal the patch edges with a compatible seam sealer or extra adhesive to prevent moisture intrusion and peeling.
- Let the patch cure according to the adhesive manufacturer’s instructions, usually 12 to 24 hours, before exposing the cover to weather or tension.
- Check the repaired section periodically for signs of lifting or cracking and reapply sealant if needed.
Patching on the truck can cost between $30 and $60 for a vinyl patch kit and adhesive when done yourself, often less than 10% of a replacement cover’s price. A quality repair can last several months to up to three years, depending on weather exposure and material quality. Avoid rushing the curing time; improper drying is the main reason patches fail prematurely. Large damage or a cover older than 4-6 years often calls for removing it to check if replacing the cover is a better choice.
Essential Tools and Materials for Patching

Gathering the right tools and materials ensures a successful patch job on your tonneau cover, saving you time and preventing further damage. Start by identifying your cover’s material. Vinyl covers need a vinyl repair kit with adhesive backing, while canvas or fabric covers require heavy-duty fabric patches paired with waterproof glue. Using mismatched materials can lead to weak bonds and water leaks.
Cleaning the damaged spot carefully before applying a patch is essential. Begin by washing with a gentle detergent to clear away dirt and grime, then use rubbing alcohol to remove any oils. This preparation helps adhesives stick better, making the repair last longer. Steer clear of inexpensive or multi-use glues that aren’t waterproof because they won’t withstand weather conditions.
Essential tools include scissors for cutting patches to size and a roller or squeegee to smooth out air bubbles and press the patch firmly against the cover. Proper smoothing prevents moisture pockets that cause peeling. Having a clean cloth handy throughout the process helps keep the surface dust-free until the adhesive cures.
- Vinyl repair kit with adhesive backing for vinyl tonneau covers
- Heavy-duty fabric patches and waterproof glue for canvas covers
- Mild detergent and rubbing alcohol for thorough surface cleaning
- Scissors to trim patches precisely
- Roller or squeegee to eliminate air bubbles and ensure firm adhesion
- Clean cloths to prepare and maintain a dust-free workspace
Choose waterproof adhesives specifically formulated for truck bed covers or marine vinyl. Strong adhesive strength with UV resistance prevents patch failure caused by sun exposure. Patches designed to match the cover’s color and texture improve appearance and reduce UV damage around the repair site. Expect to spend between $10 and $30 on a quality patch kit, depending on the size and brand. Kits accommodating tears under 6 inches are most common; bigger damage might require a replacement panel.
Failing to properly clean and dry your cover’s surface before applying the patch is the most common cause of patch failure and water leaks.
Testing the patch’s bond and waterproof seal after curing should be part of your process. Avoid patching on sections that show heavy UV degradation, as these are prone to new tears near the patch within a year. Keeping all these tools and materials on hand prevents delays and helps create a durable repair that maintains your tonneau cover’s waterproofing and strength.
How to Assess and Measure Damage on Your Cover
Recognizing the type and size of damage on your tonneau cover is key before starting any patching work. Using a flashlight and measuring tape helps you identify tears or holes precisely and decide if patching is a viable option. The patch size should extend beyond the damage by at least 2 inches on all sides to ensure a tight seal.
Types of Damage Eligible for Patching
Minor tears, small holes, and areas with worn seams are the most common damage types that you can patch yourself. These usually result from sharp edges, weather exposure, or frequent use. Damage limited to the cover’s surface or vinyl material is repairable with a suitable patch kit made for your cover type.
Extensive damage like large rips, structural frame breaks, or major hinge failures are beyond simple patch repair and generally require professional attention or cover replacement. Spotting small problems early helps prevent them from growing. You should avoid patching if the damage compromises the cover’s framework or if the surrounding material is brittle and likely to tear soon after.
Measuring Tears and Holes Correctly
Measuring accurately helps you cut an effective patch and avoid wasting material. Use a measuring tape to find the tear’s or hole’s longest and widest points. A flashlight can highlight fine cracks or subtle fraying around the damage that might be easy to miss in daylight.
Mark the edges of the damaged area with a washable marker or painter’s tape for visibility. Check carefully for any lifting or bubbling in the vinyl close to the tear, as these also need patching. Accurate measurement prevents gaps where water or dirt could enter after repair.
Determining Patch Size with Margin
Adding a margin around the damaged area ensures the patch adheres securely to solid material and covers any hidden weak spots. A standard rule is to add a 2-inch margin beyond the measured tear or hole on every side. This extra coverage makes the patch less likely to peel off under stress or weather changes.
For example, if you have a 3-inch tear, measure 3 inches across and add 2 inches on each side, which gives patch dimensions of 7 inches wide total (3 + 2 + 2). This works well for most vinyl tonneau covers and allows the adhesive to bond fully on stable surfaces.
Choosing a patch size too small leads to poor sealing and frequent re-patching, while an excessively large patch can look bulky or interfere with cover folding. Stick to 2 inches margin unless your cover’s instructions recommend differently based on the material. Follow these steps to assess and measure damage effectively before patching your tonneau cover:
- Use a flashlight to inspect the cover closely for tears, holes, and frayed seams.
- Mark the outer edges of visible damage clearly with a washable marker or painter’s tape.
- Measure the longest length and width of the damaged area using a flexible measuring tape.
- Check for additional damage nearby such as lifting or bubbling vinyl.
- Add a 2-inch margin around the measured damage to determine patch size.
- Calculate the patch dimensions by adding margins to both length and width.
- Choose a patch material compatible with your tonneau cover’s vinyl or fabric.
- Decide if the damage is minor enough to patch yourself or if professional help is needed for extensive problems.
Step-by-Step Guide to Patching a Tonneau Cover
Patching a tonneau cover requires cleaning the damaged area thoroughly, cutting a patch that fully covers the tear, firmly applying adhesive, and smoothing out bubbles to ensure a tight seal. After applying the patch, allow the adhesive to cure for 2 to 4 hours before exposing it to stress or water. Proper preparation and technique are key to a durable repair.
Cleaning and Preparing the Surface
Start by cleaning the damaged area with a mild detergent to remove dirt and grime. Rinse the surface with clean water, then dry it completely. After drying, wipe the area using rubbing alcohol to eliminate oils or residues that can interfere with adhesive bonding.
Lightly sand or roughen the surface around the tear with fine-grit sandpaper. This step improves adhesion by creating a textured surface for the adhesive to grip. Avoid sanding too aggressively, which can damage the cover further.
Cutting the Patch to Size
Use a patch material that matches your tonneau cover, typically vinyl. Cut the patch with scissors or a utility knife, ensuring it’s at least 1 inch larger than the damaged area on all sides to fully cover the tear and allow for a watertight seal.
Make the edges of the patch rounded rather than sharp corners. Rounded edges reduce the chance of peeling over time. Double-check the size by holding the patch over the tear before applying adhesive.
Applying the Patch and Smoothing Edges
Apply a waterproof adhesive evenly to the back of the patch, covering the entire surface and edges. Then press the patch firmly onto the cleaned and prepared area of the tonneau cover. Start from one side and smooth it toward the opposite edge to push out air bubbles.
Use a roller or a firm squeegee to apply pressure evenly across the patch. Take care to eliminate any wrinkles or bubbles, as these compromise the waterproof seal and adhesive strength. Applying patch and cover at room temperature, or gently warming them beforehand, can improve bonding.
Curing Time and Post-Application Care
Allow the adhesive to cure undisturbed for at least 2 to 4 hours before reinstalling or folding the tonneau cover. Full curing often takes 24 hours depending on the adhesive brand and environmental conditions, such as temperature and humidity.
During curing, avoid exposing the patch to water, extreme temperatures, or mechanical stress. For colder environments, a longer curing time may be necessary for strong adhesion. Once cured, inspect the edges carefully and apply a waterproof sealant along seams and edges for added protection against leaks.
| Step | Action | Tip |
|---|---|---|
| 1 | Clean the damaged area with mild detergent, rinse, dry, then wipe with rubbing alcohol | Use a soft cloth to avoid scratching the surface |
| 2 | Lightly sand around the tear to roughen the surface for better adhesion | Sanding too hard can worsen damage, so be gentle |
| 3 | Cut a vinyl patch at least 1 inch larger than the damaged area with rounded edges | Test fit the patch to confirm full coverage before applying adhesive |
| 4 | Apply waterproof adhesive evenly to the patch’s underside | Cover edges thoroughly for a watertight seal |
| 5 | Press patch firmly onto damaged area, smoothing from one side to the other to remove air bubbles | Use a roller or squeegee for even pressure and eliminate wrinkles |
| 6 | Allow adhesive to cure for 2 to 4 hours before handling the cover | Longer curing (up to 24 hours) improves adhesion, especially in cold conditions |
How to Prevent Future Damage After Patching
Keeping your patched tonneau cover in good shape requires regular cleaning and inspection. Clean the cover every three months using a cleaner made for the material, vinyl or leather. This prevents dirt and oils from breaking down the fabric or the patch adhesive. Do not use harsh detergents or solvents, as they can damage the cover surface and cause the patch to fail prematurely. For vinyl covers, a mild soap and water solution applied with a soft cloth works well, while leather covers need a specialized cleaner designed to protect the finish and flexibility.
Applying a waterproofing treatment after patching helps maintain the protective seal. Products like vinyl protectants or water-repellent sprays create a barrier against rain and UV rays, which can dry out and crack the cover over time. Use these treatments at least twice a year, ideally in spring and fall, following the product instructions carefully. This effort prevents water from seeping under the patch and causing it to peel or mold. Expect to spend around $10 to $20 on a small bottle that will last multiple applications.
Handling the cover carefully every time you use your truck is critical to avoid creating new damage near the patch. Avoid slamming the cover or forcing it against sharp edges. When folding or rolling the cover, do so gently to prevent stress on the repaired area. Check the hardware such as snaps, rails, and latches on a quarterly basis to make sure nothing is loose or bent, which can twist or tear the cover. If you notice any hardware issues, tighten or replace parts promptly to keep the cover fitting smoothly and to avoid extra strain on the patch.
Seasonal maintenance is just as important. After heavy rain, wind, or snow, remove any trapped water and dry the cover thoroughly. Inspect the patch specifically for signs of peeling or bubbles, which indicate trapped moisture. Moisture under the patch can lead to mold and adhesive failure. For winter storage, if you live in freezing climates, keep the cover clean and dry to avoid cracking due to cold weather. Regularly checking and caring for the cover will help extend its overall lifespan by at least 40% to 60%, according to vehicle accessory maintenance studies.
Inspect your patched area regularly and address any small signs of wear immediately, delaying can turn a minor fix into a costly replacement.
Common Mistakes and How to Fix Them
Applying a patch that is too small or positioned incorrectly can leave your tonneau cover vulnerable to leaks and additional tearing. A patch should extend at least 2 inches beyond the damage on all sides to create a strong seal. Using a patch smaller than this often results in peeling or partial adhesion because the edges lift under wind and water pressure. Measuring the damaged area accurately and adding an extra margin ensures the patch overlaps securely, preventing water intrusion and making the repair last longer.
Bubbling or peeling can happen if the patch or cover surface isn’t properly cleaned or dried before application. Dirt, oils, or moisture reduce adhesion, leading to failed repairs. Clean the area with isopropyl alcohol and let it air dry for at least 10 minutes before applying the patch. Press the patch firmly with a roller to eliminate air pockets and promote maximum contact. For additional security, applying pressure for 2 to 3 minutes improves bonding. Avoid stretching the patch during application, as this can cause wrinkles that trap air and promote bubbling.
Some patches fail earlier than expected, often due to improper surface prep, extreme weather soon after patching, or the cover being near the end of its life. If a patch starts to peel or crack within months, re-clean the surface, apply adhesive specifically designed for vinyl or fabric covers, and replace the patch with a larger or reinforced one. For repeated failures, inspect the entire cover for brittleness or other damage. Covers older than 80% of their expected lifespan may cost more to repair over time than to replace, according to repair economics.
- Using a patch smaller than 4 inches by 4 inches for small tears, use larger patches to cover 2 inches beyond the damage.
- Skipping surface cleaning, clean with isopropyl alcohol and dry for 10 minutes before patching.
- Not pressing firmly, roll or press the patch for 2 to 3 minutes to avoid bubbles.
- Applying patches in cold or wet conditions, ideally work at temperatures between 60°F and 80°F in dry weather.
- Ignoring cover age, consider replacement if the cover is older than 5 to 7 years or shows widespread wear.
For patches that bubble or peel, gently lift the patch, clean both surfaces again, and reapply adhesive if available before pressing firmly. Use a heat gun on a low setting for 10 to 15 seconds to soften adhesive if needed, but don’t overheat, which can damage the cover. Make sure to follow adhesive label instructions and avoid applying patches during rain or high humidity, as moisture compromises bonding. Persistent problems often signal the need for professional repairs or a full cover replacement.
When to Repair Yourself and When to Call a Professional
Deciding whether to repair your tonneau cover yourself or call a professional depends on the damage type, repair cost compared to replacement, and safety concerns. Small issues and minor wear can often be fixed at home, while extensive damage or mechanical failures generally require expert service.
DIY Repair vs Professional Repair Criteria
Simple problems like water pooling due to weatherstripping failure or sagging vinyl can usually be repaired with basic tools and supplies. More complex issues such as large vinyl tears, hard cover panel malfunctions, or problems with the cover’s frame or latch system often surpass DIY capabilities and need professional attention. Use this checklist to decide:
- Is the damage confined to a small area such as a puncture or weatherstrip deterioration? DIY repair is likely suitable.
- Does the cover show multiple signs of aging, like weatherstrip hardening and frequent tension adjustments? Consider replacement or professional repair.
- Are mechanical parts like latches or folding panels broken or stuck after attempts to fix? Professional service is recommended.
- Is your cover beyond 80% of its expected lifespan (4-6 years for soft, 8-10 years for hard covers)? Professional evaluation for replacement is advised.
Cost and Lifespan Comparison
Balancing repair cost and the value of your tonneau cover helps decide the best course of action. Repairs costing less than 30% of a new cover’s price typically make economic sense for minor fixes. The break-even point for replacement occurs when repair expenses exceed 40% of the cost of a new cover.
| Symptom | Likely Cause | Repair Difficulty | Typical Cost |
|---|---|---|---|
| Water pooling inside bed after rain | Deteriorated weatherstripping or clogged drain tubes | Easy | $15-35 |
| Cover won’t latch or stay closed | Worn latch striker or misaligned clamps | Easy to Moderate | $20-50 |
| Vinyl sagging or flapping while driving | Lost tension in bow/rail system | Easy | $0-25 |
| Torn or punctured vinyl panel | Impact damage or UV degradation | Moderate | $30-60 |
| Hard cover panel won’t fold or lift | Broken frame or hinges | Difficult | $150-300 |
Replacement frames alone can cost between $150 and $300, often representing 50% to 70% of a new cover’s price. If repairs add up to more than this, investing in a new cover is often smarter, especially if your current one has noticeable wear and tear.
Safety and Warranty Considerations
Safe operation is essential when your tonneau cover involves mechanical components like latches or folding panels. Repairing these parts without proper knowledge risks malfunction during vehicle use, which can cause accidents or damage.
Repairs on covers still within their warranty period should be handled through authorized service to avoid voiding coverage. Attempting non-professional repairs on complex issues may also compromise safety and future performance.
Seek professional help with any hardware that resists basic tightening or alignment fixes, or if your cover stays stuck after attempts to clear or lubricate parts. These issues can indicate serious mechanical or frame failures requiring specialized tools and expertise.
How to Test and Ensure a Successful Repair
Wait at least 24 hours after applying the patch before testing its effectiveness. This waiting period allows any adhesives or sealants to cure fully, which is essential for creating a strong, waterproof bond. Testing too soon may give a false impression of success because the patch could loosen as it dries completely.
Begin your test by visually inspecting the patched area to confirm the patch is firmly attached without gaps or bubbles. Then check the cover’s alignment to make sure it closes properly and seats tightly against the truck bed, as a poor fit can cause leaks even if the patch holds. To verify waterproof integrity, simulate rainfall or wash the patched area with a hose on moderate pressure, focusing water directly on the repair for about 5 to 10 minutes. You should not see any water seeping through on the inside of the cover or inside the truck bed.
Look for signs that suggest a successful seal: no moisture, no damp spots under the patch, and no water stains on the truck bed liner after exposure. A faulty repair may show bubbling in the patch, lifting edges, wet spots, or smell of damp fabric. Also, listen for unusual flapping or slipping sounds when driving, which can indicate an insecure patch or improper closure. These signs mean you need to revisit the patch or possibly replace it.
If the patch fails during testing, start by cleaning the area thoroughly and applying a new patch or additional adhesive following the manufacturer’s guidelines. Use isopropyl alcohol or a similar cleaner to ensure the surface is free of dirt and oils before patching again. For stubborn leaks or hard tonneau covers, consider consulting a professional, especially since they have the tools and expertise to maintain the structural integrity of your cover without causing further damage. Replace any straps or hardware involved in the repair if they are worn or incompatible, as these can weaken the waterproof seal.
Return to testing after each repair attempt, keeping in mind ideal outdoor temperatures for curing adhesives range between 60 and 80 degrees Fahrenheit. Extreme cold or heat can affect drying times and bonding quality. Continuous minor leaks may require several layers of allowed-dry patches or specialized patch kits designed for your specific brand and material of tonneau cover. Costs for these kits vary but expect to spend between $15 and $40 depending on materials and brand compatibility.
Always allow your patch to cure fully, testing too early can cause you to miss unseen leaks that will worsen over time.
Step-by-Step Action Plan to Patch Your Tonneau Cover
Follow this plan to repair your tonneau cover efficiently and make sure it stays waterproof and durable.
- Before you start: Gather all necessary tools and materials like patch kits, cleaning supplies, and adhesive. Check the damage size and type to choose the right patch.
- Day 1: Clean the damaged area thoroughly with mild soap and water, then let it dry completely. The patch will bond properly only if the surface is clean and dry.
- Day 2: Cut the patch to size, allowing at least one inch around the damage. Apply adhesive if needed, then press the patch firmly on the damage. Smooth out bubbles, ensuring full contact.
- After applying the patch: Let it cure for at least 24 hours in a warm, dry place. Check the edges to confirm the patch didn’t lift or peel during curing.
- After 2 days: Test the repair by spraying water or observing your cover after rain. The patch should prevent leaks and maintain flexibility.
- One week later: Inspect the patch for wear or peeling. Reapply adhesive or add a second patch if necessary to maintain a strong seal.
- Ongoing: Clean the cover regularly and avoid sharp objects to prevent new damage and extend your patch’s life.
Frequently Asked Questions
What Types of Adhesives Work Best for Patching Different Tonneau Cover Materials?
Use adhesives designed for vinyl or fabric, matching your tonneau cover’s material. This ensures strong bonds and weather resistance, critical for lasting repairs. Avoid general glues, which can fail under outdoor conditions.
Can You Patch a Tonneau Cover in Extreme Temperatures?
Patching in moderate temperatures is best; very hot or cold weather can affect adhesive curing and patch adhesion. Aim for a dry day with temperatures between 50°F and 80°F for optimal results.
How Long Should You Wait Before Driving After Patching?
Allow at least 24 hours for the patch adhesive to fully cure. Rushing may weaken the bond, compromising waterproofing and durability. Check the patch kit instructions for specific cure times.
What Kind of Patch Material Provides the Longest-Lasting Repair?
Vinyl or heavy-duty fabric patches specifically made for tonneau covers last longer. They remain flexible and resist cracking or peeling under weather exposure better than generic materials.
Can a Patch Affect the Tonneau Cover’s Waterproof Capabilities?
A properly applied patch maintains waterproofing, but poorly sealed edges can allow water in. Seal edges carefully to ensure the repair stays watertight and protects your truck bed.
Is It Possible to Fix Stretching or Sagging in a Tonneau Cover Patch Area?
Patching can’t fix sagging or stretching; these issues need tightening mechanisms or replacement. Use patches only for tears or holes, not for structural adjustments.
Key Points to Remember
Repairing a tonneau cover yourself can save money and restore its waterproofing when you choose the right materials and follow careful steps. Start by inspecting your cover today and preparing the area for patching. Doing this early can keep your pickup truck bed protected and your cover lasting longer.