How to Remove Oil Filter: Simple Steps and 8 Expert Tips to Avoid Damage
How to remove oil filter often comes down to using the right technique and tools. First, loosen the filter by turning it counterclockwise, ideally by hand or with an oil filter wrench for stubborn cases. Starting with a clean surface on the filter gives you a better grip and reduces the risk of damage.
Key Takeaways
- Always let the engine cool before attempting oil filter removal to avoid burns.
- Use an oil filter wrench or strap wrench if you can’t loosen the filter by hand.
- Turn the filter counterclockwise to remove it, applying steady force rather than sudden jerks.
- Clean the filter surface before gripping to ensure a secure hold when loosening.
- Apply 16 ft-lb torque when installing a new filter to match typical vehicle requirements.
- Inspect the rubber gasket for leftovers to prevent leaks and difficulty removing the next time.
1. How to Remove an Oil Filter Step by Step
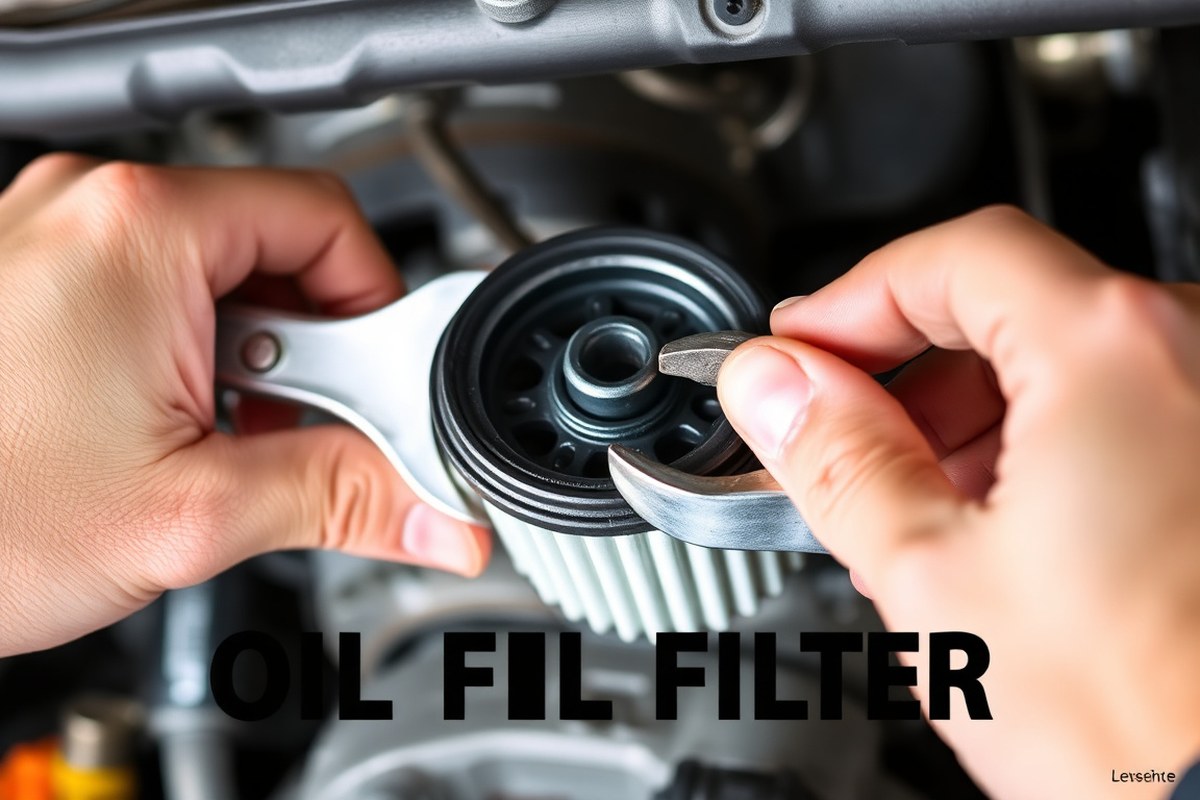
Removing an oil filter by hand is often straightforward if you follow the correct technique. Most oil filters loosen by turning them counterclockwise when you look directly at the exposed end. Start by cleaning the filter surface with a shop towel to remove any oil and debris, which helps you get a better grip. If your hands alone cannot turn the filter, an oil filter wrench or pliers designed for filters can provide the extra use needed. Proper hand and tool use prevent damage to the filter housing and engine components. Avoid using tools that can crush or deform the filter, and always work with the engine cool enough to handle safely.
- Prepare your workspace: Park the vehicle on a flat surface and engage the parking brake. Place an oil drain pan underneath the oil filter area to catch any drips during removal.
- Clean the filter surface: Use a shop towel to wipe dirt and oil off the oil filter’s rubber gasket and body. This ensures a firm grip by hand or tools.
- Grip the filter by hand: With a firm hand grip, try turning the oil filter counterclockwise. Most filters loosen this way since they screw on with a right-hand thread (righty tighty, lefty loosey). Use moderate force but avoid slipping or squeezing too hard.
- Use an oil filter wrench if needed: If the filter doesn’t budge, fit a strap wrench or oil filter pliers around the filter. A strap wrench works by wrapping a chain or strap around the filter to turn it, while pliers grip the filter body directly if there’s enough space around it.
- Turn the wrench carefully: Apply steady pressure counterclockwise. Avoid jerking or forcing it, which might damage the filter housing or mounting stud.
- Remove the filter: Once loose, finish unscrewing it by hand. Tilt it slightly upright to prevent oil from spilling and pull it away from the mounting surface.
- Inspect the mounting surface: Check that the old filter’s rubber gasket did not stick to the engine block. Removing a double gasket prevents leaks and future removal issues.
2. Tools and Equipment Needed for Oil Filter Removal

Removing an oil filter requires the right tools to avoid damage and ensure a smooth process. Commonly used tools include strap wrenches, cap wrenches, band wrenches, and three-jaw wrenches, each suited to different filter types and situations. Choosing the correct size and type of wrench for your vehicle’s specific oil filter improves effectiveness and safety.
Strap Wrench Advantages and Limitations
A strap wrench uses a flexible band, usually made of rubber or fabric, that tightens around the oil filter as you turn the handle. This type is versatile and works well for most standard spin-on oil filters, offering a secure grip without damaging the filter casing. Strap wrenches cost between $10 and $20, making them an economical choice for many DIYers.
Despite their convenience, strap wrenches can slip on filters that are heavily coated with oil or dirt. They are best used when you have enough clearance around the filter to apply the band firmly. Once the filter starts to turn, you should remove the wrench and finish loosening the filter by hand to prevent over-tightening or crushing.
Cap Wrench Benefits and Compatibility
A cap wrench fits over the fluted end (crown) of the filter and is attached to a 3/8″ drive ratchet. This design provides excellent use and a tight grip, especially on stubborn or stuck filters. Cap wrenches are highly effective for filters with standard flute counts and specific diameters, so it’s essential to confirm your filter’s size and flute pattern before purchasing one.
Cartridge filter housings often require dedicated cap sockets designed for that model, differing from those used on canister filters. The cap wrench connection allows turning with precise torque, reducing the risk of damaging the filter housing or seal. These wrenches usually cost around $15 to $30, depending on size and quality.
Using Oil Filter Pliers Safely
Oil filter pliers, such as tongue and groove pliers, can be a last resort when other wrenches fail, especially on filters that won’t budge. They provide strong grip force by compressing the filter canister, allowing you to turn it free. However, pliers often crush or puncture the filter, risking oil spills and requiring filter replacement.
To minimize damage when using pliers, apply gentle but firm pressure and turn slowly. If the filter remains stuck, switch to a properly sized cap or strap wrench whenever possible. Pliers are generally not recommended for removing the filter in routine maintenance due to the risk of filter damage.
Choosing the right tool depends on the filter size, clearance space, and condition of the filter. The table below compares common oil filter wrench types and their ideal use cases.
| Wrench Type | Description | Best For | Cost (Approx.) | Notes |
|---|---|---|---|---|
| Strap Wrench | Flexible band tightens around filter casing | Standard spin-on filters; good clearance | $10 – $20 | Gentle on filters; may slip if oily |
| Cap Wrench | Fits over filter crown, used with ratchet | Filters with fluted ends; stubborn filters | $15 – $30 | Provides strong use; size must match filter |
| Band Wrench | Metal loop tightens around filter body | Filters with sufficient clearance | $12 – $25 | More durable than strap; risk of crushing if overtightened |
| Three-Jaw Wrench | Adjustable jaws grip filter sides | Various filter sizes; stuck filters | $20 – $35 | Effective but can damage filter if mishandled |
| Tongue and Groove Pliers | Strong gripping pliers | Last resort stuck filters | $10 – $20 | Prone to crushing filter; use cautiously |
Always confirm that the oil filter wrench or cap socket exactly matches your filter’s diameter and flute count before using it to avoid damage or slipping.
3. Why Oil Filters Get Stuck and How to Prevent It
Oil filters often get stuck due to improper installation or prolonged use, making removal tough and frustrating. Over-tightening, dry gaskets, and heat changes cause the filter to bond tightly to the engine, while dirt and grime buildup add resistance. Preventing these problems requires correct installation techniques and regular maintenance.
Common Causes of Stuck Oil Filters
A major reason oil filters become difficult to remove is over-tightening during installation. When you screw the filter on too tight, it becomes challenging to unscrew later, especially if the threads bind or the gasket compresses excessively. Installing the filter without lubricating the gasket also causes it to stick to the mounting surface. Over time, repeated heating and cooling cycles cause the filter’s rubber seal to adhere firmly against the engine block.
Leaving the oil filter in place for too long increases the chance it will become stuck. Dirt and heat exposure lead to deposits and grime buildup around the filter base, which adds friction. An old filter that is past its recommended replacement interval can bond to the engine surface, complicating removal.
How Installation Mistakes Lead to Stuck Filters
Install the oil filter incorrectly, and you risk a stuck filter on your next oil change. The gasket should be lightly lubricated with clean engine oil before installation. Without this lubrication, the rubber seal can stick to the mounting surface after heat cycles.
Following the recommended tightening torque or “hand tight plus 3/4 turn” rule matters. This standard allows a secure but not over-tight seal. Many DIYers turn the filter too far, sometimes more than twice what’s recommended, which crushes the gasket and binds the filter in place.
Preventive Tips Checklist for Future Removals
Applying these preventive steps reduces the risk of stuck oil filters in routine maintenance:
- Lubricate the filter gasket lightly with fresh engine oil before installation.
- Hand tighten the filter until the gasket touches the mounting surface, then turn 3/4 to 1 full turn more.
- Replace the oil filter every time you change the oil, following the owner’s manual interval.
- Clean the filter mounting surface on the engine block before installing the new filter.
- Avoid leaving the filter installed for extended periods beyond the recommended change interval.
- Use a high-quality filter designed to resist gasket bonding and deposits.
- Inspect the O-ring or gasket for damage and replace if necessary.
These steps take only a few extra minutes and cost little but save hours of frustration and potential damage during removal.
Why Clean Filter Housing Matters
Dirty filter mounting areas cause filters to stick. Old oil residue and grime build up around the filter seat and gasket surface. This can cause the gasket to stick tightly or the filter to bind on the threads.
Before installing the new filter, wipe the filter housing surface clean with a rag. Removing oil sludge, dirt, or corrosion improves the seal and prevents the filter from becoming stuck due to debris. This simple cleaning step is often overlooked but highly effective in preventing future removal problems.
Effects of Heat and Chemical Exposure
Repeated heat cycles from running your engine and cooling off cause the oil filter’s rubber gasket to harden or bond to the metal mounting surface. Old oil residues can turn into sticky deposits that glue the filter in place.
Using high-quality oil and filters designed to resist deposit buildup helps minimize this risk. Some motor oils include additives that clean and protect engine parts, reducing residue formation on and around the filter.
4. How to Remove a Stuck Oil Filter Without Damaging It
Loosening a stuck oil filter safely requires patience and the right approach. Using penetrating oil and an oil filter wrench is the safest and most effective method. Avoid damaging the filter or making a mess by steering clear of screwdrivers and excessive force with pliers.
Using Penetrating Oil and Heat Application
Spraying penetrating oil around the bottom of the oil filter breaks down dirt and loosens the gasket seal. Allow the oil to soak for about 5 to 10 minutes before trying to remove the filter. Heat from a recently running engine makes the metal expand slightly, which can ease removal. Applying gentle heat from a heat gun near the filter base also softens the gasket, but take care to prevent burns or damage by not using excessive heat.
This method reduces the risk of twisting or tearing the filter’s rubber seal, preventing leaks when you install the replacement. Overuse of penetrating oil may create a mess, so apply just enough to wet the area without drenching surrounding parts.
Proper Use of Oil Filter Wrenches on Stuck Filters
An oil filter wrench designed for your filter type offers the best use without damaging the filter. There are several styles: band, claw, cap, or plier types.
Use the wrench according to the manufacturer’s instructions. Position it firmly on the filter, then apply steady counterclockwise pressure. The wrench’s long handles increase use, helping break the seal with less force. Follow these steps to remove a stuck oil filter safely:
- Allow the engine to cool slightly to avoid burns but keep the oil warm.
- Spray penetrating oil evenly around the oil filter base and wait 5 to 10 minutes.
- Select an oil filter wrench matching your filter’s size and type.
- Position the wrench securely on the filter.
- Apply steady, controlled counterclockwise pressure until the filter begins to turn.
- Remove the wrench and finish unscrewing the filter by hand.
- Prepare a drain pan to catch any residual oil dripping from the filter.
- Clean the filter mounting surface before installing the new filter.
Why Avoid Screwdrivers and Pliers for Removal
Puncturing an oil filter with a screwdriver is often suggested as a last-ditch option but creates several problems. It can cause oil to spill, create sharp metal edges, and may damage the engine’s sealing surface. This increases the risk of leaks or even engine damage if debris enters the oil system.
Using pliers, especially locking or channel-lock pliers, can crush the filter housing. This compresses the filter and makes removal even harder, often leaving pieces behind. It also risks damaging the filter mounting area on the engine block.
Reserve these tools for situations where the filter is severely damaged or other methods have failed. To avoid costly repairs or a messy cleanup, rely on proper tools and techniques whenever possible.
5. How to Prepare and Install a New Oil Filter Correctly
When installing a new oil filter, it’s important to ensure a proper seal and make future removal easier by following specific steps. First, remove any old gasket material left on the engine mounting surface. Leaving the old gasket can cause a double-seal issue, leading to leaks and difficult removal next time.
Before screwing on the new filter, apply a thin layer of clean engine oil to the rubber sealing gasket. This lubrication creates a better seal and prevents the gasket from sticking or twisting during removal. Avoid using engine grease or other lubricants, as these can interfere with the seal.
Hand-tighten the new oil filter only. Most manufacturers recommend turning the filter until the gasket makes contact with the mounting surface, then tightening it an additional 3/4 to 1 full turn by hand. Avoid over-tightening with tools or exceeding torque specs because overtightening can damage the gasket, cause leaks, or make the filter difficult to remove.
- Clean the engine mounting surface to remove old gasket residue.
- Apply a thin coat of clean engine oil to the new filter’s rubber gasket.
- Hand-tighten the filter until the gasket contacts the engine, then turn 3/4 to 1 full turn more.
- Do not overtighten or use a wrench to install the filter.
- Inspect the drain plug and new filter for leaks after installation.
Following these steps helps assure that the oil filter seals correctly and reduces the risk of leaks after startup. A properly installed filter also comes off more easily during the next oil change, saving time and effort. Different engines might have slight variations in torque recommendations, so checking the vehicle manual for exact specs can be helpful.
Always replace the old gasket to avoid double sealing, which is a common cause of oil leaks after installing a new filter.
6. Safety Precautions and Best Practices During Oil Filter Removal
Removing an oil filter safely requires several key precautions to protect yourself from burns and spills. Start by ensuring the engine is warm but not hot, around 100°F to 120°F. This temperature range allows oil to drain more easily without the risk of severe burns from hot surfaces or splashing oil. Avoid working immediately after driving; wait at least 30 minutes for the engine to cool to a safe level.
Wear proper protective gear every time you remove an oil filter. Nitrile or latex gloves prevent skin contact with oil and help you maintain a firm grip. Safety glasses protect your eyes from splashes. Long sleeves and pants shield your skin from accidental contact with hot oil or rough surfaces around the engine bay.
Place an oil drip pan or catch tray directly beneath the filter before loosening it to collect any oil that spills out. Keep absorbent rags or paper towels nearby to immediately wipe up drips and prevent slick spots on the floor. Avoid disposing of oil-soaked rags in open trash containers to reduce fire hazards.
- Ensure the vehicle is parked on a level surface and the parking brake is engaged.
- Wear gloves, safety glasses, and protective clothing like long sleeves.
- Wait at least 30 minutes after driving to let the engine cool to below 120°F.
- Use an oil drip pan placed directly under the oil filter to catch spills.
- Turn the oil filter counterclockwise using the appropriate tool.
- Keep absorbent materials handy for immediate cleanup of drips.
- Take used oil and the removed filter to an approved recycling center.
Use the proper oil filter wrench size to avoid slipping, which can cause injury or damage to the filter housing. Before installing a new filter, lubricate the rubber seal with clean engine oil to ensure a tight, leak-free seal. After removing the oil filter, immediately transport the used filter and drained oil in sealed containers to a designated recycling center or auto parts store accepting used oil. This reduces environmental contamination and complies with local regulations.
7. How Engine Conditions Affect Oil Filter Removal Ease
Removing an oil filter is generally easier when the engine is warm, but not hot. Heat causes the metal parts to expand slightly, loosening the filter’s grip on the engine block. After you run your engine for about 10 to 15 minutes, the oil filter reaches a temperature that softens the rubber seal while slightly expanding the metal housing, making it simpler to break the seal and unscrew the filter. Wait until the engine is warm but cool enough to touch to avoid burning yourself or damaging parts.
Cold engines cause the metal and rubber inside and around the oil filter to contract, tightening the seal and making the filter harder to remove. The oil inside the filter also thickens when cold, creating additional resistance. Attempting to remove the filter with a cold engine often requires more force and increases the likelihood of stripping the filter or damaging threads. For example, the rubber gasket can become brittle in cold conditions, causing it to tear and stick stubbornly to the mounting surface.
The optimal time to remove the oil filter is right after you turn off the engine when the oil and filter are warm but cool enough to handle safely. This timing balances easier removal with safety. Allow your car to sit for about 10 minutes after shutting it off to let the oil and filter cool from their peak temperature. Wearing gloves can provide extra protection during this process.
Engine conditions like temperature and oil state also matter because old, dirty oil can thicken and gum up the filter threads. Over time, this increased friction from trapped particles can make even a warm filter harder to twist off. Regular oil changes prevent excessive buildup and help keep removal efforts manageable. Oil flow restriction causing engine overheating can bake sludge onto the filter, making it stick tighter to the engine and harder to remove.
In some cases, such as working in cold weather or with an engine that hasn’t run recently, warming the filter area with a heat gun or warm cloth can help loosen the seal. Do not apply direct open flames to avoid damage. Allow extra cooling time before removing the filter when the engine runs very hot. You’ll get better results and avoid injuries.
Trying to remove a filter while the engine is either very cold or extremely hot can lead to extra time, tools, or risks. Stuck filters might need special removal tools or penetrating oil, which add to the overall effort and cost. Knowing when to tackle the job helps you finish faster and protect your engine parts.
8. When to Call a Professional for Oil Filter Removal
Attempting to remove an oil filter on your own might be more challenging than expected if certain risks or complications arise. You should consider calling a professional whenever the oil filter is severely stuck, the surrounding area shows damage, or the engine’s position makes access difficult. These situations increase the chance of causing harm to your engine or yourself, costing more time and money to fix than hiring trained help upfront.
Signs that it’s better to get professional assistance include stripped filter threads, leaking oil despite your attempts, visible corrosion or rust on the filter or housing, and oil residue indicating the filter may have been overtightened or cross-threaded. Also, if your vehicle’s engine layout is compact or positioned oddly, common in some luxury or performance cars, a professional will know the safest method and have tools designed for tight spaces.
Professionals use specialized tools not commonly found in an average DIY toolkit. These include chain-type oil filter wrenches, claw-style extractors, and even pneumatic or electric oil filter removal tools. These help avoid damage to the filter and mating surfaces, which can happen with improvised or worn-out hand tools. Use this checklist to decide if you should call a pro:
- Oil filter shows signs of rust, corrosion, or damage.
- You cannot loosen the filter with standard hand tools within 10 to 15 minutes.
- Oil leaks around the filter area after initial removal attempts.
- Engine layout restricts access to the oil filter, risking injury or damage.
- Filter threads appear damaged or stripped.
- You’re unsure about how to prevent cross-threading or proper tightening during removal.
- Previous attempts caused oil spills or extreme mess.
Never use excessive force or incorrect tools to remove a stuck oil filter; this could damage the engine and increase repair costs significantly.
Calling a professional for oil filter removal typically costs between $20 and $50, depending on your location and service shop rates. Considering that a damaged filter housing or oil leak can lead to engine damage, costing hundreds or thousands of dollars, this investment is often worthwhile. Professionals also safely dispose of the old oil filter, comply with local environmental regulations, and can inspect related components for any hidden problems.
Getting expert help makes sense when your DIY skills and tools aren’t enough to complete the task quickly and safely. Oil filters are designed to be replaced regularly to protect your engine, but mishandling can cause major issues. Pros bring not only the right equipment but also the experience to handle tough cases without damage or frustration.
Step-by-Step Action Plan for Removing and Replacing Your Oil Filter
Follow this plan to safely remove your old oil filter and install a new one with confidence.
- Before you start: Gather all tools and a new oil filter, making sure they fit your vehicle model. Confirm the engine is cool to avoid burns.
- Start of the job: Drain the engine oil to prevent spills when removing the filter. You’ll know it’s ready when oil flow slows significantly.
- During removal: Use the proper oil filter wrench and turn counterclockwise to loosen the filter. When it resists, try using a rubber strap or a special tool made for stuck filters.
- For a stuck filter: Apply penetrating oil, wait 10-15 minutes, then try again, checking for movement after each attempt.
- After removal: Clean the filter mounting surface on the engine to remove debris and old oil, ensuring a good seal for the new filter.
- Before installing the new filter: Apply a thin coat of fresh engine oil on the new filter’s rubber gasket to help it seal properly.
- Installation: Screw the new filter on by hand until the gasket contacts the mounting surface, then tighten it about ¾ of a turn. Avoid over-tightening to prevent damage.
- After completion: Refill the engine with the correct type and amount of oil. Start the engine and check for leaks around the filter and drain plug.
Frequently Asked Questions
How Do I Remove the Oil Filter Without a Tool?
You can try cleaning the filter and gripping it tightly with your hand, turning counterclockwise. Sometimes extra effort and traction are enough if the filter isn’t too stuck.
Are Oil Filters Righty Tighty or Lefty Loosey?
Oil filters tighten clockwise and loosen counterclockwise, following the standard threading direction.
Why Are Oil Filters so Hard to Get Off?
Filters can be stuck due to over-tightening, compressed gaskets, or buildup of oil and dirt causing a strong seal.
Is It Easier to Remove an Oil Filter, Hot or Cold?
Removing an oil filter hot is easier because the materials expand and loosen the seal slightly.
How Do I Prevent Oil Filter Removal Issues in the Future?
Apply fresh oil to the new filter gasket before installation and avoid over-tightening to ensure easier removal next time.
Can I Remove an Oil Filter with Common Household Tools?
Simple tools like a strap wrench can help, but dedicated oil filter wrenches are best for most filters.
The Bottom Line
Removing and replacing your oil filter carefully protects your engine and ensures proper oil circulation. Taking time to prepare and handle the filter correctly reduces risk of damage and messy spills. Your next step is to schedule regular oil changes and include filter checks to keep your vehicle running smoothly.