
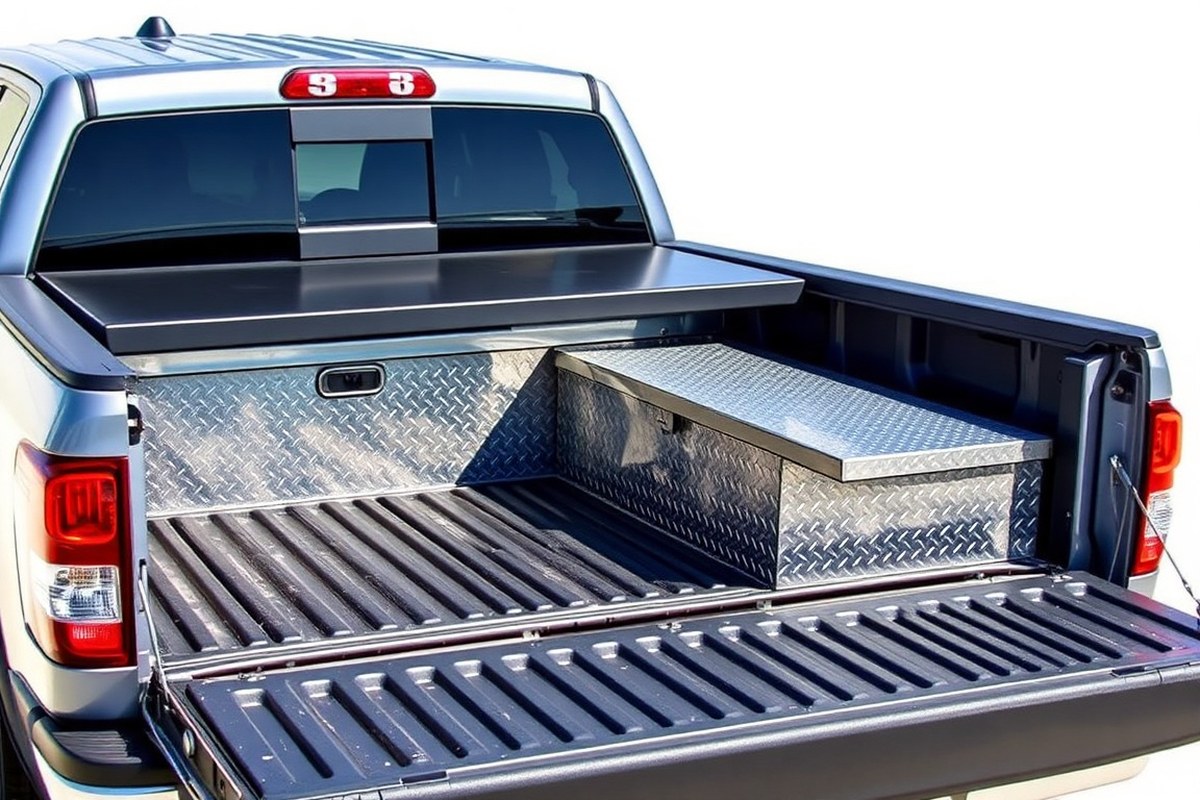
How to Install a Tonneau Cover with a Tool Box: Complete Step-by-Step Guide
You can install a tonneau cover with a tool box installed as long as the two are compatible and mounted correctly. Selecting a cover made to fit over your truck’s tool box helps ensure a secure, weather-tight installation. This guide focuses on fitting your tonneau cover with the tool box already in place, covering key steps for accurate measuring, installation, and weatherproofing. Truck owners wanting to combine functionality and protection will find clear instructions and practical tips for a smooth installation process.
Understanding how to measure your truck bed and choose the right tonneau cover for your tool box is essential. Proper rail positioning and cover attachment prevent leaks and gaps, so you avoid costly mistakes. You’ll also learn how to troubleshoot common issues like tight fabric or latch trouble, ensuring your setup stays reliable and easy to use. Follow these instructions to get the best fit and maintain your truck’s storage and bed protection.
Key Takeaways
- Confirm the tool box and tonneau cover are compatible before installation to avoid fitment issues.
- Measure your truck bed accurately, noting any length differences in front and rear to prevent gaps.
- Install the tool box securely first, positioning it where the cover rails can fit around it smoothly.
- Use made-to-fit tonneau covers designed to mount quickly with no tools, saving time and effort.
- Slide side rails onto bed rails and hand-tighten clamps every 12 to 18 inches to secure the cover.
- Adjust fabric tension and check rail level to fix any latching or fit problems after installation.
Can You Install a Tonneau Cover with a Tool Box Installed?
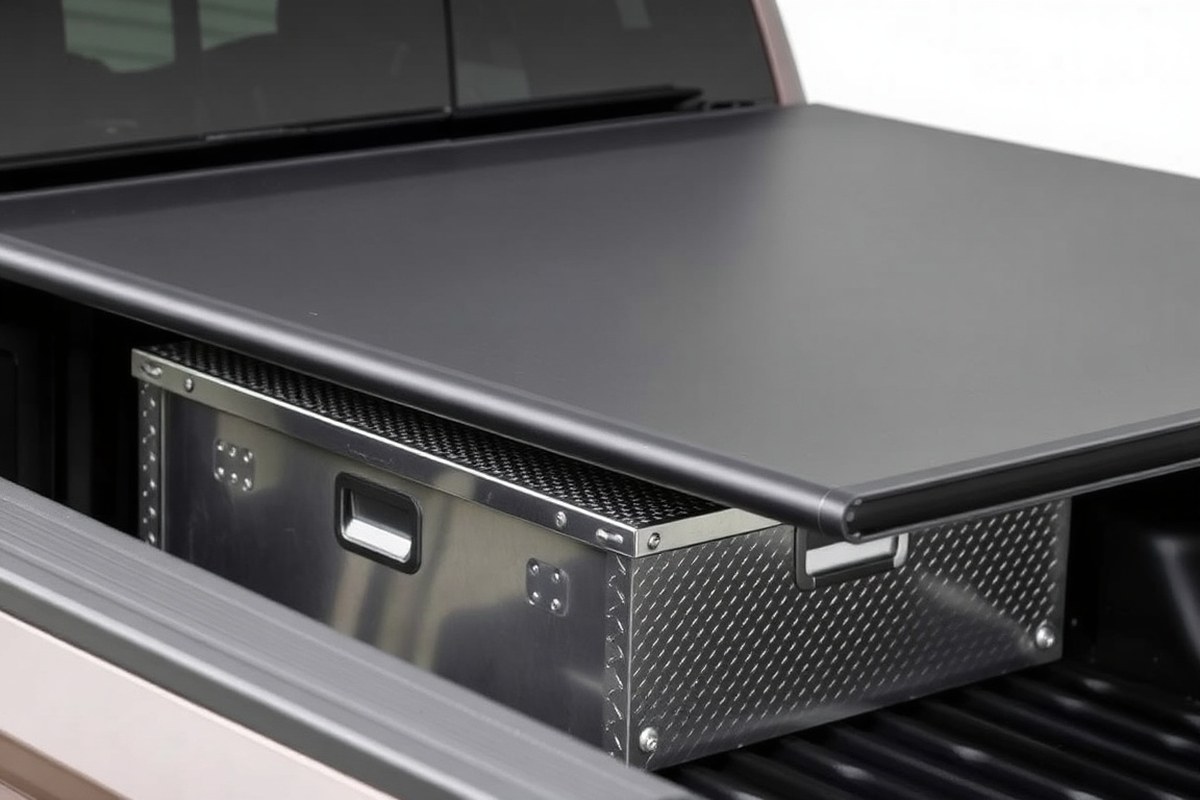
Yes, you can install a tonneau cover on a truck that already has a tool box installed, but compatibility is key to avoid issues. Some types of tonneau covers work better with tool boxes than others. Hard covers that fold or roll up can conflict with common tool boxes because of space and mounting constraints, while soft covers typically offer more flexibility. You need to ensure the truck tool box and tonneau cover do not interfere with each other’s operation or cause damage over time.
The first step is to confirm that the tool box is designed to fit alongside or even on top of your chosen tonneau cover. For example, some tool boxes are made specifically to mount at the front of the truck bed, right behind the cab, allowing most soft tonneau covers to roll or fold freely without obstruction. Conversely, if you have a hard tonneau cover with rigid rails, your tool box must fit without blocking these rails or creating excessive pressure that could tear or warp the cover.
Here’s a basic checklist to follow. Measure the height and width of the installed tool box and then check the clearance your tonneau cover requires when closed and when opening. Areas around the tailgate and bed rails must remain unobstructed. Your tool box might extend above the truck bed rails, so confirm the cover can still close completely. Check manufacturer specifications for both products to see if they’re rated for combined use. Some companies provide combo kits or advise specific models known to be compatible.
Decision rules help narrow down your options. Trucks with hard covers that lift or fold upward should avoid tool boxes mounted near the tailgate or those extending far above the bed rails. Choose tool boxes that sit low or are designed to be integrated with the cover. For trucks with soft tonneau covers, you can generally install a tool box at the front of the bed, making sure the cover clamps don’t interfere with box mounting points. Keep in mind, installation methods vary, some tool boxes require drilling the bed rails, while others clamp into place.
Proper installation reduces risks like cover stretching, tearing, or the tool box shifting during driving. Test the completed setup by opening and closing the cover multiple times and checking for binding or interference. Also, test the tool box’s stability under load. Costs vary by product type, but plan for between $150 and $500 for a compatible tool box plus another $300 to $1,000 for a tonneau cover, depending on brand and features.
Rarely, specialized 2-in-1 designs that combine a tool box with a tonneau cover are available. These can simplify installation and guarantee fit but tend to cost more and limit customization. Selecting compatible products and carefully following installation steps helps your tool box and tonneau cover work well together, offering both security and easy access to your truck bed.
Which Tonneau Covers Work Best with Tool Boxes?
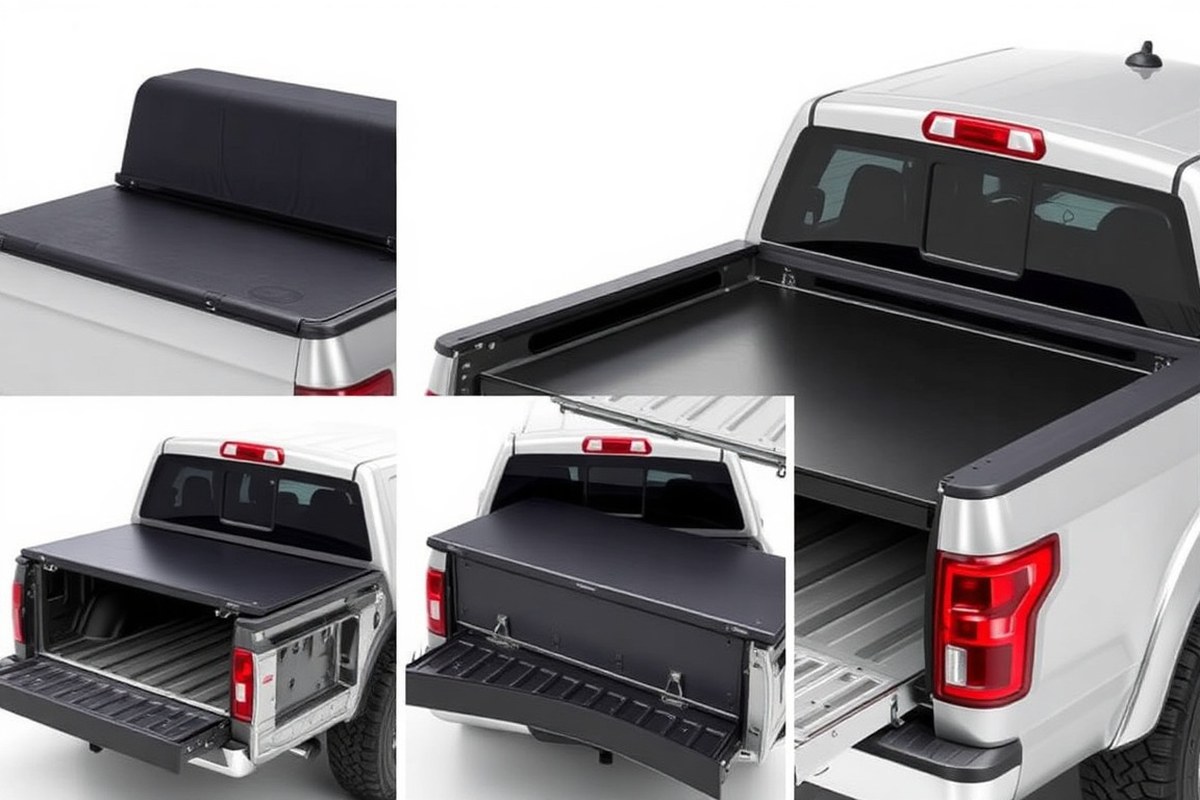
Choosing the right tonneau cover depends on the type of tool box you have and how you want to install the cover. Soft roll-ups offer the easiest installation around tool boxes due to their flexible material. Hard tri-fold and quad-fold covers require more care in rail placement and clamping, while retractable covers need precise alignment for their canister housing but provide excellent bed access. Each type impacts installation time and ease differently.
Soft Roll-Up Covers
Soft roll-up tonneau covers are the most tool box-friendly option because their flexible vinyl or fabric material easily wraps around or above the tool box. Installation typically involves clamping the side rails directly to the bed rails, avoiding drilling or modifications. This flexibility lets you position the rails slightly differently to accommodate tool box height without compromising the cover’s seal.
Expect to spend about 30 to 45 minutes installing a soft roll-up cover for the first time. The clamps require less torque than harder covers since the seal pressure is lower. The soft cover also allows for minor adjustments after mounting, which is helpful if the tool box has uneven edges or protrusions.
Soft roll-up covers are forgiving if your tool box is slightly taller or wider than average, but always measure twice to avoid gaps or bunching.
Hard Tri-Fold and Quad-Fold Covers
Hard tri-fold and quad-fold covers are made of panels that fold over each other and generally have rigid side rails. These covers sit directly atop or just inside the truck bed rails, which means the tool box must fit within the clearance dimension allowed by the side rails. You’ll need precise measurements of both tool box width and height to ensure the rails can clamp securely without interference.
Installation takes 30 to 45 minutes for most tri-fold covers but add about 10 minutes if installing alone, especially with a heavier hard cover. Clamps require higher torque compared to soft roll-up covers, as the solid panels press firmly against the seals to keep water out. Rail placement is critical, too close to the tool box and the cover won’t lay flat; too far and you lose bed coverage. Some covers even include cutouts or adjustable rails designed specifically to fit around common tool boxes.
Hard covers require more accurate leveling around the tool box; misalignment can cause difficulty folding and reduce weatherproofing.
Retractable Covers
Retractable hard covers use a rolling mechanism housed in a front canister. Because the canister must be bolted securely and aligned perfectly before side rails attach, installation is more involved, taking approximately 60 to 90 minutes. Space restrictions created by tool boxes require careful planning to ensure the canister housing and rails fit without obstructing the tool box or the bed rail clamps.
The main challenge with retractable covers is ensuring that the tool box does not block the track or affect the seal pressure. Since the cover slides on tracks, any interference can cause jamming or leaks. Installation involves mounting the canister first, then attaching the rails around the tool box, which often calls for precise adjustment of bracket positions. This type also demands stronger clamp torque, similar to other hard covers, to maintain a tight seal.
Allow extra time for aligning the retractable cover’s canister and rails, especially when working around a large tool box.
How to Measure Your Truck Bed for a Tool Box and Tonneau Cover
Ensuring both your tool box and tonneau cover fit perfectly requires precise measurements of your truck bed. Focus on inside rail length, tool box footprint and height, and clearances between the side rails. Accurate sizing prevents gaps, interference, or mounting problems.
Measuring Bed Length Inside the Rails
Bed length between the inside edges of the rails determines the maximum length of your tonneau cover and tool box setup. You want this measurement to be consistent and precise within about 1/8 inch to ensure the side rails and cover fit snugly without gaps or stretching. Follow these steps to get an accurate inside rail length:
- Open the tailgate fully to give yourself a clear line of sight and unobstructed access.
- Use a steel tape measure and place one end at the inside edge of the front rail (closest to the cab).
- Extend the tape straight back to the inside edge of the rear rail (nearest the tailgate).
- Record the measurement precisely, noting fractions of an inch.
- Repeat the measurement on both the driver and passenger sides to confirm they are within 1/8 inch of each other.
- If the lengths differ, identify the longer side and check for any rail damage or warping that may affect installation.
Measuring Tool Box Footprint and Height
The toolbox will sit on the bed rails or sidewall, so its width and length must fit inside the bed without blocking rail clamps or interfering with the cover rails. Height matters if the tonneau cover folds or rolls over the toolbox, affecting cover panel clearance and fit. Measure your tool box this way:
- Place the tool box in the intended position inside the truck bed.
- Measure the width at the widest points, across the tool box’s base, ensuring it won’t extend beyond the bed rails.
- Measure the length from the front of the toolbox to its rear edge; confirm this length fits comfortably inside the bed rails with space left for clamps and cover rails.
- Measure the vertical height from the bed floor to the tallest point of the toolbox, factoring in clearance for the tonneau cover to close without obstruction.
- Write down all three dimensions and compare them to your bed measurements to select the correct cover size.
Checking Rail-to-Rail Clearance
Rail-to-rail clearance ensures the tonneau cover rails can be mounted securely around the toolbox. Clamps or brackets usually attach every 12 to 18 inches along the rails, so the toolbox must allow enough space for these fasteners without forcing the rails outward. Check clearance as follows:
- Measure the distance between the inside edges of the rail on both sides near where the toolbox will be placed.
- Compare these values to the toolbox width to confirm it leaves space for clamps or bolts without pressing against the rails.
- Ensure the toolbox height does not interfere with cover operation and that the side rails remain level to prevent latching issues.
- Verify there is at least 12 inches between clamps to distribute pressure evenly and secure the rails properly.
Gathering the Tools and Materials Needed
To install a tonneau cover with a tool box, you need a certain set of tools and materials ready beforehand. Preparing everything ahead avoids interruptions, ensures correct mounting, and helps secure both the tool box and cover properly. Most installations take 30 to 60 minutes using basic hand tools.
Essential Hand Tools for Installation
The core tools for this job usually include a tape measure, cordless drill or driver, and a socket set. You’ll need the tape measure to double-check dimensions and clearances around the tool box. The drill or driver speeds up fastener installation but keep drill bits handy for pilot holes or new mounts. A socket set helps you tighten bolts securing rails and clamps firmly.
Standard screwdrivers and adjustable wrenches are useful for smaller fasteners or adjustments. Some tonneau covers need a torque wrench to tighten bolts to manufacturer specs. Check your cover’s instructions to see if this applies, especially if rubber or plastic parts are involved to prevent over-tightening.
Specialized Tools and Their Purpose
Some tonneau covers and tool boxes require specific tools for fitting. For example, some rail systems need hex keys of particular sizes, often included with the cover. Certain tool boxes attach with clamps that might require a clamp tightening tool or rubber mallet. A utility knife can help trim packaging or weather stripping.
If drilling into the truck bed or components is needed, use a quality metal drill bit to prevent damage. Avoid impact drivers unless instructed since they might crack plastic parts on some cover models.
Materials, Fasteners, and Accessories to Prepare
Having the right fasteners and materials ready is critical for secure mounting. Most tonneau covers come with their own clamps, bolts, screws, and seals. Check the parts list before starting and gather any extras you might need for your tool box clips or mounts.
Weatherstripping or foam tape is often required around the tool box edges to prevent water intrusion and rattling. A tube of thread locker (blue, medium strength) helps keep metal fasteners from loosening over time.
- Clamps and mounting brackets specific to your tonneau cover and tool box
- Bolts, screws, washers, and nuts matching manufacturer specifications
- Weatherstripping foam tape or rubber seals for waterproofing
- Thread locker to secure fasteners
- Cleaning cloth and mild cleaner to prep surfaces before mounting
Collecting these materials early saves time and avoids running out mid-installation. Use only the fasteners recommended to prevent damage or voiding the warranty.
Organizing Your Workspace and Tools
Arrange all tools and materials in an accessible spot near the truck. Group similar items together, fasteners separated by type and size, drilling tools together, hand tools grouped for quick reach. Lay out the tonneau cover panels and rails carefully to avoid scratches.
Clear workspace prevents lost screws or drops that can happen when working around a tool box. Having a small container or magnetic tray can keep tiny bolts and washers secure when not in use. Position the toolbox where you can reach clamps and screws without awkward bending or overreaching.
Cost and Time Factors for Tools and Materials
Basic hand tools like screwdrivers, a tape measure, and a socket set usually cost $20 to $50 if you don’t already own them. Specialty bits or torque wrenches may add $15 to $40. Thread locker and foam tape are inexpensive consumables, generally under $10 each. Proper investment improves installation quality and reduces return trips or adjustments.
Preparing tools and materials cuts installation time to under an hour for most styles. Missing or wrong tools can extend the process by hours and increase frustration. Double-check everything before you start to keep the workload manageable and safe.
Positioning and Installing the Tool Box in the Truck Bed
Properly positioning the tool box in your truck bed ensures it does not interfere with the tonneau cover’s rails or clamps. Most tool boxes sit close to the cab, but placing it too far forward or backward can prevent the cover from sealing correctly or cause misalignment. The key is to align the tool box so the side rails rest above or just beside it without obstruction, allowing clamps to secure the cover rails firmly.
Tool boxes with low-placed side rails require care because those rails might interfere with cover mounting hardware. Avoid mounting the tool box too high or too far forward to prevent contact with the cover’s front seal bar or crossbar. Mounting methods vary: permanent tool boxes often bolt directly to the bed, while removable or clamp-style boxes use brackets that allow easier adjustment. Both need a secure fit that won’t let the tool box move under driving vibrations, which can loosen clamps or rails. Follow these steps to position and mount your tool box for smooth tonneau cover installation:
- Place the tool box at the front of the truck bed, just behind the cab and centered left to right. Ensure there’s about 1 to 2 inches of clearance between the box and the bed rails for clamp placement.
- Check the height of the tool box rails. Rails positioned too low may hit the cover’s side rails; adjust the tool box height with shims or mounting brackets if needed.
- Mock up the tonneau cover rails around the tool box without tightening clamps. This helps visualize any interference points and allows minor adjustments to the tool box position.
- Secure the tool box to the bed using the manufacturer’s recommended mounting hardware. For bolt-on boxes, use the pre-drilled holes in the bed or anchor points. Clamp-style boxes should have evenly tightened brackets, ensuring no movement.
- Plug in the clamps to the cover rails next, starting with the front clamps. Tighten these first because they hold the cover’s front seal and prevent slack; leave rear clamps for last to allow fine-tuning.
- Test the cover’s fit by cranking down clamps gently and checking for any movement or gaps along the rails near the tool box.
- Adjust the tool box position slightly if the cover pulls loose at the tailgate or tight at the cab. Small shifts can improve tension balance and seal integrity.
Always tighten front clamps before the rear ones to prevent the cover from stretching unevenly and causing gaps or damage near the tool box.
Installing the Tonneau Cover Rails Around the Tool Box
Mounting the side rails of a tonneau cover when a tool box occupies part of the truck bed requires precise placement and careful clamping to ensure a secure fit without interfering with the tool box. Proper rail installation around the tool box guarantees the cover lays flat, retains its locking function, and prevents damage to either component.
For most tonneau cover kits, expect to use 6 to 10 clamps per side, depending on your bed’s length. When a tool box is present, adjust clamp placement so they secure the rails on the bed rails while avoiding any contact or pressure against the tool box edges. Maintaining clearances typically means positioning the rails at least 1 to 2 inches away from the tool box to prevent rubbing or interference as the cover opens and closes.
Use a rubber mallet to gently tap rails into position, ensuring they sit flush with the truck bed rails and clear the tool box by these few inches. Clamps should space evenly across the entire rail length but must not clamp directly over the tool box. Failure to leave adequate clearance can cause the cover to bind, reduce seal effectiveness, or damage clamps and the tool box. A proper fit also prevents water intrusion between the cover and tool box.
- Clean and dry the truck bed rails. Remove dust, debris, or moisture to promote clamp grip and prevent slipping during installation.
- Position the tool box securely. Confirm the tool box is installed and locked in place before mounting the cover rails.
- Place the side rails along the truck bed rails. Leave at least 1 to 2 inches of clearance between each rail and the tool box edges. The rails should be parallel to the bed rails and straight.
- Evenly space the clamps. For a standard 6-clamp side rail, position clamps at these approximate intervals: one clamp near the tailgate end, one near the cab, and the remaining four spaced evenly in between. Avoid placing clamps over or closer than 1 inch to the tool box.
- Secure each clamp. Use a socket wrench to tighten clamps firmly but avoid overtightening which can warp rails or damage the tool box paint. Check that clamps evenly press the rails against the bed rails without skipping pressure near the tool box.
- Confirm rail clearance. Open and close the tailgate and check the gap between the rails and the tool box remains consistent, with no contact or rubbing.
- Tighten clamps again after initial tests. A light re-tightening after a few minutes of settling helps ensure long-term retention.
Good results look like rails that lay flat and parallel to the bed rails with clamps securing them at regular intervals but never pressing on the tool box. Rails should not wobble or shift after tightening. Avoid placing clamps too close to the tool box edges. This step ensures your tonneau cover fits tightly without damage, retains water resistance, and stays easy to operate.
Attaching and Securing the Cover Panel over the Rails and Tool Box
Attaching the tonneau cover panels or roll over the rails and tool box requires careful alignment and tension adjustment to ensure a snug fit without wrinkles or gaps. Soft covers use snaps, Velcro, or clamps to fasten the fabric smoothly, while hard tri-fold or roll-up covers rely on hinges and latches. Properly securing the edges near the tool box prevents wind lift and water intrusion. Follow these steps to attach and secure the cover panels or roll, making sure the cover integrates properly with the tool box:
- Lay out the cover panels or unroll the soft cover. For soft covers, position the leading edge at the front rail near the cab, ensuring it doesn’t interfere with the tool box edges. For hard tri-fold covers, have a helper assist with placing the first panel flat on the rails.
- Attach the front edge to the front rail. Snap, Velcro, or clamp soft covers onto the front rail according to the manufacturer’s instructions. For hard covers, engage the hinges or brackets securely on the front rail, ensuring panel alignment with the tool box corner.
- Secure the side edges along the rails and tool box. Soft covers often have side snaps or clamps that attach directly to the rails and along the tool box edge. Hard covers should rest firmly on the side rails and tool box, with rubber seals compressed slightly to form a weather-tight fit.
- Adjust the tension of soft covers.Tighten the side snaps or clamps evenly on both sides when the fabric is too loose or bunching. Some models feature tension rods or straps underneath the cover; adjust these carefully until the fabric is taut but not overstressed. Leave about 1/4 inch of slack to avoid excessive strain on seams.
- Ensure the hard cover panels fold and latch correctly over the tool box. Fold each panel toward the tailgate, checking that the latches engage firmly without forcing. Realign the hinges or adjust the position slightly to prevent stress on the mounts when the cover resists closing.
- Check the seal between the cover and tool box. Run your hand along the interface to confirm no gaps are present. Install additional weather stripping or foam tape at the junction to improve the seal and reduce water intrusion when necessary.
- Test the cover by pressing gently on several areas. Confirm the cover remains taut without sagging and that the tool box cylinder latches remain accessible and fully functional.
Soft covers typically cost between $150 and $400 and weigh 10 to 20 pounds, requiring no special tools beyond clamps or snaps. Hard covers often weigh 40 to 60 pounds, so enlisting a second person helps position and align the panels safely. Proper tension prevents premature wear and keeps the cover looking neat, while secure edges near the tool box avoid rattling or wind noise during driving.
Preventing Water Intrusion and Weather Issues Around the Tool Box
Sealing the gap between the tonneau cover and the tool box is critical to keep water and debris out. Even small gaps allow rain or dust to enter, which can damage tools and cause rust. Start by inspecting the interface where the cover meets the top and sides of the tool box once both are installed. Use a high-quality, automotive-grade rubber or foam weatherstrip tape designed for outdoor use to create a continuous seal along these contact points. This tape should be at least 1/4 inch thick and self-adhesive for easy application. Clean both surfaces thoroughly with isopropyl alcohol before applying the tape to ensure strong adhesion.
Ensure the weatherstrip runs along the entire length where the cover and tool box meet, paying extra attention to corners where water often pools. For additional protection, apply a bead of exterior-grade silicone sealant in any remaining gaps or joints after the weatherstrip tape is in place. Allow the silicone to cure according to the manufacturer’s directions, usually 24 hours, before using the truck to prevent compromising the seal. Be cautious not to use too much sealant, which can cause mess and interfere with the cover’s movement.
Water intrusion often occurs when the tonneau cover is rolled open but secured with safety straps, allowing rain to drip directly into the tool box. To minimize this, install a drip rail or rain guard along the front edge of the tool box, which redirects water away and prevents pooling. These accessories typically cost between $20 and $50 and install with simple screws or adhesive, providing an affordable weatherproofing upgrade.
Replacing or adjusting the rubber seals on both the tool box lid and the cover rails improves weather resistance over time. These seals can wear out after years of sun exposure and temperature changes, especially in areas where summer highs reach above 90°F and winter lows drop below freezing. When seals become brittle or cracked, they lose elasticity and allow leaks. Expect the average replacement cost for rubber seals to range from $30 to $70, depending on the brand and material.
After all weatherproofing measures, test the installation by running a garden hose over the sealed joints for several minutes. Check inside the tool box for any moisture entry points. Good results mean dry tools even after heavy sprays of water, while any drips indicate where additional sealing is required. Repeat inspection and sealing before each wet season to maintain protection.
Regularly check and replace weatherstripping to prevent leaks, especially after exposing your truck to harsh weather or washing the bed.
Testing and Adjusting the Cover and Tool Box Installation
Verify the installation by testing each critical point where the tonneau cover and tool box interact. Ensuring the cover latches properly, rails align perfectly, and no components interfere guarantees durability and security. Poor alignment or tension can cause leaks, damage, or theft risk. You’ll need to check the latching mechanism, rail fit, cover tension, and overall tightness systematically.
Start by checking how the cover latches with the tool box installed. The latch should engage smoothly without extra force. Any resistance could mean the rails or box are shifted or the latch needs adjusting. Rails must be parallel and firmly fixed to prevent gaps or rail misalignment, which will hinder the cover’s slats from gliding freely.
Adjustments are common after the initial setup, especially if you spot loose spots or binding when closing the cover. Cover tension plays an important role; too loose causes flapping or water intrusion, while too tight stresses mounts and rails. Proper tension means the cover feels taut but still opens and closes without strain. Here is a practical step-by-step checklist to test and adjust your tonneau cover with the tool box installed:
- Close the cover slowly: Watch the cover slats feed smoothly into the rails without catching. If they catch, loosen the rails slightly, reposition, then retighten.
- Test latch engagement: Close the cover fully and operate the latch handle. It should catch firmly without excessive force or play. Adjust the latch position to align with the striker if needed.
- Measure rail alignment: Use a level or straightedge along the top edge of both rails. They should be parallel and level across the toolbox width. Adjust mounting brackets by loosening bolts and shifting rails slightly.
- Check cover tension: Pry up the center of the cover lightly. It should resist but not feel rigid or loose. Adjust tension by tightening or loosening the tension cables or springs according to the manufacturer’s instructions.
- Inspect for interference: Open and close the cover several times, observing any contact with the tool box edges or mounts. Realign rails or reposition the box as necessary to avoid scraping or binding.
- Secure all fasteners: Once adjustments are complete, retighten all bolts and clamps to manufacturer torque specs or until firmly snug but not overtightened.
- Perform a water test: Use a hose to simulate rain over the closed cover and toolbox seams. Check inside the bed for any leaks or water intrusion, and adjust seals or trim as needed.
This testing and adjustment process takes around 30 to 60 minutes, depending on fit complexity. Good results mean a cover that opens and closes smoothly, locks securely, has no rattles, and leaves no gaps or water leaks. Poor results might include difficult latching, cover slats binding, loose rails, or water seeping past seals. Persistent issues often trace back to misaligned rails or uneven tool box mounting.
Common Installation Mistakes and How to Fix Them
Incorrect clamp tightness is one of the most common errors when installing a tonneau cover with a tool box. Loose clamps allow the rails to shift, leading to leaks and cover bunching over time. Over-tightening, on the other hand, can damage the clamps or the truck bed’s finish. After installation, check clamp firmness by hand and tighten until snug. Then, retighten all clamps after driving the first 100 miles to secure everything properly.
Misaligned rails that hit the tool box cause installation headaches and cover fit problems. Rails that contact the box can prevent the cover from closing or latching correctly. To fix this, reposition the rails slightly away from the tool box edge. Use a tape measure and level to ensure rails run parallel to the bed rails. Rails usually need to maintain at least ½ inch of clearance from the toolbox to avoid interference. Adjust clamps and rail placement before fully tightening.
Leaks typically result from improper seal placement or rail alignment. Water often enters when the tonneau cover’s weather stripping isn’t flush against the tool box or bed rails. Ensure weather seals sit firmly and evenly along contact points. When there’s a gap, think about adding a thin rubber gasket or adjusting the rail height to improve seal compression. Test for leaks by spraying water over the cover edges after installation.
- Fix cover bunching by loosening and repositioning clamps to realign rails.
- Adjust tool box position closer or farther from the tailgate to provide enough lash clearance.
- Replace worn or twisted weather stripping to prevent leaks around the box edges.
- Use a rubber mallet sparingly to tap rails into proper alignment without damage.
- Inspect latch mechanisms for obstruction or misalignment caused by the tool box.
- Re-measure distances before drilling any holes to avoid rail-tool box interference.
Should the cover fail to latch properly due to the tool box blocking access, double-check the alignment of both the cover and box before forcing it closed. Adjust the tool box slightly forward or backward, or loosen cover rails and move them to clear the latch area. Testing the latch engagement by hand ensures smooth locking without forcing. Taking time to confirm proper clearances reduces frustration and wear on hardware.
Rails contacting the tool box means installation needs rework. Temporarily loosen all clamps, then nudge the rails upward or outward from the box edge. Using a spacer like a ¼-inch shim under rails can help maintain clearance. Avoid drilling new holes until you confirm the best position to balance clearance with a solid, sealed fit. After repositioning, retighten clamps evenly to keep rails from shifting during use.
Maintenance and Care Tips for Combined Tool Box and Tonneau Cover
Maintaining your tonneau cover and tool box starts with regular cleaning and inspecting the seals to prevent damage and leaks. Use a clean shop rag and mild soap with water to wipe down surfaces. Avoid harsh chemicals that can degrade seals or paint. After cleaning, examine the weatherstripping and seals along the cover edges and around the tool box. Look for cracks, tears, or sections where the seal may be coming loose, since compromised seals can allow water to enter and cause corrosion or damage to your tools.
Lubricating moving parts like hinges, latches, and lock mechanisms is essential to keep them operating smoothly and prevent rust. Use a silicone-based lubricant on hinges and locks every three months or more often if you notice stiffness. Avoid heavy oils that can attract dirt and grime. Check all mounting bolts and screws with a socket wrench fitted with a 1/2-inch socket. Tighten any loose fasteners by turning them snugly; be careful not to overtighten and strip threads. Plan to check fasteners seasonally or after heavy use, especially after winter when salt and road grime can accelerate rusting and loosening.
When the cover is not in use, secure it properly to protect it from wind damage and prevent accidental opening. Roll-up or folding covers should be fully secured in their open or closed positions according to manufacturer instructions. If the cover can be removed or folded back, store it in a dry, shaded place away from direct sunlight for long periods to prevent UV damage and warping. For hard covers, keep them latched tightly and lock them if possible, to protect both the cover and the contents of the toolbox.
Creating a maintenance checklist helps preserve the durability and performance of your combined tool box and tonneau cover. Monthly, clean surfaces and inspect seals. Quarterly, lubricate hinges and locks and tighten fasteners. Before winter, apply a water repellant to seals if recommended by the cover maker. After winter’s end or heavy storms, thoroughly check for damage or dirt buildup around all edges. This routine costs little time or money but can extend the life of your investment by years and prevent costly repairs.
Regularly check for loose bolts or cracked seals to avoid water damage that can ruin tools and the truck bed.
Step-by-Step Action Plan
Follow these steps to install your tonneau cover with a tool box correctly and avoid common issues.
- Before you start: Measure your truck bed and tool box to ensure compatibility; success means both fit without gaps or interference.
- Day 1: Gather all tools and materials; confirm you have brackets, clamps, seals, and the right tonneau cover model for your tool box.
- Day 2: Position and securely install the tool box in the bed; it should be tight against the bulkhead without movement.
- Day 3: Install the tonneau cover rails around the tool box, aligning them per manufacturer instructions; rails should sit evenly and clamp firmly to the bed.
- Day 4: Attach and secure the cover panel over the tool box and rails; the cover must close flush with no gaps along edges.
- Day 5: Apply weather seals around the tool box edges to prevent water intrusion; test by spraying water and checking inside the bed for leaks.
- After 1 week: Inspect the entire setup for loose fittings or damage; tighten clamps and adjust as needed to maintain stability and weather resistance.
- Ongoing: Perform regular maintenance by cleaning seals and inspecting hardware; replace any damaged components promptly to extend the life of your installation.
Frequently Asked Questions
How to Install a Tonneau Cover with a Tool Box?
Start by ensuring the tool box and tonneau cover are compatible, then follow specific steps to position and secure the tool box without interfering with the cover’s operation. Test the setup for stability and ease of use afterward.
Can You Install a Tool Box on Top of a Tonneau Cover?
Yes, but only if the tool box is designed for direct installation on the cover to avoid damage or interference with cover function.
What Types of Tonneau Covers Are Best for Trucks with Tool Boxes?
Hard tonneau covers typically work best because they provide a sturdy base and usually accommodate tool box installation better than soft covers.
Will Installing a Tool Box Affect the Tonneau Cover’s Waterproof Seal?
It can if not sealed properly; applying weather-resistant sealant around edges helps prevent leaks and water intrusion.
Can I Install a Tool Box Myself or Should I Hire a Professional?
You can install it yourself if you’re comfortable with basic tools, but a pro can ensure proper fit and avoid damage.
How Can I Prevent Scratches When Installing a Tool Box with a Tonneau Cover?
Use padding between the tool box and truck bed surface and handle all components carefully during installation to avoid scratches.
Wrapping Up
Installing a tonneau cover alongside a tool box demands careful measurement and step-by-step assembly to avoid problems like water leaks or damage. Start by confirming fit and securing the tool box firmly, then integrate the cover rails carefully around it. A good next step is to fully seal the edges to protect against weather, ensuring your truck bed stays dry and your tools safe.


