7 Easy Steps to Fix a Hole in Your Tonneau Cover
To fix a hole in your tonneau cover, start by identifying its material and style. Clean the damaged area thoroughly with mild soap and dry it completely.
Cut a rounded patch slightly larger than the hole, then apply waterproof adhesive evenly around the patch edges. Press the patch firmly onto the cover to remove air bubbles and let it cure undisturbed for 24 hours.
Keep your cover maintained to guarantee long-lasting protection. Following these basics will help you restore your cover effectively, with more detailed tips ahead.
Key Takeaways
- Clean and dry the damaged area thoroughly, removing dirt and loose threads before starting the repair.
- Cut a weather-resistant patch slightly larger than the hole with rounded edges for better adhesion.
- Apply a waterproof adhesive evenly around the hole and on the patch’s perimeter before positioning the patch.
- Press the patch firmly to eliminate air bubbles and wrinkles, ensuring full coverage and smooth edges.
- Allow the adhesive to cure undisturbed for at least 24 hours for a durable, waterproof repair.
Quick Overview: How to Patch a Hole in Your Tonneau Cover
Wondering how to quickly fix a hole in your tonneau cover? Start by cleaning the damaged area with mild soap and water to guarantee a smooth surface for patching.
Next, cut a patch from a vinyl repair kit that extends at least an inch beyond the hole, shaping the corners for better durability. Apply an outdoor-rated adhesive evenly around the patch, then carefully press it onto the cover’s damaged spot.
Cut a vinyl patch an inch larger than the hole, round the corners, and firmly apply with outdoor adhesive.
Smooth out any wrinkles and use your fingers or a roller to ensure firm contact, eliminating air bubbles. Let the adhesive cure for at least 24 hours to create a strong, lasting seal.
After curing, inspect the patched area to confirm the repair is tight and secure. This straightforward process helps you maintain your cover’s integrity and prolong its life without needing professional help.
With the right materials and patience during curing, your patch will effectively seal the damage and restore your cover’s protection.
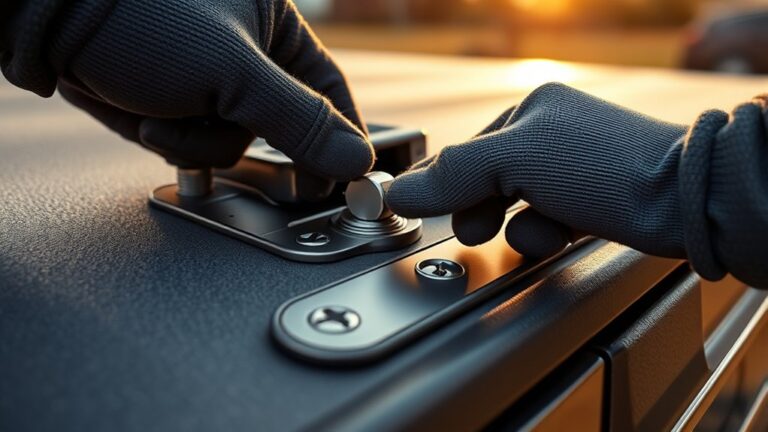
Find Out What Type of Tonneau Cover You Have
First, take a look at the material your tonneau cover is made from—could be vinyl, aluminum, or something else. Then, figure out the style. Is it a soft roll-up, a hard folding, retractable, or maybe a snap-on? Knowing these details really helps when it comes to picking the right way to fix your cover.
Identify Cover Material
How can you guarantee a successful repair? First, identify the cover material. Check tags or the manual to find the exact type, whether vinyl, fabric, aluminum, or fiberglass.
Feel the surface and test its flexibility to distinguish between soft and hard covers. A small patch with adhesive helps confirm compatibility before a full repair.
Knowing the material ensures you pick the right patch and adhesive for a lasting fix.
| Material | Surface Texture | Flexibility |
|---|---|---|
| Vinyl | Smooth | Flexible |
| Fabric | Rough | Flexible |
| Aluminum | Hard, Metallic | Rigid |
| Fiberglass | Smooth, Hard | Rigid |
| Plastic | Varies | Semi-flexible |
Identifying your cover type guides proper patch and repair material choices.
Recognize Cover Style
Because each tonneau cover type requires a different repair approach, you need to recognize whether your cover is soft, hard, retractable, or snap-on. Soft vinyl covers have a flexible, roll-up design, while hard covers are rigid, made from materials like aluminum or fiberglass.
Retractable covers feature slats or panels that roll into a cassette, and snap-on covers attach with clips or snaps, making removal easier. Proper cover identification helps you select the right repair method, ensuring effective tear repair and maintaining cover durability.
Knowing your cover style and material type is essential for choosing patches or sealants that match the specific needs of your tonneau cover. This prevents further damage and extends its lifespan.
Understand Repair Needs
What kind of tonneau cover do you have? Identifying your cover type is vital before any repair. Whether it’s soft vinyl, hard aluminum, fiberglass, retractable slats, or a snap-on style, each demands different repair techniques.
Start with a thorough material inspection, checking the cover material and attachment style like clips or clamps. Next, conduct a damage assessment. Look at the damage size and extent of the tear to decide if simple patching will work or if you need more extensive fixes.
Consult the manufacturer’s specs to confirm material compatibility with repair products. Understanding these factors helps you choose the right patching method and guarantees repair suitability. That way, your tonneau cover holds up well after fixing the hole.
Gather Weather-Resistant Materials for Your Cover
You’ll want to pick patch materials like vinyl or heavy-duty outdoor fabric because they can handle weather without cracking. Also, make sure to grab adhesives designed for outdoor use—things like marine-grade vinyl glue or waterproof repair tape work great to keep moisture out. When you prepare these tough materials the right way, your repair will hold up through sun, rain, and wind.
Selecting Durable Patch Materials
When selecting patch materials, prioritize weather-resistant options like heavy-duty vinyl or outdoor fabric to guarantee your repair lasts through rain, sun, and wind. Choose a vinyl patch or outdoor fabric with UV-resistant coatings to prevent sun damage and ensure durability over time.
Make sure the patch material matches your cover’s flexibility and thickness to avoid cracking or peeling. Opt for a patch slightly larger than the hole with rounded corners to strengthen the repair and reduce peeling edges.
While you’ll prepare adhesives later, keep in mind your patch must maintain waterproofing when combined with the right adhesive. Selecting a flexible, heavy-duty patch material designed for outdoor use will provide lasting protection and a seamless fix for your tonneau cover.
Preparing Adhesives For Outdoors
How do you guarantee your tonneau cover repair stands up to harsh weather? Start by choosing outdoor adhesives designed for durability. Opt for marine-grade glue or waterproof fabric adhesive with proven outdoor suitability.
Make certain the product label highlights UV resistant adhesive and waterproof adhesive properties to protect against sun and moisture damage. A flexible adhesive is essential to handle the cover’s expansion and contraction without cracking.
Apply a weatherproof sealant or outdoor repair glue that bonds firmly but remains pliable. After application, allow proper curing time in a shaded, dry spot to ensure maximum strength.
Store your adhesives in a cool, dry place and always follow manufacturer instructions. By preparing with the right weather-resistant materials, your repair will last through all conditions.
Clean the Damaged Area and Prepare It for Repair
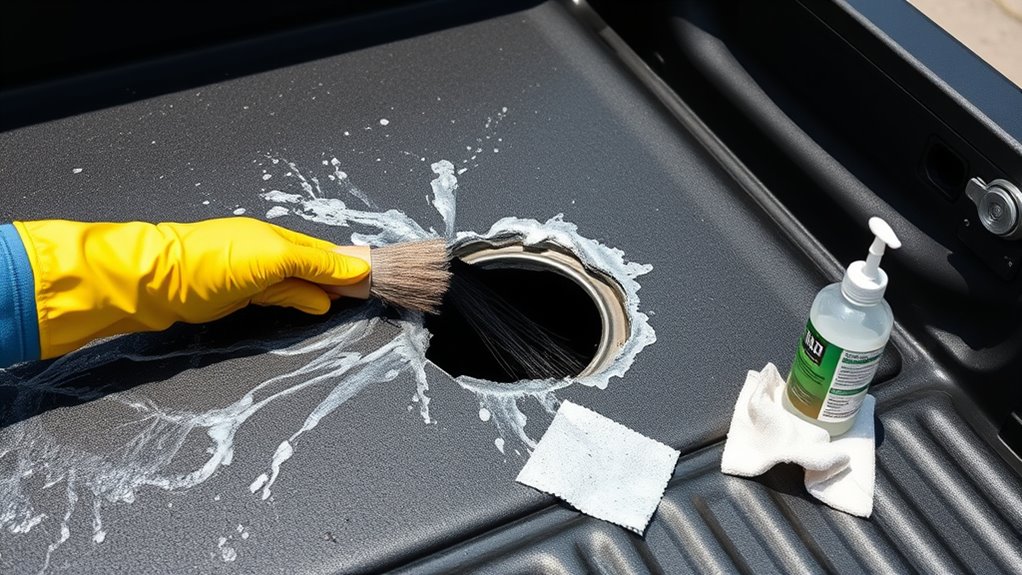
Why is cleaning the damaged area essential before fixing your tonneau cover? A clean surface ensures proper adhesion and a lasting repair. Start by gently cleaning the damaged area with mild soap and water to remove dirt, dust, and debris. Avoid harsh chemicals or solvents, as they can weaken the material.
After washing, dry the surface completely using a lint-free towel. Any moisture left can prevent the patch from sticking well. Next, carefully trim any loose threads or frayed edges around the hole with scissors. This removal creates a smooth, even surface, making it easier to prepare the area for repair.
Before moving on, double-check that the surface is free from dirt, debris, and moisture. Taking these steps to clean and prepare the damaged area will give your repair the best chance to hold strong against the elements.
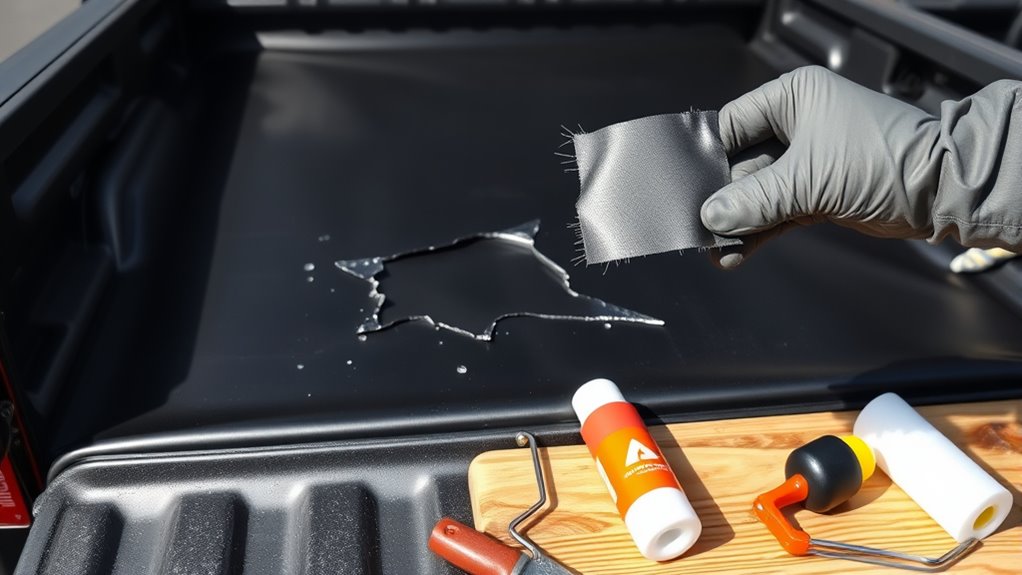
Cut and Fit a Rounded Patch to Your Tonneau Cover
Once you’ve cleaned and prepped the damaged area, it’s time to cut a patch that fits perfectly over the hole. First, measure the damaged area carefully and add at least a 1-inch overlap on all sides to guarantee full coverage.
Use chalk or a fabric marker to draw the shape of the patch on your weather-resistant material, making sure to include rounded corners. Rounded corners help prevent peeling and increase the patch’s durability.
Use sharp scissors to cut the patch precisely along the marked lines. Before moving on, place the patch over the damaged area to check the fit. It should cover the hole completely with smooth edges that distribute stress evenly, reducing the risk of tearing.
Keep these points in mind when preparing your patch:
- Measure accurately, adding overlap.
- Cut with scissors, ensuring rounded corners.
- Choose weather-resistant material for lasting repair.
This careful preparation will make applying adhesive much easier and more effective.
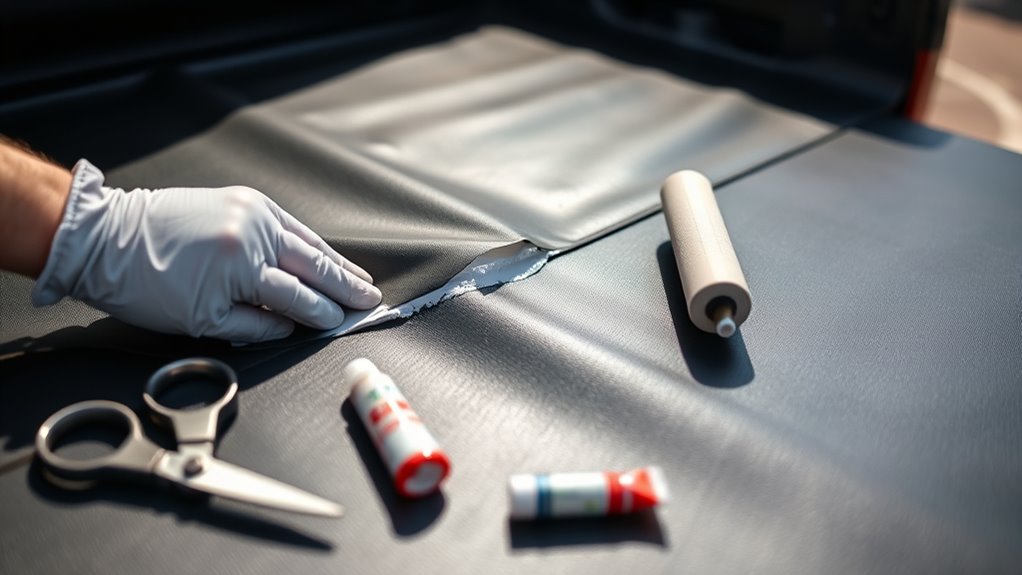
Apply Adhesive and Secure the Patch Firmly
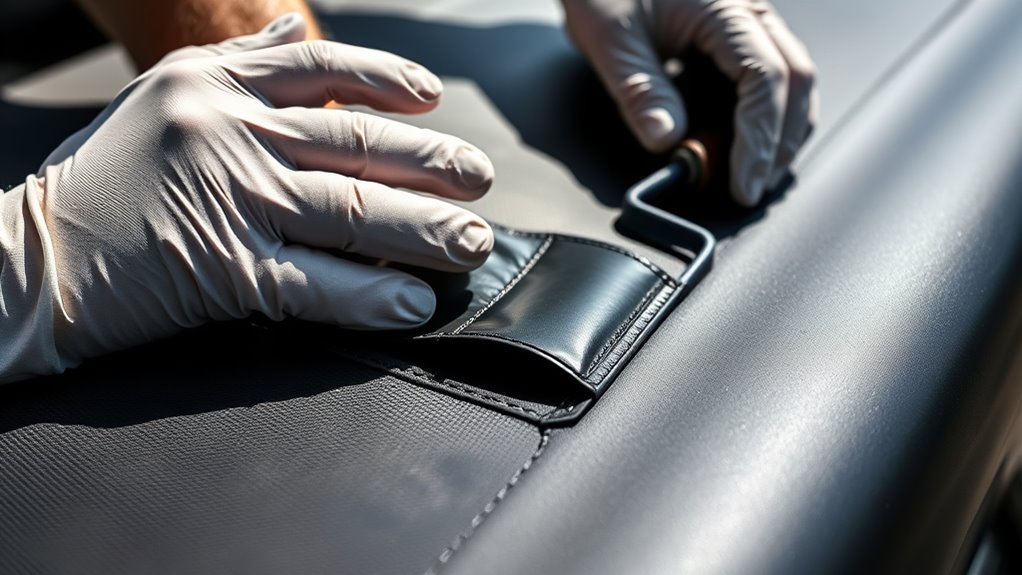
Although the patch is cut to size, you’ll need to apply a thin, even layer of waterproof adhesive around its entire perimeter to create a strong, lasting bond. If your patch has an adhesive backing, peel it carefully and add extra waterproof adhesive around the edges for maximum security.
Next, align the patch precisely over the hole, ensuring full coverage without any gaps. Once aligned, press the patch firmly onto the tonneau cover to avoid wrinkles or air bubbles that could weaken the seal. Use your fingers or a roller to apply consistent pressure across the surface, securing the patch tightly.
Don’t forget to press down the edges thoroughly to prevent water leaks and enhance adhesion. Finally, allow the adhesive to cure undisturbed for the recommended time, typically at least 24 hours. This curing process is crucial to ensure your patch stays secure and your tonneau cover remains waterproof.
Maintain Your Repaired Tonneau Cover for Long-Lasting Protection
To keep your repaired tonneau cover effective, you’ll need to maintain it carefully over time. Proper maintenance guarantees the durability and longevity of the repair. This provides lasting protection against the elements.
Regular cleaning with mild soap and water prevents dirt buildup that can weaken the adhesive and cover material. Periodic inspection of the repair site helps you spot any signs of wear early. This way, you can prevent further damage before it happens.
Focus on these key maintenance tips to protect your cover:
- Clean gently to avoid harsh chemicals that may degrade adhesive and fabric.
- Store or park in shaded areas and consider UV-protective sprays to reduce sun damage.
- Keep the cover taut without overstretching to prevent stress on patched areas.
Frequently Asked Questions
Can I Repair a Hole in My Tonneau Cover Myself or Hire a Professional?
You can choose DIY repair if the hole is small and you want a cost-effective fix using basic repair tools. However, professional assistance offers better repair durability, material compatibility, and weather resistance, which improves longevity and reduces aesthetic impact.
Consider the cost comparison and warranty considerations before deciding. For lasting results, professionals guarantee seamless patches, but DIY works for quick, temporary fixes. Balance your skill level with desired durability and appearance.
How Long Does the Adhesive Take to Fully Cure?
You know what they say: patience is a virtue. The adhesive strength usually peaks after 24 to 72 hours, depending on curing time, surface preparation, and material compatibility.
Proper application techniques guarantee seal integrity and repair durability while boosting weather resistance. Avoid disturbing the patch during the bonding process for best results.
If you need adhesive removal, wait until it’s fully cured to prevent damage. Following instructions assures a lasting fix.
What Type of Adhesive Works Best for Different Tonneau Cover Materials?
For vinyl tonneau covers, choose marine-grade vinyl glue for excellent material compatibility, adhesive strength, and weather resistance. Hard plastic or fiberglass covers need epoxy or resin-based adhesives that offer strong UV protection and patch durability.
Fabric covers require flexible, outdoor fabric adhesives to avoid flexibility issues. Proper surface preparation boosts curing time and patch durability. Follow application techniques carefully, and if needed, use adhesive removal methods safe for your cover’s material to maintain repair quality.
Will the Patch Affect the Cover’s Waterproof Rating?
Yes, a patch can affect your cover’s waterproof integrity, but if you choose the right adhesive durability and guarantee material compatibility, you’ll maintain weather resistance.
Pay attention to patch size and application techniques to avoid leaks. Pick patch color matching and UV protection to keep repair longevity high.
Regular maintenance tips, like resealing edges, help preserve waterproofing. With proper care, your patch won’t compromise your cover’s performance.
Can I Use a Repair Kit Instead of Cutting My Own Patch?
You absolutely can use a repair kit instead of cutting your own patch. Studies show kits improve DIY repair success by 40%. Kits offer pre-sized patch materials and adhesive types tailored for waterproof sealing and weather resistance, boosting cover durability.
Just check material compatibility with your cover to avoid adhesion issues. Remember, curing time is essential for a lasting fix. While professional repair might be pricier, kits give you a reliable, time-saving alternative.
Conclusion
Now that you’ve fixed that hole in your tonneau cover, you’re ready to hit the road like a true pioneer, no wagon needed! By following these easy steps and using weather-resistant materials, you’ve given your cover a new lease on life.
Just remember to keep it clean and check your patch regularly. With a little care, your cover will stay strong and protect your truck bed for many miles to come.
Keep rolling and stay covered!