How to Clean an Oil Filter in 10 Easy Steps
First, confirm your filter type, disposable or reusable mesh, since only reusable filters can be cleaned.
Gather gloves, cleaning agents, and tools, then cool your engine and drain oil.
Remove the filter carefully, soak it in a suitable cleaner, rinse thoroughly, and air dry completely.
Inspect for damage or residue, then lubricate the gasket and reinstall by hand without over-tightening.
Finally, check for leaks once the engine runs.
Keep going to uncover detailed tips for each step.
Key Takeaways
- Remove the oil filter carefully with a wrench after the engine has cooled and oil has drained into a pan.
- Submerge the filter in a cleaning agent like solvent or kerosene and soak to loosen oil and debris.
- Rinse the filter thoroughly with clean water to remove all residues and contaminants.
- Use compressed air below 40 PSI to blow out dirt and water from inside the filter, then air dry completely.
- Inspect the filter for damage, worn gaskets, or embedded particles before deciding to reuse or replace.
Decide When to Clean or Replace Your Oil Filter
Although it might seem convenient to clean and reuse your oil filter, most experts recommend replacing it during every oil change, typically every 3,000 to 5,000 miles. The reason is simple: embedded particles in the oil filter are tough to remove completely, which reduces its ability to protect your engine.
Experts advise replacing your oil filter every 3,000 to 5,000 miles for optimal engine protection.
While some reusable mesh filters can be cleaned and reinstalled, they lose efficiency if not thoroughly dried or properly maintained. If you notice signs like poor engine performance or reduced oil pressure, it’s a clear sign to replace the oil filter rather than clean it.
Using a new filter ensures your engine stays protected from microscopic debris that accumulate over time. So, when deciding whether to clean or replace the oil filter, remember that replacing it is generally more reliable and safer for your vehicle’s health.
Cleaning is rarely enough to restore full filtration effectiveness.
Get Your Tools and Cleaning Supplies Ready
If you decide to clean a reusable oil filter, the next step is to gather the right tools and cleaning supplies to do the job effectively. Start by collecting essential tools like gloves, safety goggles, a screwdriver or wrench, and compressed air to blow out debris.
For cleaning supplies, prepare solvent, kerosene, aerosol carburetor cleaner, or dish soap to remove oil and grime thoroughly. Prioritize safety by working in a well-ventilated area and laying down protective sheets to catch spills.
Have a container or basin ready for soaking or rinsing the filter, and a clean towel or air compressor to dry it afterward. Make sure all your tools and cleaning supplies are clean and in good condition to avoid contaminating the filter during the process.
Taking these safety precautions and preparing the right equipment guarantees your cleaning job goes smoothly without any unwanted mess or hazards.
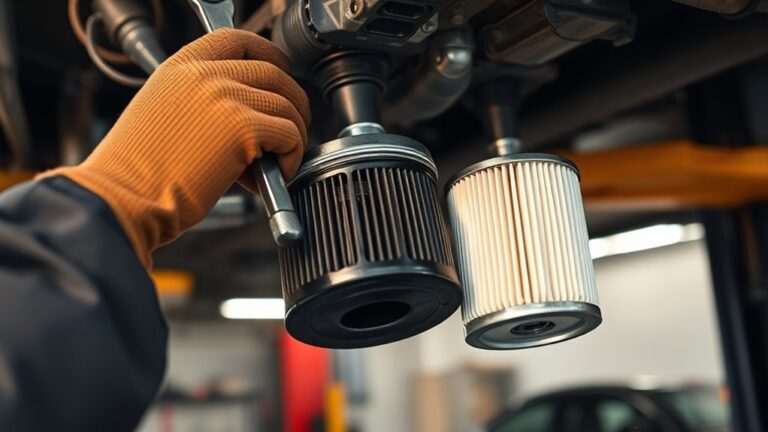
Identify Your Oil Filter Type Before Cleaning

Before you start cleaning, make sure you identify whether your oil filter is reusable or disposable. Proper filter identification is vital because reusable mesh filters can be cleaned and reused, while disposable paper filters are meant for one-time use only.
Identify if your oil filter is reusable or disposable before cleaning to avoid damage and save time.
To determine your filter type, check for any markings or model numbers on the filter itself. These often indicate if it’s washable. Also, inspect the filter’s construction: reusable mesh filters have a metal or wire mesh, whereas disposable paper filters consist of cellulose or synthetic fibers.
Don’t forget to consult your vehicle manual or the manufacturer’s instructions to confirm if your filter supports cleaning. Knowing whether your oil filter is a reusable mesh or disposable paper type will save you time and prevent damage.
This step guarantees you follow the correct cleaning process tailored to your specific filter type.
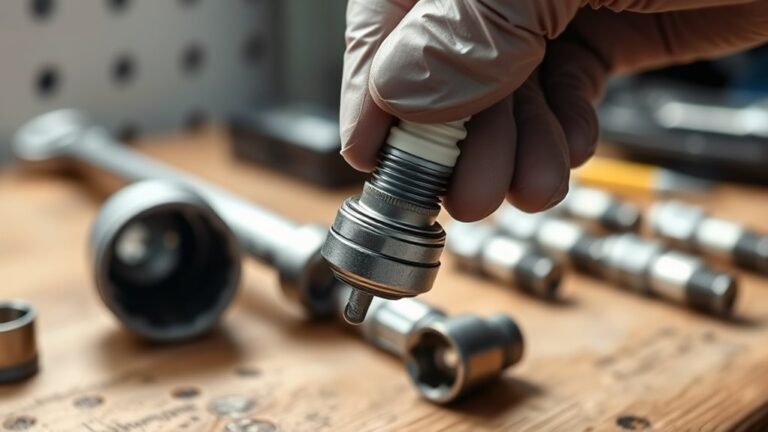
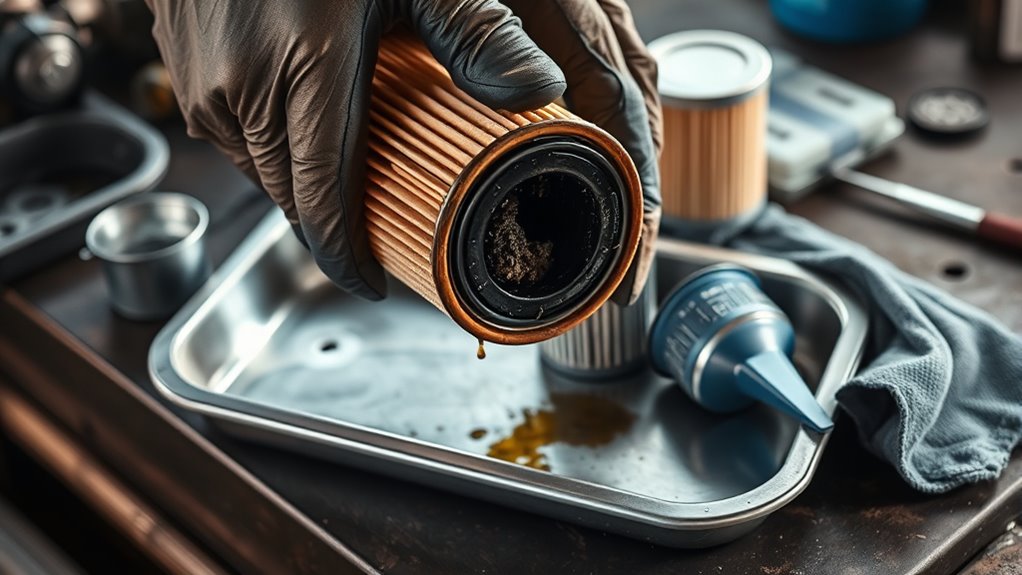
Access and Remove the Oil Filter Safely
Since the engine must be completely cool to avoid burns, start by ensuring it has cooled down before you access the oil filter. For your safety, always wear gloves and protective eyewear to shield yourself from oil splashes and dirt during removal.
Position a drain pan underneath the oil filter to catch any residual oil that might spill.
To remove the oil filter, use a wrench or your hand to carefully turn the filter cap or housing counterclockwise. If the filter feels stuck, gently tap around the housing with a rubber mallet to loosen it without causing damage.
Take your time and avoid forcing the filter off, as this could harm the housing or cause spills.
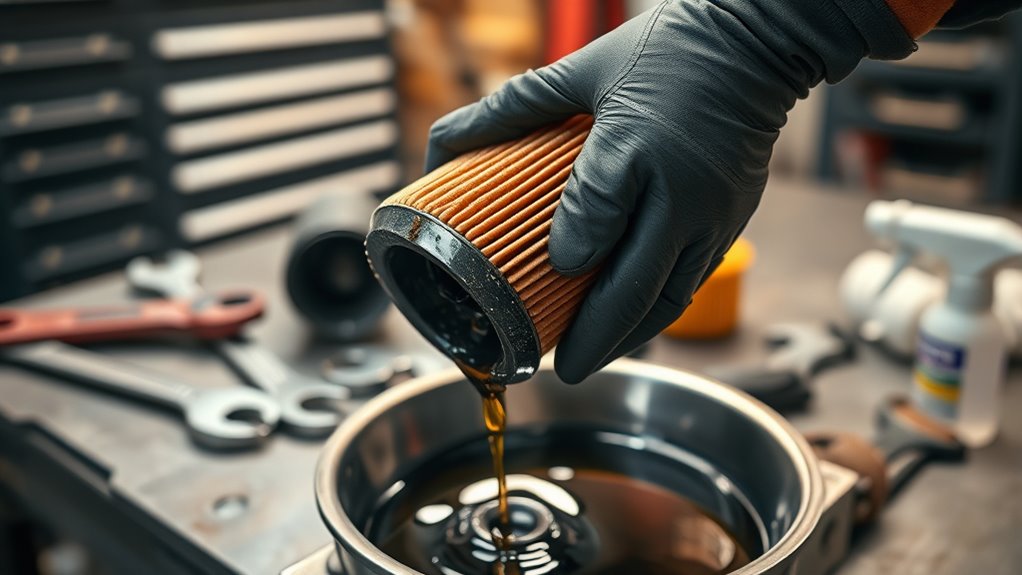
Rinse the Oil Filter With the Right Cleaning Agents
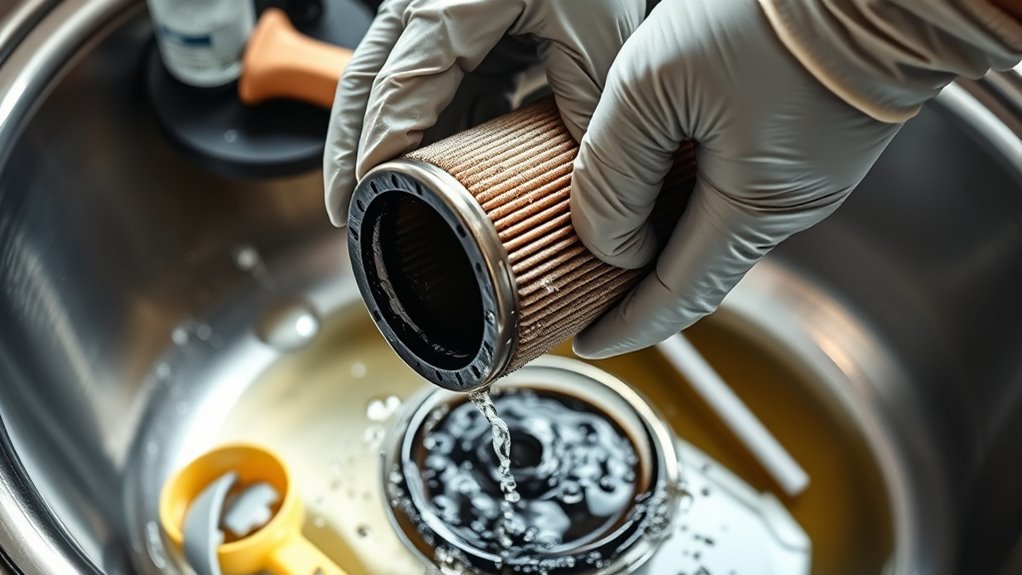
When cleaning your oil filter, choose a cleaning agent that effectively removes oil and debris without harming the filter media. You can use solvent, kerosene, aerosol carburetor cleaner, or dish soap as your cleaning agent.
Submerge or spray the oil filter with the chosen agent, letting it soak for several minutes if needed. This helps break down stubborn oil deposits and grime. Avoid harsh or abrasive cleaners, as they can damage the filter’s delicate components.
After soaking, thoroughly rinse the oil filter with clean water to wash away any leftover contaminants and cleaning agent residue. This step guarantees no chemicals remain that could affect your engine’s performance later.
Blow Out Dirt and Water With Compressed Air
After rinsing your oil filter thoroughly, you’ll want to remove any remaining dirt and moisture trapped inside the filter media. Use compressed air to blow out the dirt and water from the filter by directing air from the inside out. This method helps clear away dust, debris, and moisture that can compromise your engine’s performance.
Keep the air pressure below 40 PSI to avoid damaging the delicate filter media. Blow in short bursts while frequently inspecting the filter to prevent over-pressurizing. Always wear safety goggles and a dust mask to protect yourself from airborne particles during this process.
Removing all dirt and water ensures the filter is clean and ready for the next step, preventing contamination of engine oil. This step is vital to maintain the filter’s efficiency and prolong your engine’s life.
Air Dry the Oil Filter Completely Before Reinstalling
Make sure you air dry the oil filter completely before putting it back on. This helps prevent any moisture-related engine issues. Just place the filter in a well-ventilated spot and let it sit for at least 30 minutes.
If you want to speed things up, you can use compressed air to blow out any leftover water. But be careful—avoid using heat sources because they can damage the filter material and make it less effective.
Importance Of Thorough Drying
Why is thorough drying essential before reinstalling your oil filter? Thorough drying guarantees all moisture is removed, preventing milky oil and potential engine corrosion. Moisture left inside the filter can compromise oil quality, reducing engine protection and filtration efficiency.
By air drying, you allow residual water to evaporate naturally without risking damage that high heat methods might cause. While small amounts of water can evaporate during engine operation, relying on this isn’t safe, as trapped moisture can accelerate corrosion and filter deterioration.
Proper moisture removal not only safeguards your engine but also extends the filter’s lifespan. So, make sure your oil filter is completely dry before reinstalling it to maintain ideal engine performance and avoid costly damage.
Air Drying Best Practices
Although drying an oil filter might seem straightforward, following proper air drying best practices guarantees no moisture remains to harm your engine. Start by placing the filter in a well-ventilated area to promote effective air drying.
Use compressed air to blow out any residual water, directing it from the inside out for thorough moisture removal. Avoid using heat sources like ovens or hair dryers, as excessive heat can damage the filter media.
Let the filter air dry for at least 30 minutes to ensure complete dryness. Before reinstalling, double-check that no moisture lingers inside the filter.
Risks Of Residual Moisture
How much damage can residual moisture inside your oil filter cause? Even small amounts of leftover water can mix with engine oil, creating a milky substance that reduces lubrication efficiency. This can lead to increased wear and potential engine damage.
Air drying the filter completely before reinstalling is essential to prevent this issue. While using compressed air helps remove water from inside out, it often doesn’t eliminate all moisture. Oven drying at 180°F can speed up evaporation but requires caution to avoid damaging the filter.
Ensuring your oil filter is thoroughly dry minimizes risks like corrosion and bacterial growth, protecting your engine’s performance. Don’t skip thorough air drying. Removing every trace of residual moisture keeps your engine oil clean and your engine running smoothly.
Inspect the Oil Filter for Damage and Residue
Before you start cleaning the oil filter, carefully inspect it for any visible damage like cracks, tears, or worn gaskets that could affect its performance. Look closely for residue such as built-up sludge or debris, which may indicate the filter is too clogged to reuse.
Check the metal parts for corrosion or rust, as these weaken the filter’s integrity. Also, inspect the filter media for embedded particles or discoloration, signaling contamination or wear. Confirm the gasket remains intact and pliable, without cracks or deformities, to maintain a proper seal.
| Inspection Focus | What to Look For |
|---|---|
| Damage | Cracks, tears, worn gaskets |
| Residue | Sludge, debris buildup |
| Structural Integrity | Rust, corrosion, media quality |
Thorough inspection helps you avoid reusing a compromised filter that could harm your engine.
Lubricate the Gasket and Reinstall the Oil Filter
Before you reinstall the oil filter, go ahead and apply a thin layer of clean engine oil to the gasket. This helps ensure you get a proper seal.
Next, screw the filter on by hand. Turn it until the gasket makes contact with the mounting surface. After that, tighten it just enough to prevent leaks—don’t overdo it though!
Once it feels snug, double-check that the gasket is sitting evenly. Before you fire up the engine, take a moment to inspect for any leaks. That way, you can be confident everything’s sealed up correctly.
Gasket Lubrication Importance
Since a properly lubricated gasket guarantees a tight seal, you should always apply a thin layer of clean engine oil to it before reinstalling the oil filter. This gasket lubrication is vital because it creates a proper seal that prevents leaks during operation.
The oil also reduces friction, so the gasket won’t stick or tear when you tighten the filter. Using fresh oil helps keep the gasket flexible and prevents it from hardening or becoming brittle over time.
Proper gasket lubrication ensures even compression, which maintains consistent oil pressure and filtration efficiency. By lubricating the gasket before reinstalling the oil filter, you secure a snug fit and minimize the risk of oil leaks or filter failure later on.
Don’t skip this essential step for a reliable engine performance.
Proper Filter Installation
How exactly should you reinstall the oil filter to guarantee a secure fit? First, apply a thin layer of clean engine oil to the rubber gasket using your finger or a clean cloth. This lubrication helps create a proper seal, preventing sticking or leaks during installation.
Next, screw the filter onto the mounting surface by hand until it’s snug. Then, tighten it an additional ½ to ¾ turn to secure it firmly. Be careful not to over-tighten, as this can deform the gasket or damage the threads, risking leaks.
Finally, double-check that the gasket is seated correctly and the filter is tightened properly before starting your engine. Following these steps assures a reliable seal and protects your engine.
Ensuring Leak-Free Fit
To guarantee a leak-free fit, you’ll want to lubricate the rubber gasket of the oil filter with a thin layer of clean engine oil before installation. This helps the gasket create a proper seal against the mounting surface.
When reinstalling, gently tighten the filter by hand until the gasket touches the surface, then turn it an additional ¾ to 1 full turn. Using a filter wrench can help you tighten the filter snugly without over-tightening, which risks damaging the gasket or threads.
After tightening, check that the gasket moves freely and is seated evenly to prevent leaks. Finally, wipe away any excess oil around the gasket to avoid drips during operation. Following these steps assures a secure, leak-free seal every time.
Check for Leaks and Troubleshoot After Reinstallation
Once you’ve reinstalled the oil filter, start the engine and let it run for a few minutes while you carefully check for any oil leaks around the filter housing or gasket. Inspect the area right after startup and periodically during operation for any signs of dripping or seeping oil.
Use a clean cloth or paper towel to wipe around the filter and gasket area to spot fresh oil leaks. If you notice leaks, tighten the filter slightly, but don’t over-tighten, as this can damage the gasket or threads.
Keep an eye on the engine oil pressure and oil level. Low oil pressure warnings may indicate leaks or improper installation. Address any issues promptly to avoid engine damage.
Frequently Asked Questions
Can I Clean an Oil Filter Multiple Times Before Replacing It?
You can clean a reusable oil filter multiple times, but keep in mind that filter maintenance has limits. Each cleaning removes some debris, but microscopic particles often stay trapped, reducing efficiency.
Using proper cleaning techniques helps extend the oil filter lifespan, but repeated cleanings will eventually degrade performance. Most experts recommend replacing the filter after a few cleaning cycles to guarantee the best engine protection and avoid decreased flow or filtration issues.
What Are the Signs That an Oil Filter Is Beyond Cleaning?
You’ll know your oil filter is beyond cleaning when its lifespan is exceeded, and cleaning effectiveness drops considerably. If the filter material shows visible deterioration, clogging, or damage, it’s time to replace it.
Also, if you notice increased engine wear or reduced oil pressure after cleaning, the filter no longer does its job. Don’t rely on repeated cleaning; once these signs appear, you should swap the oil filter for a new one.
Is It Safe to Use Household Cleaners on an Oil Filter?
You shouldn’t use household cleaners on your oil filter because over 70% of these products lack chemical compatibility with filter materials. Using them risks damaging the filter media and reducing cleaning safety.
Household cleaners often contain harsh chemicals that leave harmful residues or clog the filter, which compromises engine performance. Always prioritize products designed specifically for oil filters to maintain chemical compatibility.
This guarantees effective, safe cleaning without voiding warranties.
How Often Should I Clean My Oil Filter for Optimal Performance?
You should clean your oil filter based on its lifespan and your driving conditions. Typically, reusable filters need cleaning every 10,000 to 15,000 miles, but heavy use might require more frequent attention.
Sticking to the recommended cleaning frequency helps maintain your filter’s performance, preventing clogging and ensuring proper engine protection. Over-cleaning or ignoring signs of wear can reduce efficiency, so regularly inspect your filter during oil changes for peak results.
Can Cleaning an Oil Filter Affect Engine Warranty Coverage?
Imagine your engine’s smooth hum suddenly silenced by denied repairs—that’s the reality when cleaning an oil filter clashes with warranty implications. You might think you’re saving money, but if you ignore manufacturer guidelines, you risk coverage exclusions.
Most warranties require new, approved filters; cleaning and reusing can void protection. So, always check your vehicle’s policy before cleaning to keep your warranty intact and avoid costly surprises down the road.
Conclusion
Just as a clean oil filter lets your engine breathe easy, taking these simple steps guarantees your ride stays smooth and reliable. Imagine finishing the job, wiping your hands, and hearing your engine purr like new. Coincidence? Not at all.
By knowing when to clean or replace your filter, using the right tools, and double-checking for leaks, you’re not just maintaining your car; you’re giving it the care it deserves. Keep it running strong!