

How Long Does It Take to Replace Shocks – A Step-by-Step Guide
Replacing shocks typically takes between one and four hours, depending on your vehicle and shock type.
Front shocks usually take longer, about three to four hours, while rear shocks are quicker, often one to two hours.
You’ll need proper tools and safety steps like using jack stands and loosening lug nuts first.
Challenges like rusted bolts can slow you down, and certain shocks, like struts, require more time.
Keep going to uncover helpful tips for each stage.
Key Takeaways
- Front shock replacement typically takes 3-4 hours, while rear shocks usually require 1-2 hours depending on vehicle design.
- Prepare essential tools like a hydraulic jack, spring compressor, penetrating oil, and torque wrench before starting.
- Remove the wheel, unbolt top and lower shock mounts carefully, supporting the shock to avoid damage during removal.
- Align and secure the new shock properly, tightening bolts to manufacturer torque specs and ensuring correct piston rod orientation.
- After installation, lower the vehicle, perform a test drive, and inspect for leaks or unusual noises to confirm proper function.
When to Replace Your Shocks
Although shocks can last between 50,000 and 100,000 miles, you should replace them sooner if you notice excessive bouncing, uneven tire wear, or a rougher ride. These signs clearly show worn shocks are affecting your vehicle’s handling and comfort.
Knowing when to replace your shocks is essential to maintain control and safety, especially if you often drive on rough terrain or carry heavy loads. Even if your ride seems smooth, regularly inspect your shocks for leaks or physical damage during maintenance.
Ignoring these signs can lead to poor handling and increased impact from potholes, which not only affects performance but also risks further damage. So don’t wait for miles to add up; pay attention to how your vehicle feels and looks.
When to replace your shocks depends not just on mileage but also on the condition and driving circumstances, so stay proactive to keep your ride safe and comfortable.
Essential Tools for Shock Replacement
Before you start replacing your shocks, make sure you have the right tools on hand to make the job safe and efficient. Essential tools include a hydraulic jack and jack stands to lift and support your vehicle securely. You’ll also need a socket set and ratchet to remove bolts, along with penetrating oil to loosen any rusted parts.
If you’re replacing strut assemblies with coil springs, a spring compressor is indispensable to safely handle the springs. Locking pliers or a hollow hex key help prevent piston rod rotation during nut removal, making the process smoother.
Don’t forget a torque wrench. It’s critical for tightening bolts to manufacturer-specified settings, ensuring safety and proper performance. Finally, always wear gloves and eye protection when working with high-torque tools and compressed springs to protect yourself.
Having these tools ready will streamline your shock replacement and keep you safe throughout the process.
How Different Shock Types Affect Replacement Time
The type of shock you’re replacing really affects how long the job will take. Struts, for example, combine the shock and spring into one unit. Because of that, they usually take more time to replace compared to stand-alone shocks.
That’s mainly because struts often need extra steps, like an alignment afterward. Knowing these differences can help you set more realistic expectations for your repair.
Shock Design Impact
When you replace shocks, the design plays a big role in how long the job takes. Different shock designs come with varying levels of complexity that directly affect the time required.
For example, monotube shocks have a simpler design, so you can replace them faster. On the other hand, reservoir shocks include external tanks that need extra handling and mounting, making the process longer.
Twin-tube shocks are usually pre-assembled, helping you install them quicker than coil shocks, which often require spring compression. Integrated struts combine shocks and coil springs, increasing replacement time due to more involved disassembly and reassembly.
Struts Vs Shocks
Although both struts and shocks serve to control your vehicle’s suspension, replacing struts usually takes longer because they’re integrated with coil springs and demand more disassembly and specialized tools. Struts require spring compressors and careful handling, extending replacement time by 1-2 hours compared to shocks.
Shocks, being separate from the spring assembly, are quicker and simpler to swap out.
| Feature | Struts | Shocks |
|---|---|---|
| Integration | Combined with coil springs | Standalone |
| Tools Needed | Spring compressor, specialized tools | Basic hand tools |
| Replacement Time | Longer (1-2 hours more) | Shorter |
| Complexity | High, involves disassembly | Low, straightforward |
| Servicing | May include spring or bearing checks | Rarely needed |
Understanding this helps you plan your repair time better.
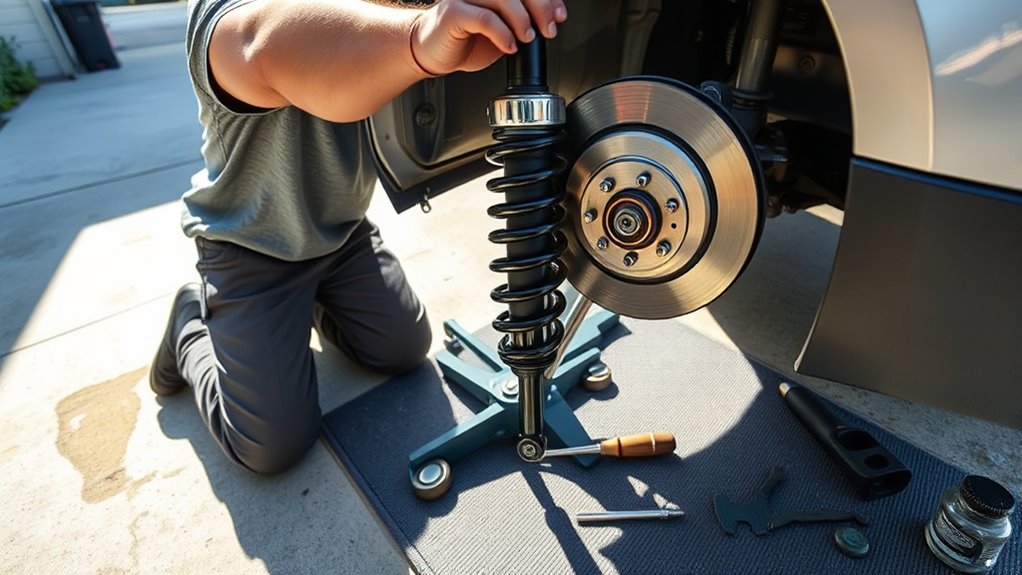
Preparing Your Vehicle Safely for Shock Replacement
Before you start replacing your shocks, make sure to park your vehicle on a level surface. It’s important to set the parking brake too, so everything stays stable while you work.
Next, grab your jack and stands to lift the vehicle safely. Just be sure to follow the manufacturer’s recommended lift points to avoid any damage. Also, don’t forget to loosen the lug nuts beforehand. Applying some penetrating fluid to the bolts can really help make removal easier and safer.
Vehicle Positioning Essentials
Ensuring your vehicle is stable and secure is essential for a safe shock replacement. Proper vehicle positioning sets the foundation for the entire process and helps you avoid accidents and damage. Follow these key steps:
- Park on a flat, level surface and engage the parking brake to prevent any unwanted movement.
- Loosen the lug nuts slightly before lifting the vehicle to keep the wheels from spinning while you work on the suspension.
- Use a hydraulic jack at the manufacturer-recommended jacking points, then securely place jack stands before removing the wheels.
Safety Measures And Tools
When you prepare to replace your shocks, securing the vehicle properly is essential to avoid accidents. Start by parking on a flat surface and placing wheel chocks to prevent any movement. Use a hydraulic jack to lift the vehicle, then support it with properly rated jack stands to guarantee stability.
Follow the manufacturer’s instructions for jack placement and support points to protect suspension parts and maintain safety measures. Always wear safety goggles and gloves to shield yourself from debris, rust, or hydraulic fluid leaks during the process.
If you’re working near electrical components, disconnect the battery to avoid accidental activation or short circuits. Taking these safety measures seriously helps you work confidently and prevents injuries or damage while replacing shocks.
How to Remove Old Shocks Step by Step
Since accessing the shock absorber mounting points requires removing the wheel, start by safely lifting your vehicle and taking off the wheel. This gives you clear access to both the top and bottom shock mounts.
Follow these steps to remove the old shocks correctly:
- Unbolt the top shock mount, usually located under the trunk lining or inside the wheel well. Use a socket and ratchet to loosen it carefully.
- Disconnect the lower shock bolt from the suspension arm or mounting point. Support the shock with your hand to prevent it from dropping suddenly.
- Remove the shock absorber completely, ensuring no damage to surrounding suspension parts.
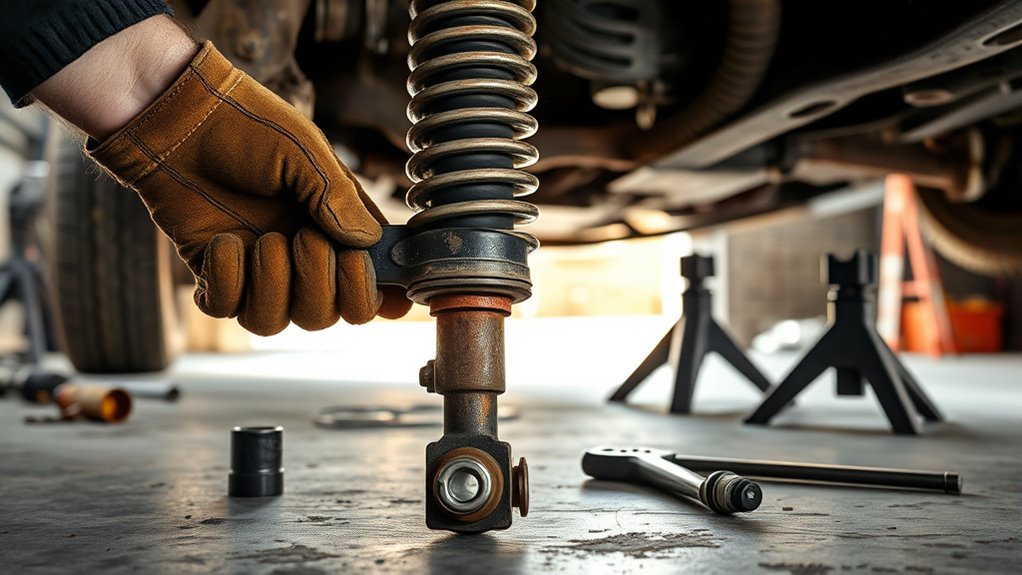
Tips for Removing Rusted or Stuck Shock Bolts
Although rusted or stuck shock bolts can be frustrating, you can often loosen them with the right techniques and tools. Start by applying penetrating oil like WD-40 to the bolts and let it sit for 10-15 minutes to break down rust.
Use a wire brush to clean rust and debris around the bolts. This helps prevent stripping the heads during removal. If the bolts still won’t budge, try using a breaker bar for extra leverage instead of a regular ratchet.
For stubborn bolts, carefully heating them with a heat gun or propane torch for a few seconds can expand the metal and ease removal. Just be cautious not to damage surrounding parts. If bolts are heavily rusted or rounded off, locking pliers or a bolt extractor kit can give you a better grip.
These tips will save you time and frustration when removing those pesky rusted shock bolts.
Installing New Shocks: Aligning and Securing Properly
When you’re installing new shocks, make sure you line up the shock components carefully with the mounting points. It really helps to use a jack or a suspension support to get everything positioned just right. Once everything is in place, go ahead and tighten the bolts to the torque specs recommended by the manufacturer. Doing this right will help your shocks work smoothly and keep things safe on the road.
Aligning Shock Components
To make certain your new shocks perform correctly, you’ll need to align them precisely with the mounting points and suspension geometry. Proper aligning prevents uneven wear and ensures smooth handling.
Start by seating the shock absorber firmly in its mounts, verifying the correct orientation. Next, align the piston rod so it matches the vehicle’s suspension angles without forcing or bending. Finally, double-check all components visually to confirm they don’t interfere with other suspension parts.
Follow these key steps:
- Position the shock absorber squarely in the mounting points.
- Align the piston rod with the suspension geometry to maintain proper function.
- Inspect for correct orientation and clearance before proceeding to secure the bolts.
This careful aligning sets the foundation for reliable shock performance and a comfortable ride.
Securing Bolts Properly
Securing the bolts properly is essential for guaranteeing your new shocks function safely and effectively. Start by aligning the shock absorber carefully with its mounting points before you begin fastening bolts.
Use a torque wrench to tighten each bolt to the manufacturer’s specified torque. This prevents over-tightening or loosening, which could compromise suspension performance. Replace any hardware or bushings as recommended, and ensure all nuts and bolts are firmly fastened.
Double-check that the shock piston rod is centered and not pinched during installation to avoid uneven wear or damage. Once everything’s secured, gently test the shock’s movement to confirm it operates smoothly without binding or excessive play.
Following these steps guarantees your shocks will perform reliably and last longer.
Using Suspension Assistance
After making sure all bolts are properly tightened, the next step is to use suspension assistance tools like a jack or lift to hold the suspension in place while you align the new shocks. When you replace front struts or shocks, using jack stands or a lift helps position the control arm, sway bar, and front strut correctly. This step is crucial to avoid misalignment often seen when removing the old shocks.
Here’s what you need to know:
- Use suspension assistance to fully seat the shock in its mounting brackets.
- Make sure bolts meet the manufacturer’s torque specs for secure attachment.
- Double-check all connections to maintain safety and suspension integrity.
If you need new shocks, your local auto parts store or auto repair shop can tell you more about proper installation and how long it takes.
How Long Does Shock Replacement Take for Front vs. Rear Shocks?
Although replacing shocks is essential for vehicle safety and comfort, the time it takes can vary considerably between front and rear shocks. When you replace front shocks, expect the process to take about 3 to 4 hours. This longer time frame is due to the complexity involved. Removing struts or the entire suspension assembly requires more effort and precision.
On the other hand, rear shock replacement generally takes only 1 to 2 hours because rear shocks are usually standalone units. You’ll mostly just unfasten and remove them from the suspension, which is simpler and quicker.
Keep in mind that vehicle design also plays a role. Some models offer easier access to the rear shocks, cutting down replacement time even more. Overall, front shock replacement tends to take roughly twice as long as rear shock replacement, so plan accordingly when scheduling your repair or DIY project.
Common Challenges That Can Extend Replacement Time
When you start replacing shocks, you might run into several challenges that slow down the process. These obstacles often relate to the shock durability and the condition of surrounding components. Here are three common issues to watch for:
1. Rusted or seized bolts
These can make removing shocks really tough, requiring extra time and penetrating fluid to loosen stubborn fasteners.
2. Limited access to mounting points
Vehicle design or rust buildup might force you to disassemble more parts than expected, adding to your workload.
3. Improper or worn spring compressors
Using the wrong tools can cause safety risks and delays, especially if the spring isn’t compressed correctly.
Also, keep in mind that unexpected damage to suspension parts can pop up during removal, forcing additional repairs. Staying aware of these challenges helps you manage time better and maintain shock durability throughout the replacement process.
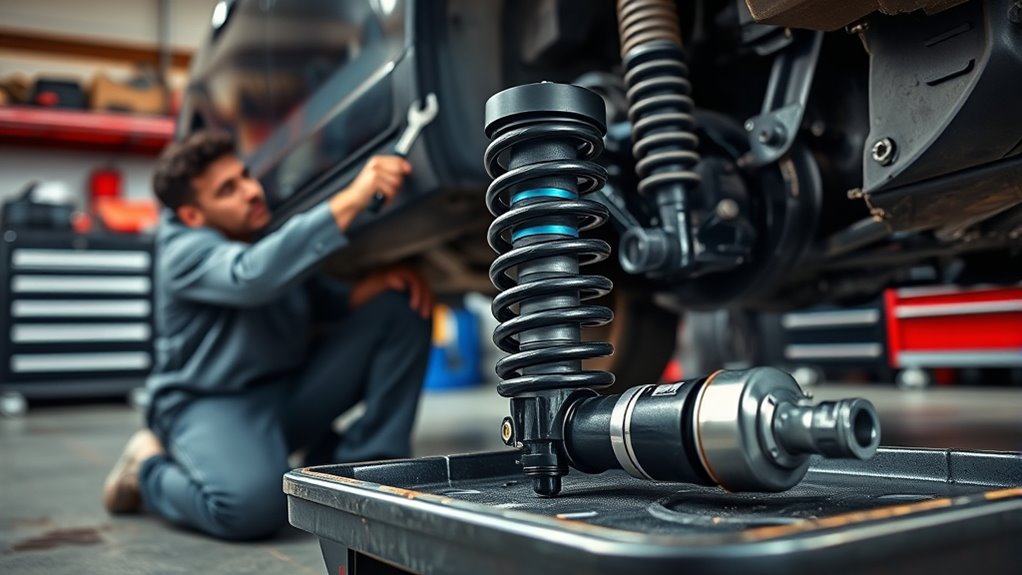
DIY or Hire a Mechanic: Which Is Best for Replacing Shocks?
Deciding whether to replace your shocks yourself or hire a mechanic depends on your experience, tools, and comfort level with suspension work. If you understand shock durability and have the right equipment, a DIY job can save money but may take 2 to 4 hours. On the other hand, professionals usually finish within 2 to 3 hours using specialized tools. This is especially helpful if rusted parts challenge shock removal.
Here’s a quick comparison:
| Aspect | DIY Replacement | Hiring a Mechanic |
|---|---|---|
| Time | 2 to 4 hours | 2 to 3 hours |
| Cost | Lower (no labor fees) | Higher (labor costs apply) |
| Risk | Higher without experience | Lower with professional skill |
If you’re unfamiliar with suspension systems or want to ensure proper shock durability and installation, hiring a mechanic is generally the safer choice.
Post-Replacement Checks and Test Drive
After you finish replacing the shocks, take care when lowering the vehicle and make sure all bolts and nuts are tightened securely. A thorough post inspection is crucial to ensure everything is in place before hitting the road.
Once you’re confident, go for a test drive on a smooth, level surface to evaluate how the suspension performs.
During this test drive, focus on these key points:
- Listen for unusual noises or excessive bouncing that might signal improper installation.
- Observe how the vehicle handles turns and reacts over bumps to confirm the shocks are working correctly.
- After driving, perform a visual post inspection for leaks or any visible damage around the shocks.
These steps help guarantee your shocks are installed properly and provide a safer, more comfortable ride. Don’t skip this crucial post-replacement check to catch any issues early.
How Regular Maintenance Extends Shock Lifespan
Although shocks are built to last, regular maintenance plays a crucial role in extending their lifespan and ensuring your vehicle handles smoothly. By routinely inspecting shocks for leaks, rust, or damage, you can catch wear early and prevent premature failure.
Keeping suspension components clean from dirt and debris also reduces corrosion risks that might shorten shock lifespan. Maintaining proper tire pressure and alignment is another simple but effective way to minimize unnecessary stress on your shocks, helping them last longer.
Clean suspension parts and maintain tire pressure to reduce corrosion and stress, extending shock absorber life.
Remember to replace your shocks every 50,000 to 75,000 miles or sooner if you notice symptoms like poor handling or unusual noises. Using high-quality shock absorbers and having them professionally installed further maximizes their durability.
With these steps, you’ll protect your investment, maintain ideal vehicle performance, and considerably extend your shock lifespan.
Frequently Asked Questions
What Are the Signs of Worn Shocks Before Replacement?
During your preliminary inspection, watch for signs like excessive bouncing or swaying when you drive over bumps. You’ll notice your vehicle nose-diving during braking or dipping in turns.
Uneven tire wear or cupping patterns also signal worn shocks. If your ride feels bumpier and less controlled, that’s another clue. Finally, check for leaking fluid or visible damage on the shock absorbers. These are clear indicators you need to replace them.
Can Replacing Shocks Improve Fuel Efficiency?
Yes, replacing shocks can improve fuel efficiency and boost your fuel savings. When your shocks are worn, your tires don’t stay firmly on the road, causing extra rolling resistance.
New shocks keep your suspension smooth and tires in better contact, reducing engine strain and preventing uneven tire wear. This means your engine works less, and you’ll notice better mileage.
How Much Do Shock Absorbers Typically Cost?
You’d think shock absorbers would come with a straightforward price tag, right? But pricing variability means you’re looking at $50 to $150 each for standard shocks.
If you want a full replacement kit, it can run between $180 and $400. Go premium or performance, and costs jump to $300 or more per shock.
Are All Shocks Compatible With My Vehicle Model?
Not all shocks are compatible with your vehicle model. Compatibility questions are vital because shocks vary based on your car’s make, model, and year.
You’ll need to check precise part numbers or consult your owner’s manual to confirm the right fit. Some vehicles use stand-alone shocks, while others have integrated struts, which affects compatibility.
Always double-check or ask a mechanic to avoid installing incompatible shocks that could compromise performance or safety.
What Warranties Are Available for New Shocks?
Think of warranty options as your shock absorbers for unexpected issues. When you buy new shocks, you’ll usually get manufacturer warranties lasting 1 to 4 years or covering 12,000 to 50,000 miles.
Some aftermarket shocks even offer limited lifetime warranties. Just remember, these warranties often require proof of proper installation and won’t cover rough use like racing.
Always read the fine print so you know exactly what’s covered and how to claim it.
Conclusion
Replacing shocks isn’t just about time; it’s about safety and comfort on every drive. While the process can take anywhere from 30 minutes to a few hours depending on your skills and shock type, remember: a smooth ride starts with well-maintained shocks.
Don’t let worn shocks wear you down. Whether you DIY or hire a pro, taking action now is the key to steering clear of bigger problems. After all, isn’t a safer journey worth every minute spent?