How to Do You Reset the Fuel Pump in 10 Simple Steps
To reset your fuel pump, first gather basic tools like screwdrivers and a multimeter.
Turn off the car and safely disconnect the negative, then positive battery terminals.
Locate and remove the fuel pump fuse or relay using your owner’s manual.
Wait about 5 to 10 minutes to let the system fully discharge.
Reinstall the fuse or relay, reconnect the battery (positive first), then test the pump by turning the ignition on.
Follow these steps, and you’ll clear faults and improve performance.
Plus, there’s more to guarantee a smooth reset.
Key Takeaways
- Turn off the vehicle and disconnect the negative battery terminal to ensure safety before starting the reset process.
- Locate and remove the fuse or relay labeled “Fuel Pump” or “FP” using a fuse puller or pliers.
- Wait 5 to 10 minutes after removing the fuse or relay to allow the fuel system to fully discharge.
- Reinstall the fuse or relay securely in its original position, ensuring proper alignment and fit.
- Reconnect the battery terminals, positive first then negative, then test the fuel pump by turning the ignition on without starting.
Tools Needed to Reset the Fuel Pump
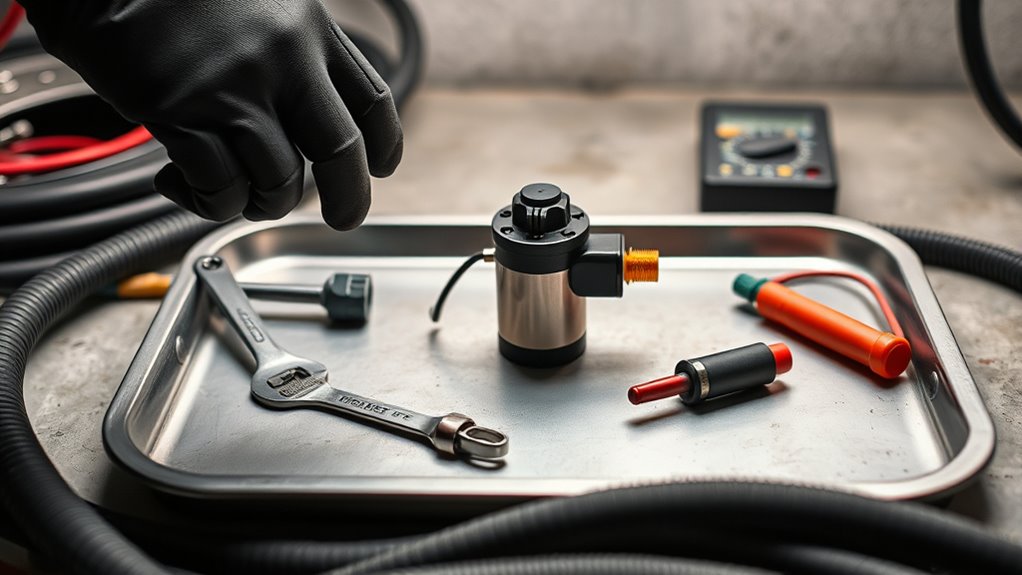
Before you start resetting the fuel pump, make sure you have the right tools on hand. You’ll need a basic screwdriver set, including flathead and Phillips screwdrivers, to remove panels or access covers easily.
Needle-nose pliers come in handy for safely pulling out and reinserting the fuel pump fuse and relay without causing damage. A socket wrench set helps you loosen or tighten bolts securing these components.
Needle-nose pliers and a socket wrench set make handling fuel pump fuses, relays, and bolts safer and easier.
Don’t forget a digital multimeter. It’s essential for testing electrical continuity and verifying proper voltage at the fuel pump connection, ensuring everything is working correctly before proceeding. A flashlight is also useful to illuminate dark or tight spaces when locating the fuse, relay, or fuel pump components.
Having these tools ready will make the reset process smoother and safer. It prevents unnecessary frustration or damage while you work on your vehicle’s fuel pump system.
When and Why to Reset the Fuel Pump
You should reset the fuel pump when your vehicle shows signs like difficulty starting or loss of power. It’s a good way to clear fault codes and can help improve engine performance and fuel efficiency. Just be sure to check for any leaks or safety issues before you go ahead and reset it.
Reset Timing Indicators
Three common scenarios call for reinitializing your fuel pump’s timing indicators: after replacing or repairing the pump, following diagnostic alerts, or after a collision that triggers the safety switch.
When diagnostic tests reveal fault codes or error codes related to the fuel pump, you’ll need to reset timing indicators to clear these alerts. Doing so ensures your vehicle’s computer provides accurate system readings, helping prevent misdiagnoses.
Resetting also helps erase any residual fault codes, allowing the fuel pump to resume normal operation without interference. Ignoring these indicators can result in ongoing error messages or improper fuel delivery.
Benefits Of Resetting
Resetting your fuel pump can quickly fix issues caused by electrical faults or system glitches. This restores proper fuel flow and engine function. A fuel pump reset is essential when you face starting difficulties, engine stalling, or power loss.
It helps maintain your fuel system’s reliability and boosts engine performance. Here’s why you should consider a reset:
- Clears fault codes from the vehicle’s computer to optimize engine performance.
- Resolves electrical faults that disrupt fuel delivery.
- Ensures vehicle restart after impacts by preventing the pump from staying shut off.
- Helps avoid costly repairs by addressing minor issues early.
Locate the Fuel Pump Relay and Fuse in Your Vehicle
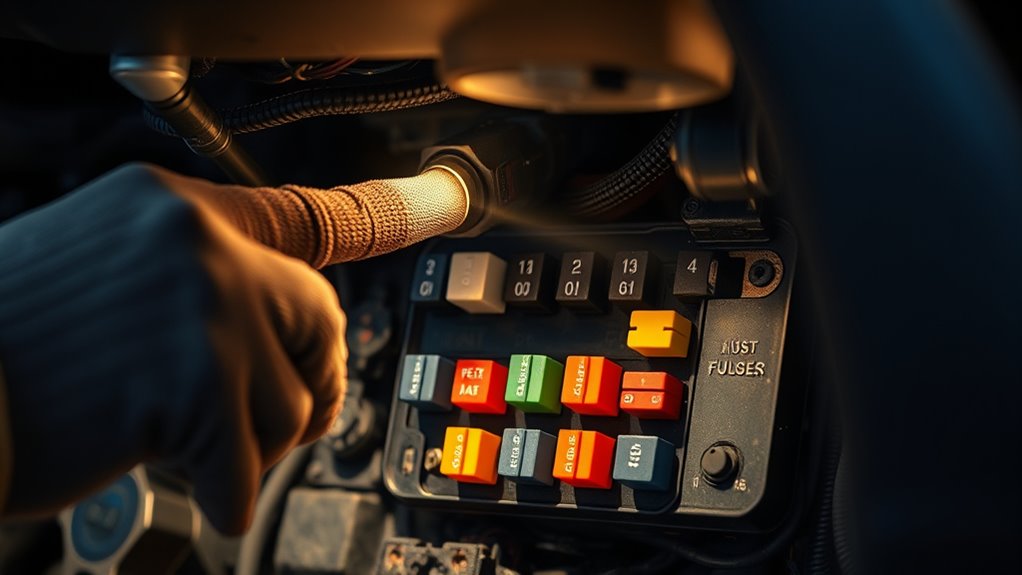
You’ll usually find the fuel pump relay and fuse in your vehicle’s main fuse box—either under the hood or inside the cabin. It’s a good idea to check your owner’s manual or the fuse box diagram to pinpoint their exact locations and labels. That way, you can easily identify the right components without accidentally removing others.
Fuse Box Location
Where can you find the fuel pump relay and fuse in your vehicle? They’re usually located in the main fuse box, which can be under the hood or inside the cabin. To pinpoint the exact location, you’ll want to check the fuse box diagram or your owner’s manual.
Here’s how to locate them efficiently:
- Open the fuse box and look for the diagram on the cover or in the manual.
- Identify the fuse labeled “Fuel Pump” or “FP,” typically rated between 10 to 20 amps.
- Find the fuel pump relay, a black or gray rectangular component with multiple pins near the fuse box or in a relay bank.
- Confirm the fuse and relay location using the diagram to make certain you’re working with the right parts.
This guarantees a safe and accurate reset of your fuel pump system.
Identifying Relay Components
After finding the fuse box and identifying the general area, focus on locating the fuel pump relay and fuse specifically. The fuel pump relay is usually a small rectangular or square relay component with metal prongs plugged into the fuse box socket. You’ll often find it labeled as “FP” or “Fuel Pump” on the fuse diagram or the cover inside the fuse box.
The fuel pump fuse, typically a blade-style fuse rated by amperage, sits close to the relay for easy access. To locate the fuel pump relay and fuse, check your vehicle’s owner’s manual or the fuse diagram on the fuse box cover. Knowing these relay components helps you quickly identify the parts needed to reset the fuel pump and troubleshoot electrical issues.
Using Diagram Guides
Although locating the fuse box might seem tricky, your vehicle’s owner’s manual provides clear guidance on its exact position, usually under the dashboard or in the engine bay. To effectively use the fuse box diagram during the reset process and troubleshooting, follow these steps:
- Locate fuel pump relay and fuse on the fuse box diagram, typically labeled “Fuel Pump” or “FP.”
- Confirm the amperage ratings and relay positions to avoid removing the wrong components.
- Use a fuse puller or your fingers to carefully remove the identified fuse or relay.
- Note the exact position for accurate reinstallation after the reset process.
Using the fuse box diagram guarantees you target the correct fuel pump relay and fuse, streamlining troubleshooting and resetting.
How to Safely Disconnect the Car Battery

Before you start disconnecting your car battery, make sure the vehicle is turned off and the keys are removed from the ignition to avoid any electrical shorts. Following proper safety precautions is vital during vehicle disconnection to prevent accidents.
First, locate the negative terminal on the battery, usually marked with a minus sign (-). Use a wrench or socket to loosen the clamp on the negative terminal. Carefully lift and disconnect the negative cable, making sure it doesn’t touch any metal parts of the vehicle. This step is essential because disconnecting the negative terminal first reduces the risk of sparks.
After that, proceed to disconnect the positive terminal, marked with a plus sign (+), using the same method. Always wear safety gloves and goggles to protect yourself from potential acid leaks or accidental sparks while handling the battery.
Remove the Fuel Pump Relay or Fuse
Once you’ve safely disconnected your car battery, the next step is to locate and remove the fuel pump relay or fuse. Begin by finding the fuse box, usually under the dashboard or hood. Use the diagram on the fuse cover or your owner’s manual to identify the specific fuse or relay for the fuel pump.
For fuse removal, carefully use a fuse puller or your fingers to avoid damaging the socket. When removing the relay, ensure it’s fully detached and free from corrosion.
Follow these steps for effective fuse inspection and relay removal:
- Locate the fuel pump fuse or relay using the fuse cover diagram.
- Gently remove the fuse or relay from its slot.
- Inspect the fuse for broken filaments or burn marks; replace if damaged.
- Check the relay for corrosion or damage before reinstalling.
Handle all components with care to maintain system integrity.
Fuel Pump Reset Wait Time
After you remove the fuel pump fuse or relay, it’s a good idea to wait about 5 to 10 minutes. This gives the system enough time to fully discharge. Taking this pause is really important because it helps prevent any damage and ensures the control module clears any fault codes. Just remember, the exact wait time might be different depending on your vehicle, so it’s always best to check your owner’s manual.
Recommended Wait Duration
How long should you wait to reset the fuel pump properly? The recommended wait duration after removing the fuel pump fuse or relay is crucial for a full system discharge. Here’s what you need to know:
Wait time typically ranges from 5 to 10 minutes to allow residual electrical energy to dissipate. Check your manufacturer’s manual for a precise reset duration, as some specify exactly 10 minutes.
This pause prevents false fault readings by ensuring the fuel system and control modules fully discharge. Rushing the wait time may leave the fuel pump in a protective state, causing incomplete reset issues.
Following these steps ensures your fuel pump resets effectively and reduces the chance of future malfunctions.
Importance of Waiting
Why does waiting matter when resetting your fuel pump? Waiting 5 to 10 minutes after removing the fuel pump fuse or relay is essential because it lets the residual electrical charge dissipate completely. This guarantees a full reset of the fuel pump system.
During this wait time, the vehicle’s control module clears any stored fault codes, which helps prevent ongoing issues. If you rush this process, the system might not reset properly, causing persistent fuel pump problems.
Proper waiting also allows the fuel pump’s safety switch to reset, avoiding faulty readings or electrical glitches. Always follow the recommended wait time in your owner’s manual to guarantee the reset works effectively and keeps your fuel pump functioning smoothly.
Vehicle-Specific Timing
Since fuel pump reset times can vary by vehicle, you should always check your owner’s manual for the exact wait period after removing the fuse or relay. The wait time is vital for a proper reset of your fuel pump relay and system.
- Typically, wait 5 to 10 minutes after fuse removal to let residual fuel pressure dissipate.
- Some manufacturers specify exactly 10 minutes to guarantee a full reset.
- Shorter waits of 3-5 minutes may work for certain models but confirm first.
- Incorrect wait times risk incomplete resets or damage to the fuel pump and electrical components.
Following vehicle-specific timing guarantees your fuel pump reset is effective and safe every time.
Reinstall the Fuel Pump Relay or Fuse
Where should you start when reinstalling the fuel pump relay or fuse? First, confirm the vehicle is off and the battery is disconnected to avoid any electrical mishaps. Next, locate the correct slot in the fuse box by consulting your vehicle manual or the fuse box diagram.
Once identified, gently reinstall the fuel pump relay or fuse, making sure it fits securely and is fully seated.
Use the following table to guide your reinstall process:
| Step | Details |
|---|---|
| Vehicle Off | Turn off ignition and disconnect battery |
| Locate Slot | Check vehicle manual or fuse box diagram |
| Insert Relay/Fuse | Place firmly into the correct slot |
| Check Alignment & Security | Ensure it’s fully seated and aligned |
After reinstalling, reconnect the battery and start the vehicle to verify the fuel pump operates correctly. This ensures your fuel pump relay or fuse is properly reset and ready to function.
How to Safely Reconnect the Car Battery
Before reconnecting your car battery, always put on safety gloves and eye protection to shield yourself from acid or sparks. Safety is crucial when handling the battery to avoid any injuries or electrical hazards. When you’re ready, follow these steps to reconnect the battery properly:
- Clean the battery terminals to remove any corrosion, ensuring a solid electrical connection.
- Connect the positive (red) terminal first, tightening the clamp securely to prevent loose contact.
- Attach the negative (black) terminal next, making sure it’s fastened tightly as well.
- Double-check both terminals to confirm they’re secure and making good contact before moving on.
Reconnecting the battery in this order helps prevent electrical shorts or sparks. Once done, you can safely proceed with the next steps of your fuel pump reset, confident that your battery is connected securely and your electrical system is protected.
Test the Fuel Pump Reset
How do you know if your fuel pump reset worked? First, turn the ignition to the “On” position without starting the engine. Listen for a humming sound, which means the pump is running correctly.
If you don’t hear it, you’ll want to test the fuel pump further. Use a multimeter to check the voltage at the fuel pump connector, making sure the fuel pump relay and wiring deliver power properly.
Next, check fuel pressure with a gauge or listen carefully for the pump’s operation during ignition. If your vehicle starts smoothly after resetting the fuel pump, that’s a good sign the reset was successful.
However, if the pump still doesn’t operate, you’ll need to troubleshoot fuel delivery by inspecting the fuse, relay, and wiring for faults. Testing the fuel pump reset thoroughly ensures your fuel system functions correctly and prevents further issues down the road.
Troubleshoot and Maintain Your Fuel Pump
Although fuel pump issues can be frustrating, you can troubleshoot and maintain your pump effectively with regular checks and simple steps. Proper maintenance helps prevent costly repairs and extends the pump’s life. After a reset, focus on these key steps:
- Regularly inspect and replace the fuel filter to avoid clogging that strains the fuel pump.
- Use a multimeter to check for electrical issues by measuring voltage at the fuel pump connector with the ignition on.
- Listen for the fuel pump’s humming sound during ignition to confirm it’s running after your reset or maintenance.
- Keep the fuel tank above a quarter full to prevent the pump from overheating and failing prematurely.
If your fuel pump still won’t operate correctly despite troubleshooting, schedule a professional diagnostic to pinpoint the problem. Staying proactive guarantees your fuel pump runs smoothly and avoids unexpected breakdowns.
Frequently Asked Questions
Can a Faulty Fuel Pump Cause My Car to Stall Unexpectedly?
Yes, a faulty fuel pump can cause your car to stall unexpectedly. When you’re dealing with vehicle stalling causes, fuel pump troubleshooting is key.
You should perform fuel pressure testing to check if the pump delivers consistent fuel flow. Fuel system diagnostics help pinpoint if the pump or related components are the issue.
Ignoring these engine performance issues can lead to more frequent stalls and damage, so address them promptly.
How Long Does a Fuel Pump Typically Last Before Needing Replacement?
You can expect your fuel pump lifespan to range between 100,000 and 150,000 miles, depending on pump durability and wear and tear. Replacement intervals vary, but sticking to your vehicle’s maintenance schedules helps extend its life.
Poor fuel quality and aggressive driving can shorten this span, so regular inspections are key. By staying proactive, you avoid premature replacement and keep your fuel system running smoothly for years.
Will Resetting the Fuel Pump Affect My Car’s Warranty?
Resetting your fuel pump won’t usually affect your car’s warranty coverage if you follow manufacturer guidelines. It’s considered routine and helps maintain fuel efficiency and meet emission standards.
However, if you reset it repeatedly without addressing underlying problems, or if an unauthorized technician does the work, repair costs might not be covered. Always check your warranty policy before resetting to avoid any surprises with warranty claims.
Can I Reset the Fuel Pump Without Turning off the Car Battery?
You shouldn’t reset the fuel pump without turning off the car battery. During fuel pump diagnosis and resetting procedures, leaving the battery connected can cause electrical shorts or false fault codes.
For safety and effective troubleshooting steps, always disconnect the battery first. Following maintenance tips helps avoid common issues and guarantees accurate results.
Check your vehicle manual because some models allow reset without battery disconnection, but it’s rare.
What Are Signs That Indicate the Fuel Pump Reset Didn’T Work?
Like trying to fix a leaky faucet without shutting off the water, if your fuel pump reset didn’t work, you’ll notice signs like persistent engine sputtering, no humming sound when ignition’s on, or warning lights staying lit.
These common issues show fuel pump troubleshooting needs more than resetting procedures. Use diagnostic tools to pinpoint the problem, and follow maintenance tips to avoid future failures.
Don’t ignore repeated no-starts or stalling; they signal deeper issues.
Conclusion
Now that you’ve navigated the necessary steps to reset your fuel pump, you’re set to savor smooth starts and steady speeds. Remember, routine checks and timely tweaks tackle troubles before they turn serious.
Stay sharp, stay safe, and keep your car cruising confidently. With a little care and caution, you can conquer common car challenges and keep your fuel pump functioning flawlessly.
Happy driving and hassle-free handling!