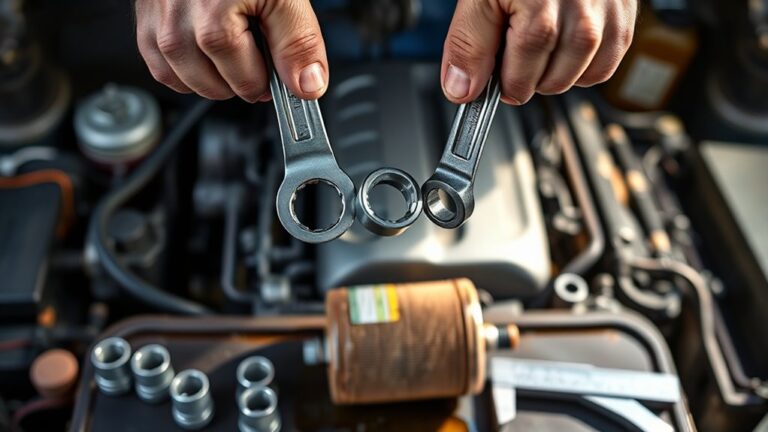

Replace 2000 Jeep Wrangler Ignition Lock Cylinder in 8 Easy Steps
You can replace your 2000 Jeep Wrangler ignition lock cylinder in eight easy steps. First, recognize signs like key sticking or difficulty turning.
Then, prepare your Jeep by parking safely and disconnecting the battery. Remove the steering column covers, turn the key to “On,” and press the release pin to remove the old cylinder.
Insert the new one, reassemble the covers, reconnect the battery, and test the operation.
Follow this guide to guarantee a smooth, successful replacement process.
Key Takeaways
- Disconnect the negative battery terminal and remove steering column covers to access the ignition lock cylinder safely.
- Insert and turn the key to the “On” position, then press the release pin to remove the old ignition lock cylinder.
- Pull out the old cylinder carefully while holding the release pin, avoiding damage to internal components.
- Insert the new ignition lock cylinder, ensuring it is fully seated and operates smoothly through all key positions.
- Reassemble steering column covers, reconnect the battery, and test the ignition system for correct functionality.
Recognize When to Replace Your Ignition Lock Cylinder
If you notice your key sticking, struggling to turn, or failing to return to the “off” position, it’s a clear sign your Jeep Wrangler’s ignition lock cylinder needs attention. A worn ignition lock cylinder often causes these issues, making it harder to start your vehicle.
When the key won’t turn despite being fully inserted, or you hear resistance or grinding noises, it indicates internal damage or debris buildup. Difficulty turning the key or having to force it repeatedly signals that the cylinder is failing.
If your key resists turning or makes grinding noises, your ignition lock cylinder may be damaged or clogged.
You might also find the ignition randomly locking or the key becoming hard to remove. Ignoring these signs can lead to complete ignition failure, leaving you stranded.
The best course of action is to replace the ignition lock cylinder as soon as you notice these symptoms. Acting promptly ensures your Jeep starts smoothly and prevents further damage to the ignition system.
Prepare Your Jeep and Work Area Safely
Noticing signs that your ignition lock cylinder is failing means it’s time to take action, but before you start replacing parts, prepare your Jeep and work area carefully. First, park your Jeep Wrangler on a flat surface and engage the parking brake to ensure stability. For safety, disconnect the negative terminal of the battery to prevent electrical shorts during your work.
Set up your work area with adequate lighting and keep tools organized to avoid accidents. Wear gloves and safety glasses to protect yourself from sharp edges around the steering column. Although you’ll remove the steering column covers later, make sure you’re ready with the proper screwdriver.
Turning the ignition key to the “on” position helps access the release mechanisms inside the steering column when the time comes. Taking these safety measures and preparing your work area thoroughly will make the replacement process smoother and hazard-free.
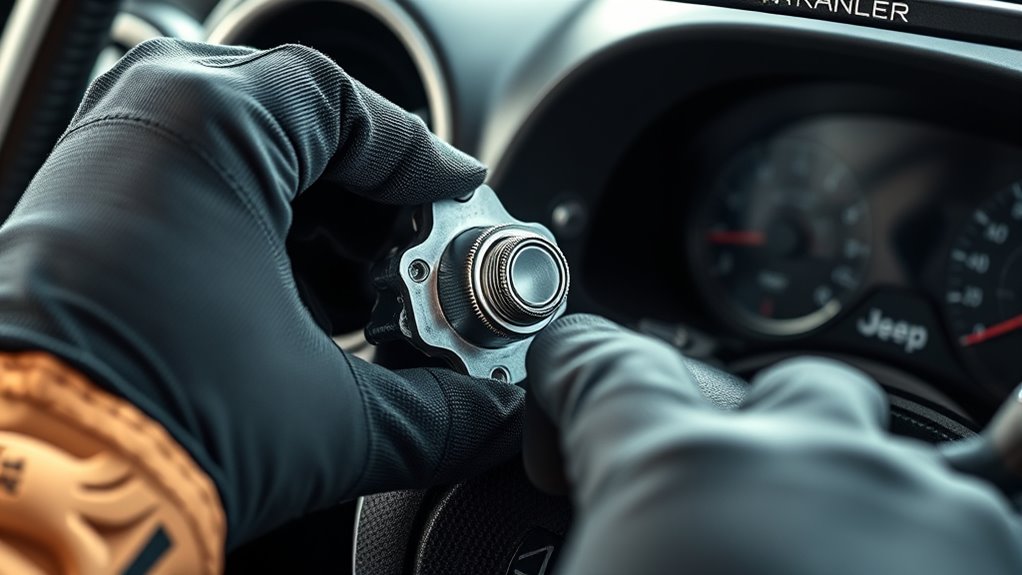
Remove Steering Column Covers to Access Ignition Lock Cylinder
Before you can access the ignition lock cylinder, you’ll need to remove the steering column covers on your Jeep Wrangler. Start by disconnecting the vehicle’s battery to avoid electrical hazards. Then, carefully disassemble the covers to expose the ignition lock cylinder.
Disconnect the battery and carefully remove the steering column covers to access the ignition lock cylinder safely.
Follow these steps to remove the steering column covers:
- Use a Phillips screwdriver to remove the screws securing both the upper and lower steering column covers.
- Gently pry apart the covers from the edges, taking care not to break any plastic clips or tabs.
- Disconnect any electrical connectors or linkages attached to the covers before fully removing them.
Once removed, the ignition lock cylinder will be fully exposed and ready for the next step. Taking your time during this disassembly ensures you don’t damage the covers or surrounding components, making the replacement process smoother and safer.
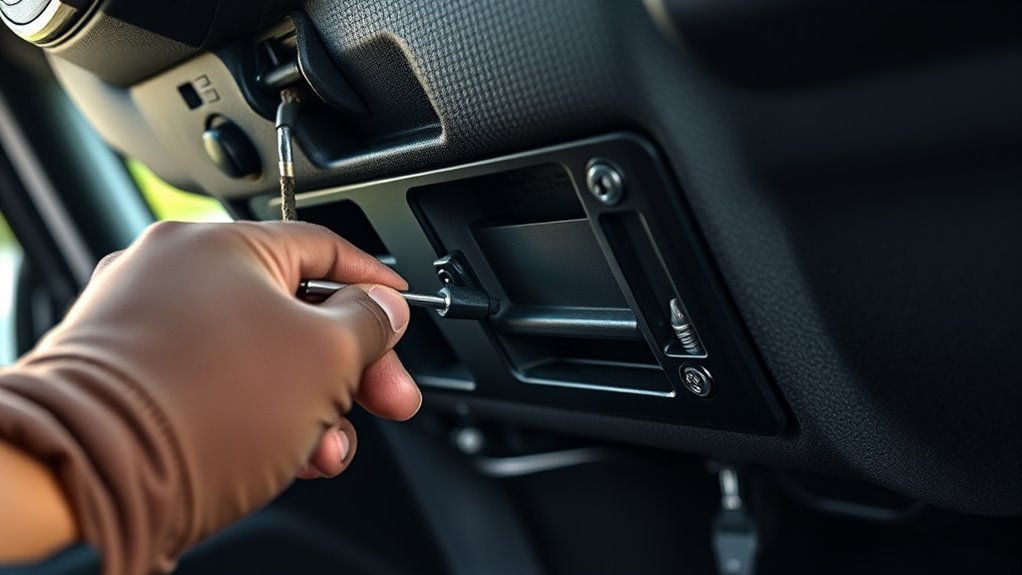
Turn Key to ‘On’ and Locate the Release Pin
Turn the key to the “On” position—that opens up the ignition cylinder and lines up the internal parts. Now, take a close look for the small release pin. It’s usually on the side or bottom of the lock housing. When you press this pin, it lets you remove the cylinder smoothly.
Turning Key To On
Once you rotate the key to the “On” position, you’ll unlock the ignition cylinder and reveal the small release pin or tab on its housing. Turning the key to ‘On’ is essential because it positions the ignition lock cylinder correctly for removal.
Here’s what you need to do:
- Insert the key into the ignition and turn it to the “On” position without starting the engine.
- This action exposes the release pin that secures the ignition lock cylinder in place.
- With the key turned to “On,” you can now access and press the release pin to disengage the cylinder safely.
Turning the key properly prevents damage to internal components and makes removing the ignition lock cylinder straightforward.
Finding The Release Pin
With the key in the “On” position, you can now focus on locating the release pin inside the ignition cylinder housing. This small release pin is usually found near the rear or side of the ignition lock cylinder.
It’s often a tiny plastic or metal tab that you need to press to free the cylinder. Use a flashlight if needed to get a clear view, especially in tight spaces where the pin might be hard to spot.
Once you’ve found the release pin, press it gently with a small screwdriver or pick. While pressing the pin, carefully pull the ignition cylinder out of its housing to remove it. This step is essential for safely releasing the cylinder without damaging the ignition lock.
Preparing Cylinder For Removal
Before you start removing the ignition cylinder, make sure the key is in the “On” position. This releases the steering column and allows access to the release pin. This step is vital to prepare the ignition cylinder for removal. Follow these steps:
- Turn the ignition key to the “On” position and keep it there to disengage the lock mechanism.
- Locate the small release pin on the ignition cylinder housing, usually near the rear or side.
- Use a small screwdriver or pick to fully depress the release pin before attempting to remove the ignition cylinder.
Press Release Pin and Remove Old Ignition Lock Cylinder
Although it may seem tricky, pressing the release pin and removing the old ignition lock cylinder is straightforward if you keep the key turned to the “On” position. Start by locating the small release pin or tab on the side of the ignition lock cylinder housing in your Jeep Wrangler.
Use a small screwdriver, pick, or even a paperclip to press the release pin firmly. While holding it down, gently pull the ignition lock cylinder out of its housing. Keeping the key in the “On” position is essential since it disengages the cylinder, allowing it to slide out smoothly.
Don’t rush this step; applying steady pressure on the release pin while pulling will prevent any damage. Once the ignition lock cylinder is free, you’re ready for the next step. Removing the old ignition lock cylinder carefully ensures a smooth replacement process for your Jeep Wrangler’s ignition system.
Inspect Old Cylinder and Prepare New Cylinder for Installation
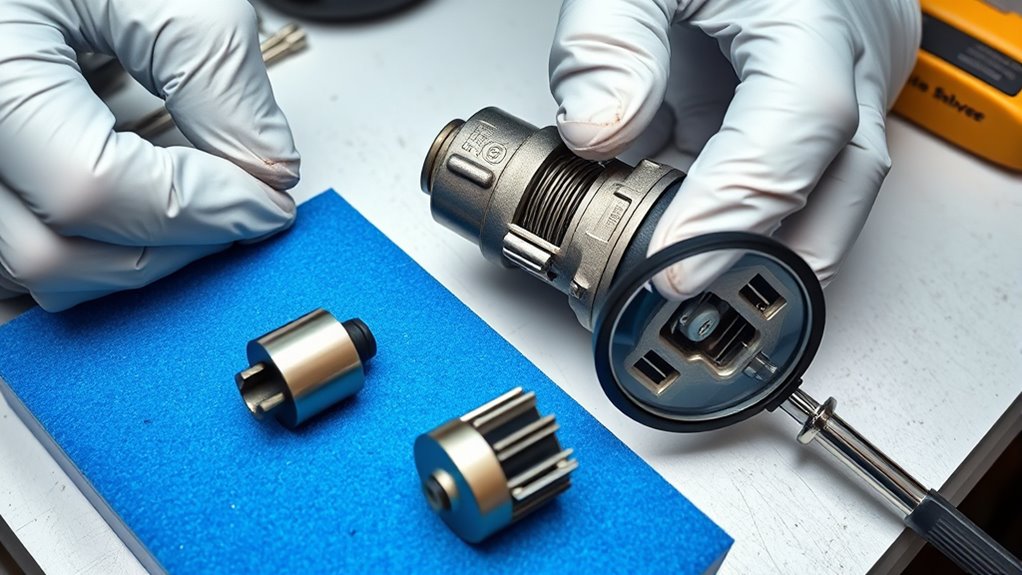
Once you’ve removed the old ignition lock cylinder, carefully inspect it for wear, damage, or broken tumblers. This will help you understand what caused the failure and guarantee you’re installing a reliable replacement. Take note of any visible issues that might have led to the malfunction.
Next, prepare the new ignition lock cylinder for installation by following these steps:
- Inspect the new ignition lock to ensure it’s compatible with your 1997-2006 Jeep Wrangler TJ and includes two keys.
- Verify that the key fits smoothly and turns properly in all positions of the new cylinder.
- Confirm the new cylinder matches the old cylinder in size and orientation to avoid alignment problems.
Finally, make sure the old cylinder is completely removed and clean the housing area before proceeding. This prep work will help the new cylinder fit securely and function flawlessly once installed.
Align and Insert New Ignition Lock Cylinder
With the old cylinder removed and the new one prepped, you’ll want to align the ignition lock cylinder carefully. Make sure the key is in the “off” position before you align and insert the new cylinder into the housing.
Gently slide the new cylinder in without forcing it, allowing it to click securely into place. Forcing it can cause damage, so take your time. Once inserted, check that the cylinder is fully seated by ensuring it sits flush with the surrounding panel and moves smoothly.
This confirms it’s properly installed and ready to function. Rotate the key through all positions to verify smooth operation and proper engagement. By carefully following these steps, you’ll successfully install the new one without issues, setting the stage for reassembling covers and reconnecting the battery in the next step.
Reassemble Covers, Reconnect Battery, and Test Cylinder Operation
After you’ve confirmed the ignition lock cylinder is seated correctly, start reassembling the steering column covers by aligning the upper and lower panels. Secure them with the original screws, being careful not to damage any clips.
Next, reconnect the negative terminal of the battery to restore power to your Jeep’s electrical system. Finally, it’s time to test the cylinder operation to guarantee everything works smoothly.
Follow these steps:
- Turn the ignition key to the “off” position to verify proper installation and disengage the key.
- Insert the key and cycle it through all positions: Off, Accessory, On, and Start. This will test smooth operation and engagement.
- Start the engine to confirm the new ignition cylinder functions correctly and that the key returns to the “off” position without resistance.
Frequently Asked Questions
What Tools Are Needed for This Ignition Lock Cylinder Replacement?
You’ll need a flathead and Phillips screwdriver for ignition lock removal and steering column panels, plus a socket wrench set for bolts. Pliers help with release clips, and safety glasses and gloves protect you while working.
Can I Rekey the New Ignition Cylinder to Match My Old Keys?
You can rekey the new ignition cylinder to match your old keys, but it depends on the cylinder’s design. Not all cylinders support key matching or cylinder reprogramming.
If yours does, you’ll likely need locksmith services since rekeying involves precise pin adjustments. A locksmith can handle key duplication and cylinder reprogramming professionally, ensuring your new cylinder works with your existing keys.
Always check if the cylinder supports these options before buying.
How Long Does the Ignition Lock Cylinder Replacement Typically Take?
Replacing your Jeep’s ignition lock cylinder usually takes about an hour, like a quick tune-up for your vehicle security. When you explore ignition repair, you’ll find the process straightforward, with key replacement fitting smoothly into the flow.
If you’re hands-on, expect to spend roughly 60 minutes opening this fix. Just remember, tricky access or extra tools might stretch your time, but generally, it’s a speedy job that keeps your ride secure.
Will Replacing the Ignition Lock Cylinder Affect My Vehicle’s Security System?
Replacing your ignition lock cylinder usually won’t affect security system compatibility if you use the right part. However, you might need to follow key programming procedures to sync the new cylinder with your vehicle’s immobilizer.
If this isn’t done correctly, it could trigger an alarm system reset or prevent your engine from starting. Always guarantee proper installation and reprogramming to avoid any immobilizer impact or security issues.
Is Professional Assistance Recommended for This Repair?
Imagine working inside your Jeep’s steering column, surrounded by delicate wires and tiny components. Yes, professional assistance is highly recommended here.
DIY safety and tool safety are essential. One wrong move can void warranties or cause costly damage.
Weigh the cost analysis: paying a pro upfront may save you from expensive mistakes. If you’re unsure about handling electrical parts or preserving your vehicle’s security, leave this repair to experts.
Conclusion
Replacing your ignition lock cylinder might seem tricky, but with these eight steps, you’ll have it done in no time. Just take it one step at a time, and soon you’ll be back on the road without a hitch.
Remember, a little patience goes a long way. Don’t rush the process, and you’ll handle this repair like a pro.
Now, go ahead and give your Jeep the fresh start it deserves!