How to Test Your Fuel Pump in 7 Easy Steps
Before testing, disconnect the battery and wear protective gear.
First, locate and inspect the fuel pump fuse and wiring for damage.
Next, check voltage at the pump with a multimeter set to DC volts. You should expect about 12V when the key’s on.
Attach a fuel pressure gauge to the fuel rail, turn the ignition on, and observe pressure build-up.
Start and rev the engine to watch pressure changes.
Loosen the fuel line to check flow, and listen for a steady pump noise.
Keep following along to uncover more detailed steps and tips.
Key Takeaways
- Disconnect the negative battery terminal and wear safety gear before starting any fuel pump testing.
- Locate and inspect the fuel pump fuse, checking for damage and correct amp rating.
- Use a multimeter to test for around 12V at the fuel pump electrical connector with the ignition on.
- Attach a fuel pressure gauge to the fuel rail, then observe pressure build-up and stability at various engine speeds.
- Listen for a faint humming sound from the pump within 2 seconds of turning the ignition key on.
Follow Safety Precautions Before Testing
Before you start testing your fuel pump, make sure to disconnect the negative terminal of the battery to prevent any accidental sparks. This essential safety precaution helps avoid electrical fires while you’re working on the fuel system.
Next, wear safety glasses and nitrile gloves to protect yourself from fuel spills, which can cause skin irritation. Always vent the fuel system carefully to release pressure before disconnecting any fuel lines, minimizing the risk of fuel leaks or sprays.
Perform all work in a well-ventilated area to prevent inhaling toxic, flammable vapors. Keep a fire extinguisher nearby and ensure there are no open flames or sparks around your workspace.
Following these safety precautions will help you test your fuel pump confidently and safely, reducing hazards and protecting both you and your vehicle. Don’t rush. Prioritize safety every step of the way.
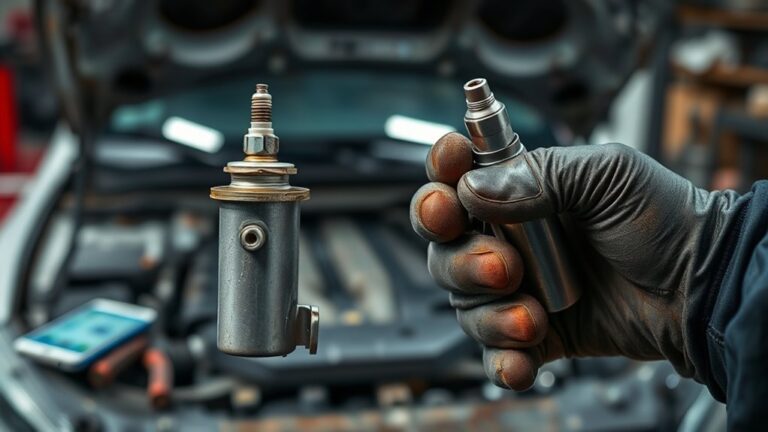
Locate and Inspect the Fuel Pump Fuse and Connections
Start by finding the fuel pump fuse in your vehicle’s fuse box. You can easily locate it by checking the owner’s manual. Once you’ve found it, carefully pull the fuse out and take a close look for any signs of damage or wear.
Next up, take some time to inspect all the electrical connections to the pump. Make sure they’re clean, tight, and free from any corrosion. This will help ensure everything is working smoothly.
Fuse Box Location
Wondering where to find the fuse box for your fuel pump? You can locate it by checking your owner’s manual, as it’s usually under the hood or inside the cabin. Once you find the fuse box, identify the fuel pump fuse, often labeled “Fuel Pump” or “FP,” using the fuse box diagram or cover.
To inspect the fuel pump fuse and connections, use a fuse puller to carefully remove the fuse. Check the fuse for visible damage like burns or corrosion. Inspect all electrical connections to ensure they’re clean and secure. Refer to your owner’s manual to confirm fuse locations and specifications.
Following these steps helps you pinpoint the fuse box and prepare for further testing or replacement.
Inspect Fuse Condition
How do you know if your fuel pump fuse is still good? First, locate the fuse box and find the fuel pump fuse by checking your owner’s manual. Use fuse pullers to carefully remove the fuse and inspect it for any visible damage like burns, cracks, or breaks.
If you see signs of a blown fuse, it needs replacing. To be sure, test the fuse with a multimeter set to continuity mode; a good fuse will show continuity, indicating it’s working properly. Always replace a blown fuse with one that matches the correct amp rating to avoid electrical problems.
After swapping the fuse, turn the ignition and listen for the fuel pump relay clicking, confirming the fuse and relay are functioning as they should.
Check Electrical Connections
After confirming the fuel pump fuse is intact and properly rated, the next step is to check the electrical connections. Start by inspecting the wiring harness and connectors at the fuel pump for any signs of damage, corrosion, or looseness. An electrical problem might arise from poor connections, so verify everything is snug and clean. Use a multimeter to verify power at both the fuse and the pump’s terminals, expecting around 12 volts during the pump’s priming cycle.
Locate the fuel pump fuse in the fuse box using your owner’s manual. Remove and inspect the fuse for burns or corrosion. Check wiring harness and connectors for damage or looseness. Test power at fuse and pump terminals with a multimeter.
Thoroughly inspecting these electrical connections helps prevent fuel pump failures.
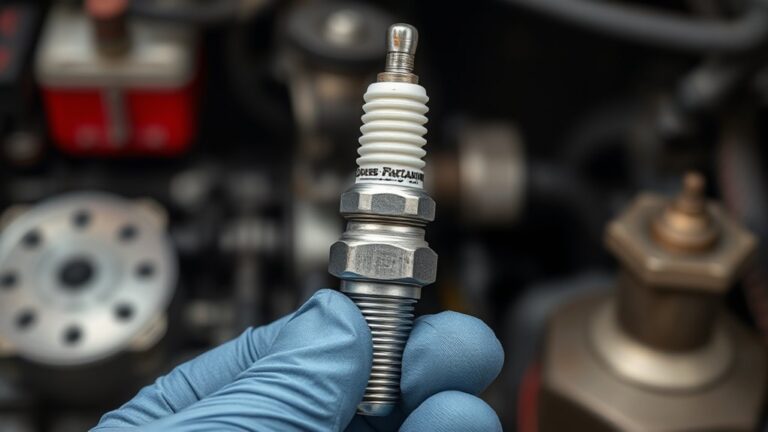
Test Fuel Pump Voltage With a Multimeter
Before you start the engine, set your multimeter to measure DC voltage on the 20V range and locate the fuel pump’s electrical connector. With the multimeter ready, turn the ignition key to the “ON” position. Don’t start the engine yet.
Carefully touch the multimeter probes to the power and ground terminals at the electrical connector. The voltage reading should be close to 12V if the fuel pump is receiving proper power. If the voltage is considerably lower or fluctuates, it’s time to inspect the fuel pump relay, fuses, and wiring for any faults.
Touch probes to power and ground; a steady reading near 12V confirms proper fuel pump power supply.
Accurately recording this voltage helps you compare it against your vehicle’s specifications. This step is vital before moving on to the fuel pressure test because it confirms whether the electrical supply to the fuel pump is adequate.
Testing the fuel pump voltage with a multimeter ensures you identify electrical issues that might prevent the pump from working correctly.
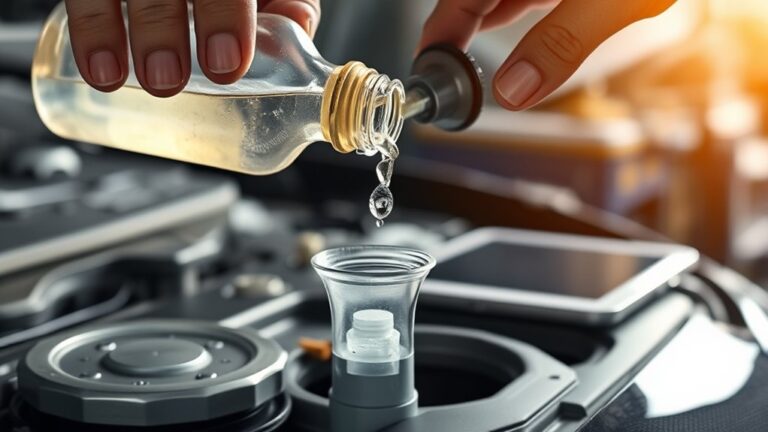
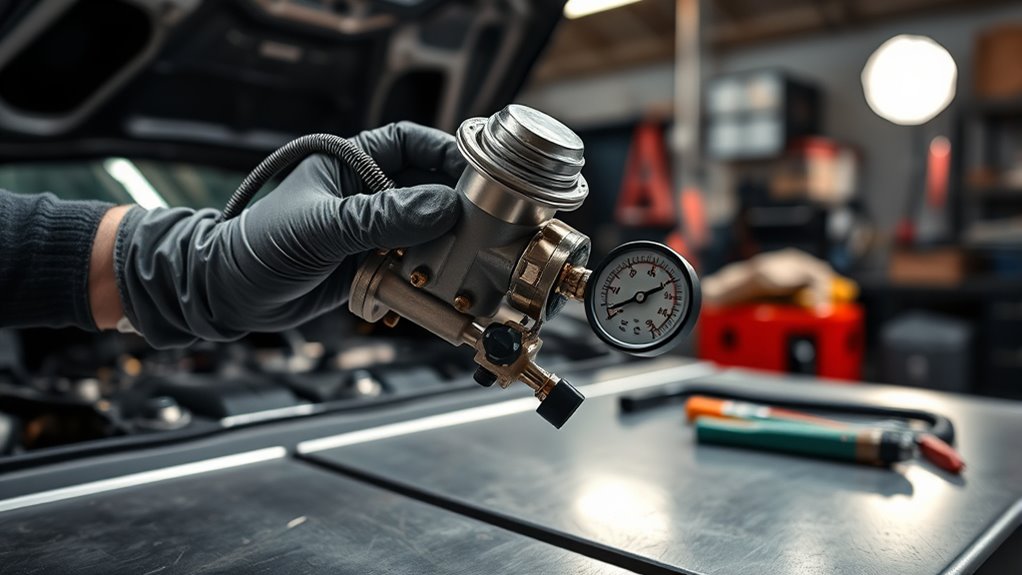
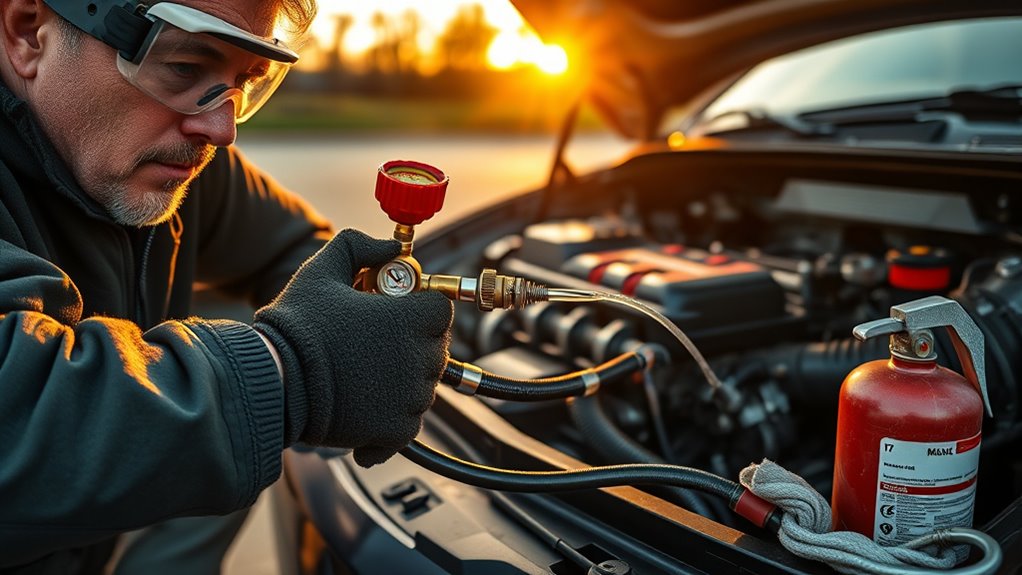
Attach a Fuel Pressure Gauge and Read the Results
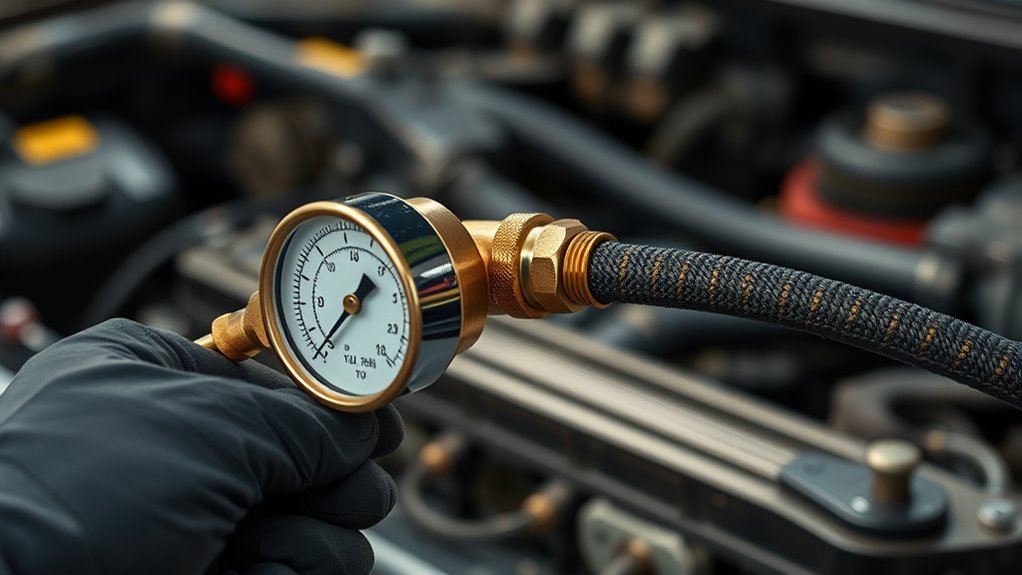
Once you locate the Schrader valve on the fuel rail or test port, attach the fuel pressure gauge securely following your vehicle’s manual. This guarantees an accurate and safe pressure reading. Next, turn the ignition to the ON position without starting the engine to let the pump prime and build pressure. Watch the gauge carefully during this step.
After that, start the engine and observe the pressure reading on the gauge. It should rise with RPM and match your vehicle’s specifications. Keep the engine idling and check if the pressure remains steady or drops below the recommended level.
To summarize what you’ll do with the fuel pressure gauge:
- Attach the gauge securely to the test port
- Turn the ignition ON to prime the pump
- Start the engine and note the pressure reading
- Observe pressure stability while idling
This process helps you accurately test your fuel pump’s performance.
Check Fuel Pressure Changes While Revving the Engine
As you rev the engine, watch the fuel pressure gauge closely to guarantee the pressure rises in proportion to the RPM within your vehicle’s specified range. During this fuel pump test, the fuel pressure should increase steadily as engine speed climbs, confirming your fuel pump delivers adequate fuel under load.
Typically, pressure rises by a few PSI per 1000 RPM, matching specs in your vehicle’s repair manual. If the pressure remains constant or drops when you rev the engine, it signals a potential problem with the fuel pump, regulator, or electrical supply.
Fluctuations or lack of pressure increase during diagnostic testing are clear signs of fuel delivery issues. Monitoring this pressure increase is essential because it reflects how well the pump maintains fuel flow as engine demand grows.
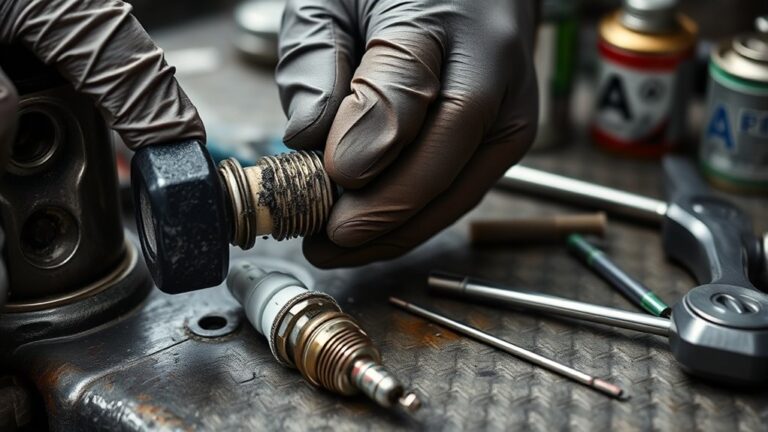
Check Fuel Pump Flow by Loosening the Fuel Line
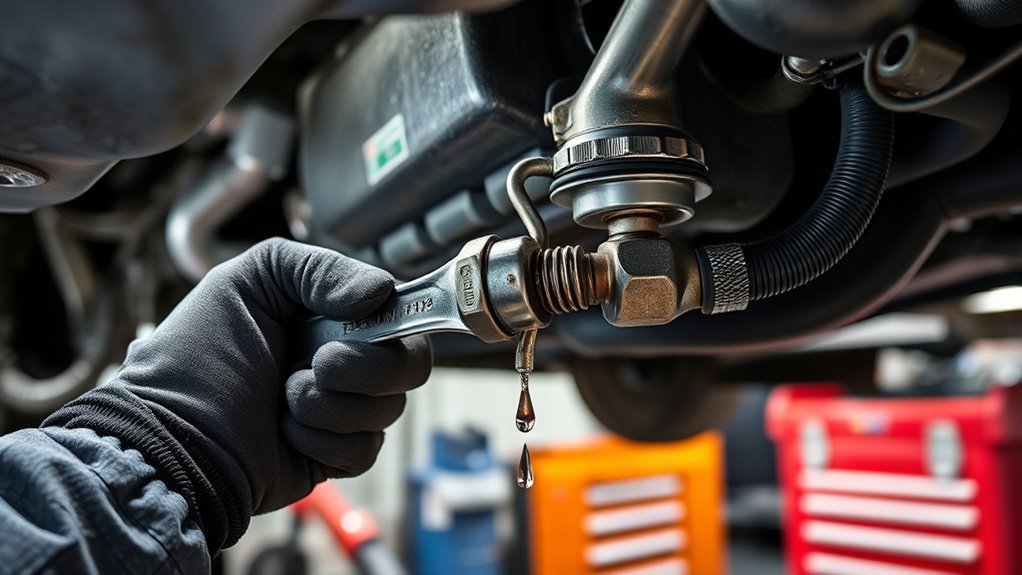
Although it might seem simple, loosening the fuel line at the carburetor or fuel rail lets you directly observe how well your fuel pump delivers fuel during engine cranking. To check the fuel pump flow accurately, follow these steps carefully.
Loosening the fuel line at the carburetor reveals your fuel pump’s delivery during engine cranking.
First, loosen the fuel line to allow fuel to flow freely from the fuel pump. Place a clean, calibrated container under the loosened line to catch the fuel. Then, crank the engine for about 10-15 seconds and watch the fuel flow rate into the container.
Keep these points in mind: verify the fuel filter is clean to avoid restricting flow. Also, confirm the fuel tank has enough fuel. A healthy fuel pump delivers roughly ¾ to 1 pint of fuel per minute. And avoid running the test longer to prevent fuel spillage.
This straightforward test helps you assess if your fuel pump is pumping adequately and if any issues lie in the fuel line or filter.
Listen for Fuel Pump Noise and Monitor Performance
If you want to confirm your fuel pump is working, listen closely for a humming or whirring sound coming from the fuel tank when you turn the key to the ON position. This noise indicates the fuel pump is operating properly.
Use a mechanic’s stethoscope or place a long screwdriver against the tank to amplify the sound, making it easier to listen for noise. During your test, pay attention to how quickly the pump activates. Ideally, it should start within 2 seconds of turning the key.
A loud whining noise could mean the fuel pump is worn or failing and needs inspection or replacement. If you don’t hear any sound or it’s much quieter than usual, the pump might not be receiving power or could have failed.
Monitoring the fuel pump’s performance this way helps assure your engine gets consistent fuel delivery, keeping it running smoothly and preventing unexpected breakdowns.
Frequently Asked Questions
How Often Should I Replace My Fuel Pump?
You should replace your fuel pump every 100,000 to 150,000 miles or about 7 to 10 years, depending on your vehicle compatibility. Keep an eye on common symptoms like engine stalling or fuel efficiency drops.
Use diagnostic tools to check pump health early. Following maintenance tips, like changing fuel filters regularly, helps delay replacement.
Considering replacement costs and repair procedures early can save you from expensive engine damage down the road.
Can a Clogged Fuel Filter Mimic Fuel Pump Failure?
Yes, a clogged filter can definitely mimic fuel pump failure. You might notice engine hesitation, reduced power, poor acceleration, or stalling issues because the fuel isn’t flowing properly.
Sometimes, you’ll even smell a fuel odor or experience rough idling. These symptoms often make you think the fuel pump’s failing, but it’s actually the clogged filter restricting fuel flow. Always check the filter before blaming the pump.
What Are the Signs of a Failing Fuel Pump Relay?
Imagine turning your key and hearing a faint clicking. That’s your fuel pump relay trying to spring to life.
Signs of a failing fuel pump relay include intermittent relay operation, engine stalling, or no start at all. You’ll want to check electrical connections, perform voltage testing, inspect wiring, and verify circuit continuity.
If signal troubleshooting reveals issues, a relay replacement often fixes the problem and gets fuel flowing smoothly again.
Is It Safe to Test the Fuel Pump Without a Pressure Gauge?
No, it’s not safe to test the fuel pump without a pressure gauge. You need proper diagnostic tools to guarantee accurate results and follow strict safety precautions.
Fuel system safety and electrical safety are essential since improper testing procedures increase risks like fuel leaks or sparks. Always perform a thorough risk assessment before attempting any testing alternatives.
Never rely solely on sounds or electrical checks without confirming fuel pressure.
How Does Fuel Pump Noise Differ Between Models?
When it comes to fuel pump noise, you can’t paint all cars with the same brush. Different models have unique sound patterns and noise frequency, ranging from a soft hum to a sharp whine.
If you notice unusual vibration symptoms or inconsistent operational consistency, it might cause engine stalling or starting difficulties. Some pumps hide their troubles quietly, so don’t rely on noise alone. Check for other signs to keep your ride smooth.
Conclusion
Testing your fuel pump is simpler than you might think, and following these steps guarantees you catch issues early. Did you know that a faulty fuel pump can reduce engine efficiency by up to 30%?
By checking voltage, pressure, and flow, you can avoid costly repairs and improve performance. With safety in mind, these quick tests help you keep your vehicle running smoothly and confidently on the road.