7 Steps to Reset Check Engine Light After Changing Spark Plugs
After changing your spark plugs, confirm the misfire is fixed by checking for smooth engine performance and no error codes on your OBD-II scanner. Use the scanner to clear any stored trouble codes and reset the check engine light.
You can also disconnect the battery for 15 minutes to reset the system, then perform a full drive cycle to allow your car’s computer to recalibrate.
If the light returns, inspect ignition components or consider professional help to avoid damage.
Learn the full process to guarantee lasting repairs.
Key Takeaways
- Verify spark plugs are properly gapped, installed, and all ignition connections are secure before attempting to reset the check engine light.
- Use an OBD-II scanner to read and clear misfire codes like P0300 or P0304 after spark plug replacement.
- After clearing codes, complete a full drive cycle with varied speed and idling to allow the ECU to reset and verify repairs.
- If the check engine light persists, inspect ignition coils, wiring, and sensors, or seek professional diagnostics.
- As an alternative, disconnect the negative battery terminal for 15 minutes to reset the ECU and then perform a drive cycle.
Confirm Spark Plug Replacement Fixed the Misfire

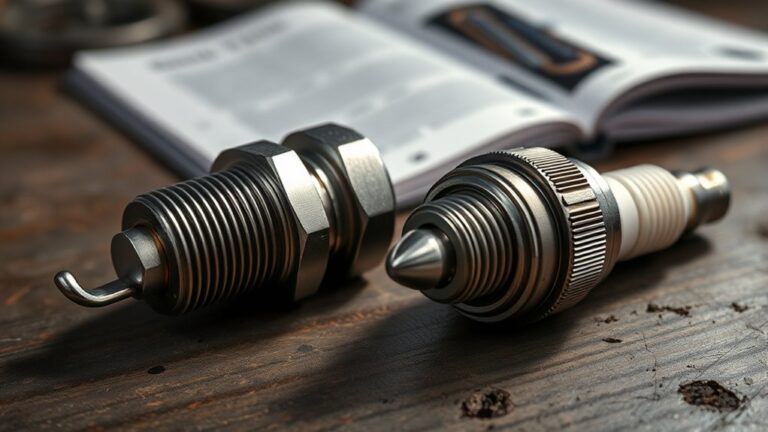
Before resetting the check engine light, make sure the spark plug replacement actually fixed the misfire. After you replace spark plugs, watch for the check engine light to change from flashing to steady or turn off entirely, signaling the misfire is likely resolved.
Ensure spark plug replacement fixes the misfire before resetting the check engine light.
You’ll want to confirm the engine is running smoothly by checking for a steady idle and no hesitation or shaking during acceleration. If the misfire code remains on your OBD-II scanner, verify spark plug installation carefully.
Double-check the spark plug gap and ensure all ignition wires or coils are properly connected. Once you confirm the misfire is gone and the engine runs smoothly, the check engine light should reset automatically after several drive cycles.
This step is essential before moving on to clearing codes manually, ensuring you don’t overlook a lingering misfire that could cause further issues down the road.
Use an OBD-II Scanner to Clear Misfire Codes
First, find the OBD-II port under your dashboard near the steering column and plug in your scanner. Once it’s connected, turn the ignition on—but don’t start the engine just yet.
Next, use the scanner’s menu to read any stored misfire codes. After you’ve seen the codes, go ahead and clear them.
Finally, unplug the device, start your vehicle, and make sure the check engine light has turned off. Easy as that!
Locate OBD-II Port
Where can you find the OBD-II port to reset your check engine light? In most vehicles, including Ford Ranger and Toyota models, the OBD-II port, also called the diagnostic port, is located under the dashboard near the steering column.
To use your OBD-II scanner, simply plug in the device to this port. Next, turn the ignition to the “on” position without starting the engine. This allows the scanner to connect to your vehicle’s computer and read stored trouble codes, such as misfire codes.
Once connected, you’ll be able to reset codes and clear the check engine light after addressing the issue. Locating and plugging into the OBD-II port is the essential first step to effectively reset your vehicle’s error codes.
Read And Clear Codes
Once you connect your OBD-II scanner to the diagnostic port and turn the ignition on, you can quickly read the stored trouble codes. The scanner will display any misfire-related trouble codes, like P0300 or P0304.
Next, use the scanner to clear these codes, which resets the check engine light. Remember, clearing codes doesn’t fix the problem but lets you confirm if spark plug replacement helped.
| Feeling Frustrated? | Relief Is Near! |
|---|---|
| Codes Confusing? | Scanner Simplifies! |
| Light Still On? | Reset with Ease! |
After clearing, turn off the ignition, unplug the scanner, then start your vehicle to verify the check engine light reset successfully.
Confirm Light Reset
Although you’ve replaced the spark plugs, you’ll need to connect an OBD-II scanner to your vehicle’s diagnostic port to confirm the check engine light resets properly. Locate the port under the dashboard near the steering column, then plug in the scanner.
Turn the ignition to the “on” position without starting the engine to power the scanner and vehicle systems. Follow the scanner’s prompts to read and clear codes related to misfires, such as P0304. Use the scanner’s option to clear codes and reset the check engine light.
Once complete, turn off the ignition, disconnect the scanner, and start the engine to confirm the reset. If the engine light stays off, you’ve successfully reset the check engine light and cleared the misfire codes.
Disconnect the Battery to Reset the Check Engine Light
To reset the check engine light by disconnecting the battery, start by turning off the ignition and removing any accessories. This helps prevent electrical surges. Next, disconnect the negative terminal and wait at least 15 minutes before reconnecting it securely. This waiting period allows the ECU to reset.
Just keep in mind, doing this might erase some of your vehicle settings. So, be ready to adjust things like your clock or radio presets once you’re done.
Battery Disconnect Procedure
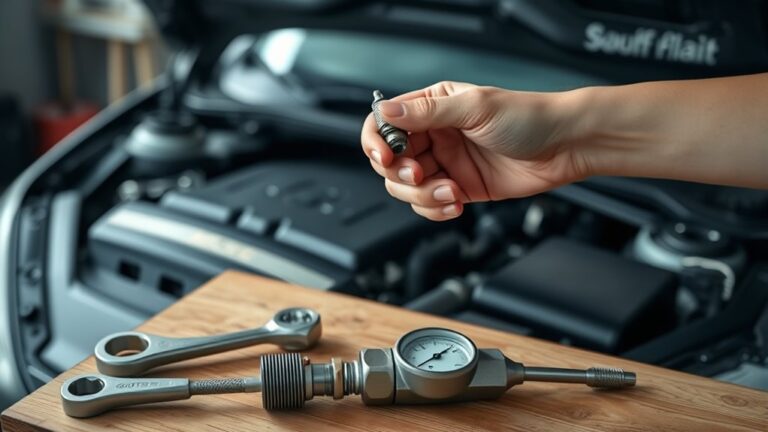
When you disconnect the negative terminal of your vehicle’s battery with a wrench while the engine is off, you initiate the process of resetting the check engine light. First, use the wrench to carefully disconnect the negative terminal from the battery.
This action cuts power, allowing the vehicle’s computer to reset. Wait at least 15 minutes to ensure the computer clears stored error codes fully. After the waiting period, reconnect the negative terminal securely and tighten the clamp with your wrench to guarantee proper contact.
Before starting the engine, use a multimeter to check that the battery voltage is within the normal range. Once everything is in order, start your vehicle and confirm the check engine light has turned off, signaling a successful reset.
Effects On Vehicle Settings
Since disconnecting your vehicle’s battery resets the ECU, you’ll notice that it also wipes out settings like your radio presets, clock, and other memory functions. When you disconnect battery power for about 15 minutes, you perform an ECU reset that clears warning lights such as the check engine light.
However, this process will reset vehicle settings, including radio presets and cause a clock reset, as the system memory is erased. Keep in mind, disconnecting the battery doesn’t solve the underlying issues triggering the warning light; it simply clears them temporarily.
After reconnecting, you’ll need to reprogram your radio and reset the clock. Understanding these effects helps you prepare for the temporary inconvenience when you disconnect battery power to clear warning lights and reset vehicle settings.
Timing For Reconnection
Although disconnecting the battery is a straightforward step, you need to wait at least 15 minutes before reconnecting it to guarantee the ECU fully resets and clears the check engine light. Start by turning off the vehicle and carefully disconnect the negative terminal of the battery.
This interruption allows the vehicle’s computer to reset stored trouble codes. During this waiting period, the ECU clears its memory, which is essential for the reset.
After waiting, reconnect the negative terminal securely and tighten the clamp to restore power to the vehicle’s systems. Make sure all electrical connections are tight and secure before restarting the vehicle.
Proper timing for reconnection ensures the reset is successful and the check engine light turns off, confirming the process is complete.
How to Do a Drive Cycle to Reset Your Car’s Computer
Because your car’s computer needs specific conditions to complete its self-checks, you’ll have to perform a drive cycle after changing spark plugs. A drive cycle involves a sequence of driving conditions that allows the engine control unit (ECU) to run diagnostic checks and reset itself.
Start with a cold engine, let it idle for a few minutes, then accelerate smoothly to a moderate speed. Maintain steady cruising speeds for several minutes before decelerating or idling again.
This process, typically lasting 20 to 30 minutes, helps the ECU verify that your repairs are recognized and that emission systems are functioning properly. Make sure you drive under normal conditions without abrupt stops or aggressive acceleration.
Completing the drive cycle correctly guarantees the check engine light resets once the ECU confirms everything is working as it should. If you skip this step, the light may stay on despite the spark plugs being replaced.
Inspect Ignition Components If the Light Returns
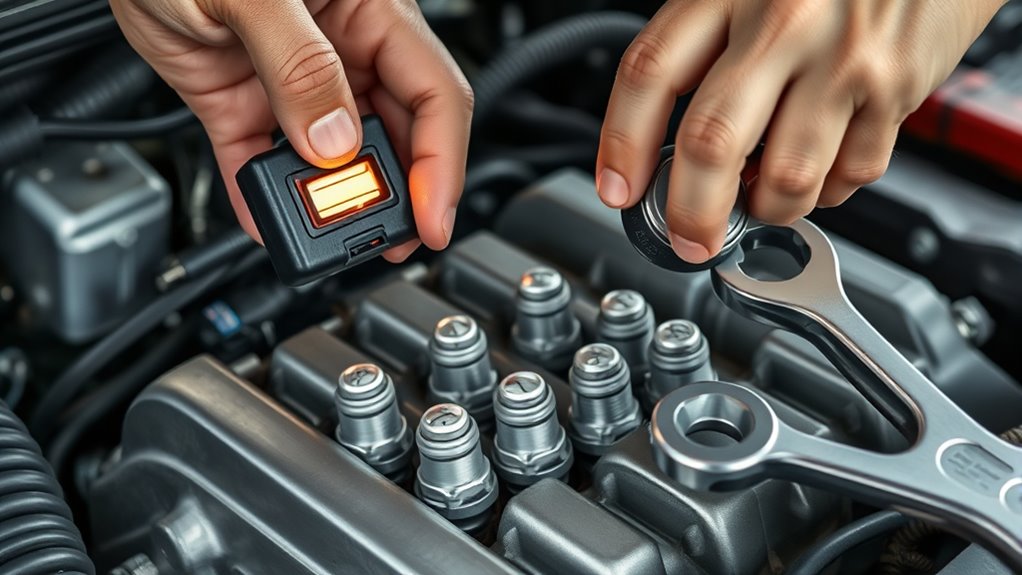
If your check engine light comes back on after changing the spark plugs, you’ll want to examine the ignition components closely. Start by checking the ignition coils for any damage, cracks, or corrosion. Faulty coils can cause misfires and trigger the warning light again.
Next, inspect the spark plug wires to ensure they’re properly connected, free from wear, and correctly seated in the firing order to avoid further misfires. Don’t forget to examine the wiring harness connected to the ignition coils and sensors for loose connections or damage that could disrupt signals.
Using an OBD-II scanner, read the diagnostic trouble codes to identify any ignition-related issues and confirm if misfires persist. Also, double-check that the spark plugs are gapped according to manufacturer specifications. Improper gaps can cause ignition problems and a recurring check engine light.
Careful inspection here can save you time and prevent ongoing issues.
When to Call a Mechanic for Persistent Misfires
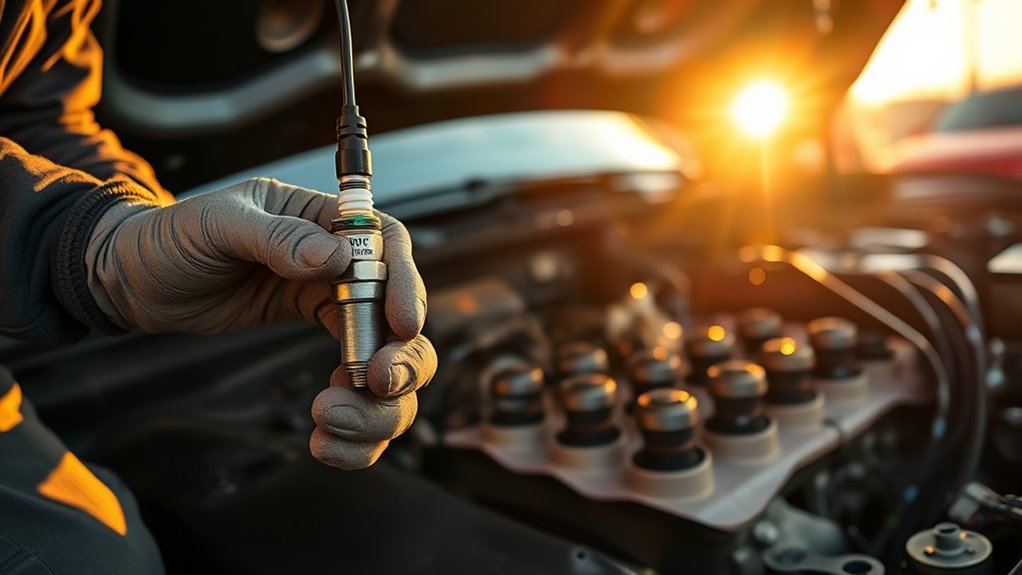
When your check engine light stays on or the misfire code like P0304 doesn’t clear after changing spark plugs and adjusting their gap, it’s a clear sign you should call a mechanic. Persistent misfires often point to issues beyond spark plugs, such as faulty ignition coils, wiring problems, or fuel system malfunctions.
If your check engine light and misfire code persist after spark plug changes, it’s time to call a mechanic.
Ignoring these can lead to severe engine damage, including piston or valve trouble. A professional can perform a thorough diagnostic, running tests like cylinder compression or coil evaluation to pinpoint the exact cause.
If the misfires continue or worsen despite your efforts, don’t delay seeking professional help. Early intervention prevents costly repairs and keeps your engine running smoothly.
Trusting a mechanic ensures that hidden faults won’t go unnoticed and that your vehicle receives the proper care it needs. Persistent misfires demand expert attention to avoid further damage and restore your car’s performance.
Prevent Check Engine Light After Spark Plug Replacement
Properly preventing the check engine light from coming on after replacing your spark plugs starts with careful installation and immediate system reset. First, ensure spark plugs are correctly gapped and installed. Check that ignition wires are firmly connected in the right firing order.
After spark plug replacement, use an OBD-II scanner to clear the codes and reset the check engine light. Next, complete a full drive cycle so your vehicle’s computer can reassess the ignition system.
Don’t forget to inspect for any underlying issue like damaged sensors or faulty wiring before resetting the light. This comprehensive approach helps keep your engine warning off.
| Step | Action |
|---|---|
| 1 | Gap and install spark plugs |
| 2 | Connect ignition wires properly |
| 3 | Use OBD-II scanner to clear codes |
| 4 | Perform full drive cycle |
| 5 | Check for underlying issues |
Frequently Asked Questions
Can Low-Quality Spark Plugs Cause the Check Engine Light to Stay On?
Yes, low-quality spark plugs can cause the check engine light to stay on because poor spark plug quality directly affects engine performance and ignition system function. When spark plugs wear out quickly or have improper gaps, they disrupt ignition timing and increase emission levels.
This leads to misfires that lower fuel efficiency and damage ignition coils. You’ll also notice a reduced spark plug lifespan, which keeps triggering warning lights until you replace them with high-quality plugs.
How Long Does It Take for the Light to Reset After Clearing Codes?
You’ll usually see the check engine light reset within 10 to 15 key-on/engine-off cycles after clearing error codes, assuming no sensor malfunction or other issues persist.
Sometimes, it can take up to 50-100 miles of driving for vehicle sensors to confirm improved engine performance, emission system status, and fuel efficiency.
Using diagnostic tools can help you clear codes right away, but the light only stays off if the underlying problem is truly fixed.
Will Resetting the Light Affect My Vehicle’s Warranty?
Think of your warranty as a garden. Resetting the check engine light is like pruning. If you trim properly, your warranty stays healthy.
But if you cut without care, manufacturer policies and dealership procedures might flag warranty implications, leading to warranty exclusions.
Always keep detailed service records and repair documentation to prove repair quality. That way, you protect your warranty coverage and avoid surprises when claims arise.
Can Weather Conditions Trigger the Check Engine Light After Replacement?
Yes, weather impact can definitely trigger the check engine light after replacement. Moisture interference from rain exposure or humidity might cause electrical issues, while temperature effects and rapid changes can affect sensor readings.
Snow conditions and storm triggers can lead to corrosion or sensor malfunctions, setting off the light unexpectedly. You’ll want to think about these weather-related factors if your check engine light comes on after spark plug work.
Is It Necessary to Reset the Light Immediately After Changing Spark Plugs?
You don’t have to reset the check engine light immediately after changing spark plugs. It’s not rocket science! If your engine performance feels smooth and warning lights stay off, diagnostic tools aren’t urgent.
Sometimes sensors need a bit of calibration during normal driving. Focus on proper vehicle maintenance and repair procedures first. Resetting too soon can hide issues affecting fuel efficiency.
Let your car’s system confirm the fix before clearing codes.
Conclusion
Think of your car’s check engine light as a lighthouse guiding you through foggy seas. After changing spark plugs, you’ve navigated the first waves by confirming the fix and clearing error codes.
Resetting your battery and completing a drive cycle are like steadying the ship’s course. If the light flickers again, inspect your ignition like a vigilant captain.
Remember, sometimes calling a mechanic is the trusted navigator you need to reach safe harbor.